
Table of Contents >> Show >> Hide
- What a GFCI Outlet Does (and What It Doesn’t)
- Where GFCI Protection Is Commonly Required in Homes
- Pick Your GFCI Strategy: Receptacle vs Breaker vs Portable
- Tools and Materials You’ll Want Nearby
- Safety First: The “Don’t Become the Circuit” Checklist
- Step-by-Step: How to Install a GFCI Outlet
- Step 1: Turn Off Power and Confirm
- Step 2: Remove the Old Outlet
- Step 3: Identify LINE vs LOAD (This Matters a Lot)
- Step 4: Prep the Wires (Better Prep = Fewer Mystery Trips)
- Step 5: Connect the Ground
- Step 6: Connect LINE Hot and Neutral
- Step 7 (Optional): Connect LOAD to Protect Downstream Outlets
- Step 8: Fold Wires Neatly and Mount the GFCI
- Step 9: Restore Power, Reset, and Test
- Testing and Maintenance: Make the Buttons Earn Their Paycheck
- Troubleshooting: When the GFCI Gets Grumpy
- Special Situations You Should Know About
- When to Call a Licensed Electrician
- Real-World Experiences Installing a GFCI Outlet ( of “Yep, That Happened”)
Installing a GFCI outlet is one of those home upgrades that feels a little like buying a fire extinguisher:
you hope you never need it, but you sleep better knowing it’s there. A GFCI (Ground-Fault Circuit Interrupter)
receptacle can shut off power fast if electricity starts taking a “shortcut” through water, a tool, orworst caseyou.
That’s why GFCIs show up in bathrooms, kitchens, garages, basements, and outdoors like the responsible friend who always brings a jacket.
This guide walks you through how to install a GFCI outlet step-by-step, including how to identify
LINE vs LOAD, how to protect downstream outlets, how to test your work, and what to do in older homes
with two-prong wiring. We’ll keep it practical, detailed, and just funny enough to keep you from “winging it” with 120 volts.
What a GFCI Outlet Does (and What It Doesn’t)
A GFCI monitors the current leaving on the hot wire and returning on the neutral wire. If there’s a mismatchmeaning some current is going somewhere it shouldn’tit trips and cuts power quickly.
That’s the “interrupter” part. It’s designed to reduce the risk of serious shock in places where moisture, concrete floors, and wet hands like to team up.
What it doesn’t do: a GFCI is not a substitute for your circuit breaker. Breakers protect against overloads and short circuits; GFCIs protect against ground faults.
You can (and often should) have both types of protection in modern electrical systems, depending on local code and the circuit.
Where GFCI Protection Is Commonly Required in Homes
In the U.S., GFCI protection is commonly required in areas where electricity and moisture are likely to share the same zip codethink bathrooms, kitchen countertop outlets, garages, unfinished basements, crawl spaces, outdoor receptacles, and pool/spa areas.
Requirements vary by location and by the edition of the electrical code your jurisdiction follows, so treat this as a smart starting point, not the last word.
The good news: even if your home is older, you can usually improve safety by adding GFCI protection (either via a GFCI receptacle, a GFCI breaker, or a portable GFCI device) without rewiring the entire house.
Pick Your GFCI Strategy: Receptacle vs Breaker vs Portable
1) GFCI receptacle (what we’re installing)
A GFCI outlet replaces a standard outlet in a single electrical box. It can protect itself andif wired correctlydownstream outlets on the same circuit.
This is the go-to choice for bathrooms and kitchens when you want targeted protection without opening the electrical panel.
2) GFCI circuit breaker
A GFCI breaker installs in the electrical panel and protects the whole circuit from the source. It’s handy when you want to protect multiple outlets on one circuit without guessing which outlet is “first in line.”
It can also be useful for certain dedicated circuitsthough panel work is often better left to a licensed electrician.
3) Portable/plug-in GFCI
If you need temporary protection (older home, workshop, outdoor tools, or you’re renting), a portable GFCI can add a safety layer without changing wiring.
It’s not as elegant as a built-in device, but it’s fast and practical.
Tools and Materials You’ll Want Nearby
- GFCI receptacle (match amp rating and style; consider TR/WR where appropriate)
- Flathead and Phillips screwdrivers
- Non-contact voltage tester (and ideally a multimeter)
- Wire strippers and needle-nose pliers
- Wire connectors (wire nuts) and short pigtail wires (same gauge as existing)
- Electrical tape (for neatness; not a substitute for tight connections)
- Outlet tester (GFCI-capable) for basic verification
- Faceplate (most GFCIs need a “GFCI/Decora” style plate)
- Flashlight/headlamp (because breakers love drama)
Safety First: The “Don’t Become the Circuit” Checklist
Working on electrical wiring can be dangerous. If you’re not confident identifying wires, working in a crowded box, or troubleshooting unexpected results,
stop and call a licensed electrician. It’s cheaper than learning CPR the hard way.
- Turn off the correct breaker. Label it if it isn’t already. (Future-you will send present-you a thank-you card.)
- Verify power is off. Test the outlet and nearby outlets with a non-contact tester. Then confirm with a meter if you have one.
- Assume wires can still be live until you’ve tested them.
- Look for red flags: scorched insulation, melted devices, aluminum wiring, brittle cloth wiring, overcrowded boxes, or weird multi-wire setups. Those are “pro time” signals.
Step-by-Step: How to Install a GFCI Outlet
Step 1: Turn Off Power and Confirm
Flip the breaker to OFF. Try turning on a lamp plugged into the outlet (or use your tester). No light, no beep, no buzz? Good.
Still test again at the wires once the outlet is pulled outbecause electricity is sneaky and does not respect optimism.
Step 2: Remove the Old Outlet
- Remove the faceplate screw and faceplate.
- Remove the two mounting screws holding the outlet to the electrical box.
- Gently pull the outlet out so you can see the wiring.
- Take a photo. It’s the DIY equivalent of “save game.”
Step 3: Identify LINE vs LOAD (This Matters a Lot)
On a GFCI receptacle, the terminals are labeled LINE and LOAD:
LINE brings power in from the breaker; LOAD sends protected power out to downstream outlets.
Many GFCIs ship with the LOAD terminals covered with tape. Leave that tape on unless you’re intentionally protecting downstream outlets.
Case A: Only one cable in the box (one hot + one neutral + ground)
If you see just one black (hot) and one white (neutral) plus a bare/green ground, you likely have only LINE conductors.
In that case, you’ll wire the GFCI using LINE only, and you’re donesimple, clean, and emotionally satisfying.
Case B: Two cables in the box (two hots + two neutrals + ground)
If you see two blacks and two whites (plus ground), one cable is usually LINE (incoming power) and the other is LOAD (feeds other outlets).
Don’t guess based on “left wire feels more powerful.” Instead:
- With power OFF, separate the two cables (keep each cable’s hot/neutral pair together).
- Cap off one cable’s black and white with wire connectors so they can’t touch anything.
- Carefully restore power at the breaker just long enough to test the remaining cable’s wires.
- The cable that reads/live is the LINE. Turn power back OFF before proceeding.
If this feels like too much, that’s your inner safety voice doing its job. It’s okay to hand it off to a pro.
Step 4: Prep the Wires (Better Prep = Fewer Mystery Trips)
Straighten the wire ends. If they’re nicked, scorched, or too short, trim and re-strip to clean copper.
Use the strip gauge on the device (most GFCIs have one). Too much bare copper = possible shorts; too little = loose connection.
If the box contains multiple connections, consider using pigtails so you have one hot, one neutral, and one ground feeding the device cleanly.
Keep wire gauge consistent (12 AWG on 20A circuits, 14 AWG on 15A circuits).
Step 5: Connect the Ground
Connect the bare/green ground wire to the green ground screw on the GFCI. If the electrical box is metal, it also needs to be bonded:
you may need a ground pigtail to the box’s grounding screw and another to the device (joined with a wire connector).
Step 6: Connect LINE Hot and Neutral
On the GFCI, the LINE terminals are typically color-coded:
- Brass screw = hot (black or red)
- Silver screw = neutral (white)
Attach the LINE hot to the brass LINE terminal and the LINE neutral to the silver LINE terminal. Tighten firmly to manufacturer torque guidance.
If your GFCI supports back-wire clamps (not cheap backstabs), those can be solidfollow the device instructions.
Step 7 (Optional): Connect LOAD to Protect Downstream Outlets
Want one GFCI to protect other outlets “downstream” (for example, the second bathroom outlet or other receptacles on the same branch circuit)?
That’s what LOAD is for.
- Only after you’ve identified the downstream cable, remove the tape covering the LOAD terminals.
- Connect the downstream hot to the brass LOAD terminal and downstream neutral to the silver LOAD terminal.
- Re-check that LINE is on LINE and LOAD is on LOAD. Reversed connections can cause a GFCI to behave incorrectly or refuse to reset.
Important: Some wiring setups (like shared neutrals/multi-wire branch circuits) can cause nuisance tripping or require special handling.
If you see multiple neutrals that don’t seem paired with the hots, or the wiring doesn’t match “one circuit in, one circuit out,” call an electrician.
Step 8: Fold Wires Neatly and Mount the GFCI
Gently fold the wires back into the box. Keep the ground wire away from the LINE/LOAD terminals.
Mount the device with the top and bottom screws, then install the faceplate.
Don’t crank the faceplate so tight you warp ityour outlet shouldn’t look like it’s trying to escape the wall.
Step 9: Restore Power, Reset, and Test
- Turn the breaker back ON.
- Press RESET on the GFCI (many won’t supply power until reset).
- Plug in a lamp and turn it on.
- Press TEST. The lamp should turn off, and the RESET button should pop/trip.
- Press RESET again. The lamp should turn back on.
Testing and Maintenance: Make the Buttons Earn Their Paycheck
GFCIs should be tested after installation and periodically afterward. A common practice is monthly testing and also testing after a power outage.
Many modern devices are self-testing and may include an end-of-life or “power denial” featuremeaning if the internal self-test fails,
the device can stop providing power rather than pretending everything is fine.
Translation: if your GFCI won’t reset and you’ve confirmed correct wiring, it might be doing its job by telling you it’s time to replace it.
Troubleshooting: When the GFCI Gets Grumpy
Problem: It won’t reset
- Power is still off at the breaker (yes, even if you “totally turned it on”).
- LINE and LOAD are reversed or neutrals are mismatched.
- There’s an actual ground fault on the circuit (a damaged cord, wet exterior box, failing appliance).
- The device is at end-of-life (common with newer self-testing units that lock out when they fail).
Problem: It trips immediately
- Loose connections (especially neutrals) causing imbalance.
- Downstream wiring issue if you used the LOAD terminals.
- A wet outdoor box or damp location without a proper cover.
Problem: Downstream outlets lost power
- That might be expected if those outlets are on the LOAD sidepress RESET.
- If RESET doesn’t restore them, double-check the downstream cable connections on the LOAD terminals.
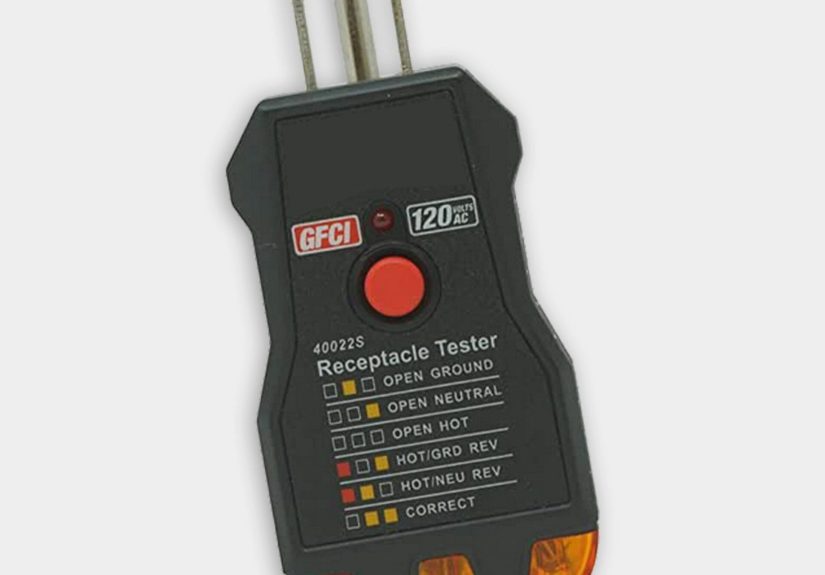
Problem: Your outlet tester gives confusing results
Basic plug-in testers often rely on a functioning equipment ground to simulate a fault and trip the GFCI.
On older ungrounded circuits, the GFCI can still provide shock protection, but some testers may not behave normally.
Use the device’s TEST/RESET buttons as your primary functional check, and consider a multimeter for deeper diagnostics.
Special Situations You Should Know About
Older homes with no ground wire (two-prong circuits)
A GFCI receptacle can still provide personal shock protection even if there’s no equipment grounding conductor in the box.
However, code practice commonly requires that the receptacle (or cover plate) be labeled “No Equipment Ground”,
and if you install a three-prong receptacle protected by a GFCI, it should be marked “GFCI Protected” as well.
Use the labels that come with the GFCI.
One more caution: do not create a fake/bootleg ground by tying neutral to ground. That can create shock hazards and defeats the point of upgrading safely.
15A vs 20A GFCI outlets (and what that “T-slot” means)
A 20-amp receptacle has a distinctive T-shaped slot (so it can accept 20A plugs). In many homes, a standard 15A duplex receptacle is used on 20A circuits for general outlets,
but you should still match device ratings appropriately and follow local requirements. If you’re unsure what you have, check the breaker size and wire gauge (12 AWG typically indicates a 20A circuit).
TR and WR ratings (tamper-resistant and weather-resistant)
In many residential settings, tamper-resistant (TR) receptacles are required to help protect children from inserting objects into slots.
For outdoor or damp/wet locations, weather-resistant (WR) receptacles and proper “in-use” covers are commonly used to fight moisture, corrosion, and UV exposure.
If you’re replacing an outdoor receptacle, choosing a WR GFCI (and the right cover) is usually the smart move.
When to Call a Licensed Electrician
DIY is great, but some situations are “DIY-adjacent” at best. Call a pro if you run into any of the following:
- Aluminum branch wiring, brittle insulation, or signs of overheating
- Multiple cables and confusing neutrals (possible shared neutrals/MWBC)
- A box that’s too small/crowded to safely fit the GFCI and wiring
- Repeated nuisance tripping with no clear cause
- Anything in the panel (breaker replacement) unless you’re trained and permitted
Real-World Experiences Installing a GFCI Outlet ( of “Yep, That Happened”)
Here’s what the instructions don’t always capture: installing a GFCI outlet is rarely hard because the concept is complicated.
It’s “hard” because houses are chaotic storytellers. You open a bathroom outlet expecting three wires, and you find a small wire convention
happening inside a box the size of a deck of cards.
One common experience is the LINE vs LOAD mystery. On paper, it’s simple: incoming power goes to LINE, outgoing to LOAD.
In the real world, you pull the old outlet out and both black wires look identical, both white wires look identical, and your confidence evaporates
faster than a puddle on hot concrete. The smart move is to slow down, keep wire pairs together by cable sheath, and test methodically.
The moment you stop guessing is the moment the project becomes predictable.
Another classic: you install everything, flip the breaker, and… nothing works. Your first thought is usually “I ruined electricity.”
But more often, it’s something simple: the GFCI needs you to press RESET before it will provide power.
Or the breaker you turned off wasn’t the correct one (because panels are sometimes labeled by someone who moved out in 1998).
That’s why a lamp and a tester are your best friendsquiet, reliable, and unlikely to offer bad advice.
If you choose to protect downstream outlets, you might experience the “why did the bedroom outlet die?” phone call from a family member.
That’s the LOAD feature doing its job: one GFCI can protect other receptacles and will cut power to them when it trips.
In practice, it’s worth labeling what’s protected. A tiny note inside the panel schedule or a quick label on the inside of the bathroom vanity door
can save a lot of future confusion.
Outdoor installs come with their own personality. Even with a brand-new WR GFCI, moisture can cause trips if the box is cracked, the gasket is missing,
or the cover isn’t a proper “while-in-use” style. The experience lesson here is simple: a GFCI is not a waterproofing system.
The receptacle is the safety net; the enclosure and cover are the raincoat. You want both.
Finally, older homes often teach the most valuable lesson: GFCI protection is still meaningful even when there’s no ground wire.
You may not be able to create a modern equipment ground without rewiring, but you can significantly reduce shock risk by installing GFCI protection and applying the correct labels.
The “experience” part is realizing that safer doesn’t have to mean perfectit means improved, verified, and honest about what the circuit can (and can’t) provide.
If you finish the job, press TEST, and the lamp clicks off exactly like it should, take the win. Then test it periodically.
Because the best electrical upgrade is the one you can forget about… until the day it quietly saves you from a very bad afternoon.


