
Table of Contents >> Show >> Hide
- What “Pro” Really Means for a Brick Walkway
- Plan It Like You Mean It
- Tools and Materials Checklist
- Base Math: How Deep Do You Dig?
- Step-by-Step: Lay a Brick Walkway Like a Pro
- Step 1: Mark the layout and set your slope
- Step 2: Excavate the trench
- Step 3: Compact the subgrade (yes, even if it looks firm)
- Step 4: Build the aggregate base in layers
- Step 5: Install edge restraints
- Step 6: Screed the bedding sand
- Step 7: Lay the brick pavers (tight, straight, and calm)
- Step 8: Cut pavers cleanly (and keep cuts where they belong)
- Step 9: Sweep in joint material (sand or polymeric)
- Step 10: Final compaction and top-up
- Common Mistakes (So You Don’t Star in a Walkway Horror Story)
- Pro Tips for a Walkway That Stays Gorgeous
- Quick FAQ
- Conclusion
- Experience Notes: The Stuff Tutorials Don’t Warn You About (But You’ll Thank Yourself For Reading)
- SEO Tags
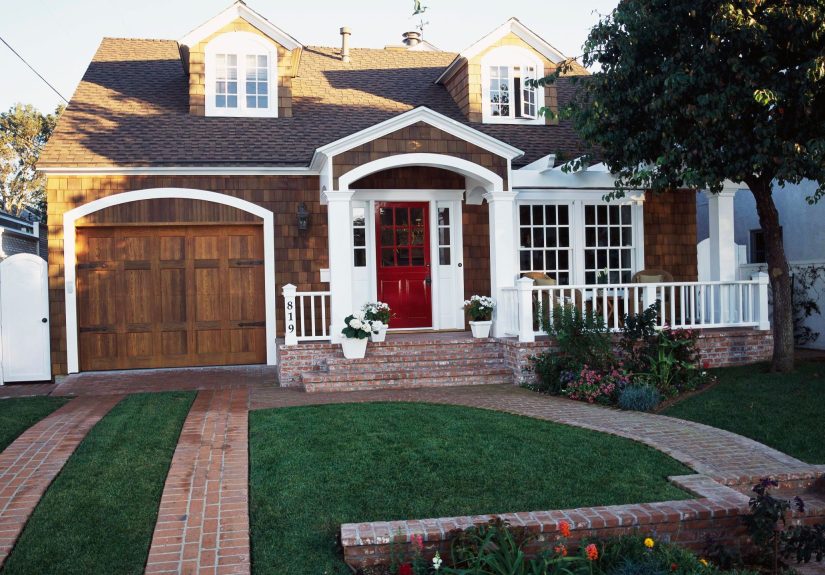
A brick walkway is one of those rare home upgrades that looks fancy, feels timeless, and survives kids, pets, BBQ traffic,
and the occasional “I swear I meant to edge that garden bed” moment. The secret isn’t some mystical mason’s handshake
it’s the unglamorous stuff: a well-compacted base, proper slope for drainage, tight alignment, and joints that actually stay filled.
This guide walks you through a professional-style install using brick pavers (clay brick pavers or concrete “brick-look” pavers).
You’ll get the why behind each step (so you don’t accidentally build a wavy trip-hazard runway), plus practical shortcuts that
don’t compromise durability.
What “Pro” Really Means for a Brick Walkway
Pros obsess over three things because they prevent 90% of walkway drama:
- A stable base (compacted in layers, not “kinda stomped on”).
- Drainage (a gentle slope so water doesn’t pool, freeze, and heave your pavers).
- Edge restraint (something solid that stops the bricks from slowly migrating like they’re trying to escape your yard).
Plan It Like You Mean It
Pick your style: clay brick pavers vs. concrete pavers
For walkways, both work well when installed correctly. Clay brick pavers are classic and colorfast; concrete pavers offer lots
of shapes/colors and can be very consistent in size. For typical pedestrian applications, many paver systems use units around
2 3/8 inches thick; heavier applications (like driveways) often require thicker pavers. Choose something rated for ground contact
and outdoor usenot leftover wall brick that hates freeze-thaw cycles.
Choose a pattern that fights movement
Brick patterns aren’t just decoration. Patterns that interlock and stagger joints distribute loads better and resist shifting.
Herringbone is the overachiever (especially near steps or turns). Running bond is easy and clean, but can creep
over time if edges are weak. Basketweave is charming and forgiving on cuts.
Lay out the path (and save future-you from regret)
- Width: Aim for at least 36 inches so two people can pass without awkward shoulder shimmy.
- Curves: Gentle curves look natural and reduce tricky cuts. Tight curves = more cutting = more swearing.
- Start from a straight edge: If you can begin from a porch, driveway edge, or a snapped string line, your layout will stay sane.
Call before you dig
In the U.S., contact your local utility locating service (commonly “Call 811”) before excavation. A brick walkway is not worth
discovering your cable line the hard way.
Tools and Materials Checklist
Tools
- Measuring tape, stakes, mason’s line/string line
- Spray paint or marking paint
- Shovel/spade, rake, wheelbarrow
- Hand tamper (small jobs) or plate compactor (recommended)
- Level (2–4 ft) and/or screed board (straight 2×4 or 2×6)
- Rubber mallet
- Brick/paver saw, diamond blade saw, or splitter (for cuts)
- Broom (a stiff push broom is your best friend)
- Safety glasses, ear protection, dust mask, gloves
Materials
- Brick pavers (buy 5–10% extra for cuts/waste)
- Base material: crushed stone/road base (often around 3/4-inch minus)
- Bedding sand: coarse concrete sand (not play sand)
- Edge restraint: plastic/metal paver edging with spikes, or a masonry edge (soldier course, curb, etc.)
- Joint material: jointing sand or polymeric sand
- Optional: landscape fabric/geotextile (helpful with weak soils or weed-prone areas)
Base Math: How Deep Do You Dig?
The excavation depth depends on your brick thickness, the bedding sand layer, and the compacted base thickness. For many
pedestrian walkways, a common target is:
- Compacted aggregate base: about 4 inches (often 4–6 inches depending on soil and climate)
- Bedding sand: about 1 inch (after screeding; keep it consistent)
- Paver thickness: varies (often ~2 3/8 inches for pedestrian pavers)
Example: If your pavers are 2 3/8 inches thick, and you want 1 inch of sand + 4 inches of base:
2 3/8 + 1 + 4 = 7 3/8 inches deep. Then adjust so the finished walkway sits flush with adjacent surfaces
(or slightly proud, depending on your landscape).
Step-by-Step: Lay a Brick Walkway Like a Pro
Step 1: Mark the layout and set your slope
Stake out both sides and run mason’s line to define edges. If the walkway meets a house, slope away so water drains.
A common approach is a small drop over distance (for example, about 1 inch of fall over several feet).
The goal: water moves off the surface, not into your joints.
Step 2: Excavate the trench
Remove sod and soil to your calculated depth. Keep the bottom reasonably smooth and follow your planned slope.
Don’t worry about making the subgrade “pretty”worry about making it consistent.
Pro move: Excavate a little wider than the finished path so you have room for edge restraints.
That extra space is what keeps your edges from becoming a slow-motion landslide.
Step 3: Compact the subgrade (yes, even if it looks firm)
Compact the exposed soil. This reduces future settling. If your soil is soft, silty, or clay-heavy (or if you’re in a freeze-thaw region),
consider laying a geotextile/landscape fabric before adding base. It helps separate soil from aggregate so your base doesn’t
gradually disappear into the earth like snacks at a Super Bowl party.
Step 4: Build the aggregate base in layers
Add crushed stone/road base in lifts (think a few inches at a time), then compact each lift thoroughly. Lightly dampening
the base can help it compact more tightly (follow your material guidance). Repeat until you hit your target compacted base thickness.
Checkpoint: Confirm slope and level frequently. You’re shaping the foundation of your finished surfacethis is where “pro”
happens, even though it’s not Instagrammable.
Step 5: Install edge restraints
Install paver edging (plastic or metal) along the sides and anchor it with spikes. Keep edges aligned and level across the width.
Edging is not optional if you want the bricks to stay put. If you prefer a more traditional look, you can create a soldier course border
or use a curb-style restraintjust make sure it provides a solid vertical face for pavers to butt against.
Step 6: Screed the bedding sand
Spread coarse bedding sand and screed it to a consistent thickness (commonly around 1 inch). Use pipes or conduit as rails
and drag a straight board across to level the sand. Then remove rails and fill the voids carefully.
Important: Once screeded, don’t walk all over your perfect sand bed. Work from the laid pavers as you go.
If you disturb the sand, re-screed that area before setting more bricks.
Step 7: Lay the brick pavers (tight, straight, and calm)
Start from a straight reference edge (a corner is ideal) and lay pavers in your pattern. Keep joint spacing consistent.
Some systems use narrow joints; other designs allow slightly wider joints. The key is consistencyrandom joints look messy
and can weaken interlock.
- Tap to seat: Use a rubber mallet to set pavers without breaking edges.
- Stay aligned: Check lines every couple of feet with a string line or straightedge.
- Square it up: Occasionally measure diagonals or use a framing square to prevent drifting courses.
Step 8: Cut pavers cleanly (and keep cuts where they belong)
Cuts are normalespecially at edges and curves. Use a paver splitter or a saw with a diamond blade.
Place cut edges toward the outside where edging or borders hide minor imperfections.
Safety note: Wear eye and ear protection and a dust mask. Paver cutting makes impressive dust clouds that you do not want in your lungs.
Step 9: Sweep in joint material (sand or polymeric)
Once all pavers are down, sweep joint sand into the gaps. For a longer-lasting joint fill, many people choose polymeric sand,
which hardens after activation and helps resist washout and weeds.
If using polymeric sand: Make sure pavers are clean and dry before application, fill joints to the recommended depth,
compact to settle sand in joints, then gently mist with water to activate. Avoid overwatering (that’s how you get haze or weak joints).
Step 10: Final compaction and top-up
Run a plate compactor over the surface (often with a protective pad to avoid scuffing). This helps seat pavers into the bedding layer
and encourages joint material to settle fully. Sweep more joint sand/polymeric as needed until joints are properly filled.
Common Mistakes (So You Don’t Star in a Walkway Horror Story)
Skipping compaction
If you don’t compact the base properly (and in layers), the walkway can settle unevenly. Translation: wobbly pavers and puddles.
A rented plate compactor is often cheaper than redoing the whole project after the first rainy season.
Using the wrong sand in the wrong place
Bedding sand and joint sand aren’t always interchangeable. Bedding sand should screed evenly and support pavers consistently.
Joint sand should fill and lock joints. Follow product guidanceespecially with polymeric sand, which can stain or haze if applied on damp pavers
or activated incorrectly.
No edge restraint
Without edge restraint, pavers slowly spread. It’s subtle at first, then one day you notice your “straight” walkway is doing interpretive dance.
Install edging early and anchor it well.
Forgetting slope
Flat walkways tend to hold water. Water leads to algae, ice, erosion, and joint loss. A slight slope is your invisible insurance policy.
Pro Tips for a Walkway That Stays Gorgeous
- Blend pavers from multiple pallets (or stacks) as you lay to avoid obvious color banding.
- Finish slightly proud of adjacent edges if neededminor settling is normal over time.
- Keep extra joint sand on hand; you may top up after the first few rains.
- Consider a border (soldier course or contrasting paver) for a clean frame and better edge stability.
- Maintenance: Sweep debris, rinse gently, and re-sand joints as needed. A little upkeep prevents weeds from winning.
Quick FAQ
Do I need mortar for a brick walkway?
Most brick paver walkways are installed as flexible, dry-laid systems over compacted base + sand bedding. Mortar is sometimes used for
edge restraints or special designs, but a properly built base and edging can deliver a long-lasting walkway without a full mortar bed.
Can I lay brick pavers directly on dirt?
You can, but you’ll regret it. Soil shifts, holds water, and compacts unevenly. A compacted aggregate base is what separates
“cute for three weeks” from “solid for years.”
Should I use polymeric sand?
If you want joints that resist erosion and reduce weeds, polymeric sand is often worth itjust follow the temperature, dryness,
and watering instructions closely.
Conclusion
Laying a brick walkway like a pro isn’t about having magical handsit’s about respecting physics. Build a compacted base, maintain slope,
lock your edges, screed consistent bedding sand, and finish joints correctly. Do that, and your walkway will look crisp and stay that way,
even after seasons of weather and foot traffic.
Experience Notes: The Stuff Tutorials Don’t Warn You About (But You’ll Thank Yourself For Reading)
People love to say, “The base is the hardest part,” which is truebut it’s also the part where most beginners accidentally create
a masterpiece of unevenness. What tends to surprise DIYers first is how normal it feels to be slightly off… until you place a few rows
of bricks and realize you’ve invented a new architectural style called “crooked.”
One of the most common “aha” moments is discovering that your eyes are liars. A line that looks straight will betray you at brick row five.
That’s why pros keep string lines handy and check alignment every couple of feet. It’s not paranoiait’s quality control. Think of it like
autocorrect for your walkway. The earlier you catch drift, the easier it is to fix. If you wait until the end, you’re not “adjusting”; you’re
negotiating with reality.
Another shared experience: renting a plate compactor feels like overkill… right up until you use it. The difference between
“hand-tamped” and “properly compacted” is the difference between a walkway that stays flat and one that develops gentle waves that
collect water. Many DIYers report that the compactor is the single most satisfying tool in the projectloud, yes, but it makes the base
feel locked in. Bonus: it’s also a great way to meet your neighbors, because everyone will suddenly appear to ask what you’re building.
Cutting pavers is another reality check. People picture a clean, simple snip; what they get is dust, noise, and the realization that
safety glasses aren’t optional. The trick most experienced installers learn is to plan cuts so they’re less visible. Put factory edges where
the eye lands, and save cut edges for the outside where edging or a border hides them. Also, don’t underestimate how long cutting takes.
If your design includes tight curves, your timeline will quietly double while you’re not looking.
Joint sandespecially polymerichas its own personality. DIYers often learn (once) that “a little extra water” is not a harmless choice.
Too much water can weaken joints or leave haze, and applying polymeric sand to damp pavers can stain. The most successful installs come
from patience: sweep thoroughly, compact so joints fill deeply, clean the surface well, then mist gently. Think “morning dew,” not “fire hose.”
Finally, the most satisfying moment is usually not the last brickit’s the first time you walk the finished path and it feels solid underfoot.
A well-laid brick walkway has a quiet confidence. It doesn’t wiggle, it doesn’t squish, and it makes your whole yard feel more intentional.
And if you did it right, you’ll forget the sore shoulders and remember the glow of having built something that looks like it came with the house.


