
Table of Contents >> Show >> Hide
- What Kind of Fountain Can You Build for Under $50?
- Budget Breakdown: How to Stay Under $50
- Materials You Need
- Tools You May Need
- Step-by-Step: How to Make a Fountain for Under $50
- Step 1: Choose the Right Location
- Step 2: Test the Container for Leaks
- Step 3: Seal Any Drainage Hole
- Step 4: Place the Pump in the Container
- Step 5: Add a Riser or Hidden Support
- Step 6: Arrange Rocks and Decorative Elements
- Step 7: Fill with Water
- Step 8: Plug In and Adjust the Flow
- Step 9: Hide the Cord Safely
- Design Ideas for a Budget DIY Fountain
- Safety Tips for DIY Fountains
- How to Maintain Your Under-$50 Fountain
- Common Problems and Easy Fixes
- Smart Ways to Save Money
- Where This Fountain Works Best
- of Real-World Experience: What You Learn When Building a Cheap Fountain
- Conclusion
There is something magical about a backyard fountain. The soft splash of moving water can make a patio feel calmer, a balcony feel more finished, and a garden corner feel like it suddenly hired a tiny spa consultant. The best part? You do not need a designer water feature, a masonry crew, or a wallet that faints dramatically every time you open it. You can make a beautiful DIY fountain for under $50 with a small submersible pump, a watertight container, a few basic supplies, and a little weekend confidence.
This guide walks you through how to make a fountain for under $50 using easy-to-find materials from home improvement stores, garden centers, thrift shops, or even your garage. We will focus on a compact recirculating fountain, which means the same water moves from the basin through the pump and back again. No plumbing line. No complicated drainage system. No mysterious backyard trench that makes your neighbors ask questions.
Whether you want a tabletop fountain, a patio water feature, a small garden bubbler, or a low-cost bird-friendly fountain, this project is beginner-friendly, budget-conscious, and surprisingly customizable.
What Kind of Fountain Can You Build for Under $50?
For a budget fountain, the easiest design is a container fountain. It uses a decorative pot, bowl, bucket, planter, ceramic basin, galvanized tub, or sealed container as the water reservoir. A small submersible fountain pump sits inside the container and pushes water upward through a tube or nozzle. The water bubbles, spills, or trickles back into the same container, creating a simple loop.
Think of it as a tiny water park with excellent manners.
The under-$50 fountain works best when you keep the design compact. A small tabletop or patio fountain usually needs a pump around 70 to 140 gallons per hour, depending on the height of the water lift. Taller fountains need stronger pumps, and stronger pumps can quickly eat the budget. For this project, the sweet spot is a low bubbling fountain, not a three-tier Versailles tribute.
Budget Breakdown: How to Stay Under $50
Prices vary by location and season, but a practical DIY fountain budget can look like this:
- Small submersible fountain pump: $15 to $25
- Watertight container or planter: $8 to $15
- Flexible vinyl tubing, if not included: $3 to $6
- River rocks, pea gravel, or decorative stones: $4 to $8
- Silicone sealant or waterproof putty: $4 to $7
- Optional riser, brick, saucer, or small bowl: free to $5
Total: about $34 to $50, depending on what you already own. If you have an old pot, spare stones, or a bucket hiding in the shed, your fountain may come in well below budget. That is the DIY version of finding money in a coat pocket.
Materials You Need
1. A Watertight Container
Your container is the star of the show. Good options include a glazed ceramic planter, a plastic bowl, a resin pot, a metal tub, a concrete-look planter, or a wide garden bowl. The container should be deep enough to fully cover the pump with water and wide enough to catch splashes.
If the pot has a drainage hole, you can still use it. Seal the hole with silicone, rubber stopper, plumber’s putty, or a fitted cork. Let sealant cure fully before adding water. If the pot is porous, such as unglazed terra-cotta, use a liner or choose another container. Terra-cotta is charming, but it drinks water like it just crossed a desert.
2. A Small Submersible Pump
A submersible fountain pump is designed to sit underwater. Look for a compact pump with an adjustable flow control and enough lift height for your design. Lift height means how high the pump can push water. For a simple bubbler, a small pump is usually enough. For water that must rise through a tube into a second pot, choose a pump with more lift.
For most under-$50 fountains, choose a pump in the 70 to 140 GPH range. If your container is very small, too much power will create splashing. If your container is larger or the water needs to rise more than a foot, you may need a stronger pump. Adjustable flow is useful because it lets you turn the fountain from “peaceful brook” down from “excited kitchen faucet.”
3. Tubing or Nozzle
Some pumps include nozzle attachments or small lengths of tubing. If yours does not, buy vinyl tubing that matches the pump outlet size. Common small fountain tubing sizes include 5/16 inch, 3/8 inch, and 1/2 inch inside diameter. Bring the pump or check the product label before buying tubing.
4. Decorative Stones
River rocks, pea gravel, polished stones, or leftover landscaping rock help hide the pump, weigh down tubing, and make the fountain look finished. Rinse stones before use so you do not turn your fresh fountain into cloudy soup.
5. Optional Support Pieces
You may need a brick, inverted plastic nursery pot, small bowl, plant saucer, mesh screen, or hardware cloth to create height inside the fountain. These pieces help position the pump, raise decorative stones, or create a bubbling effect near the surface.
Tools You May Need
- Scissors or utility knife for tubing
- Drill with masonry or ceramic bit, only if you need a custom hole
- Silicone sealant for sealing drainage holes
- Bucket or hose for filling
- Level, if placing the fountain on uneven ground
- Old towel, because water has a talent for escaping during DIY projects
Step-by-Step: How to Make a Fountain for Under $50
Step 1: Choose the Right Location
Pick a flat, stable spot where you can safely access power if using an electric pump. A patio, porch, balcony corner, garden bed edge, or side table can work well. Avoid placing the fountain where people may trip over the cord or where wind will blow water out of the container.
If your fountain is outdoors, plug it only into a GFCI-protected outlet. Water and electricity are not a cute couple. They need boundaries, supervision, and proper safety equipment.
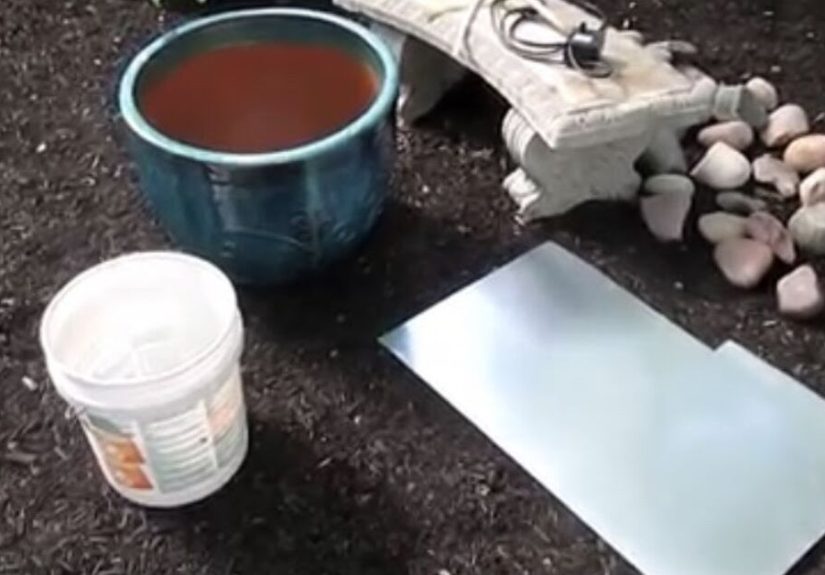
Step 2: Test the Container for Leaks
Before assembling anything, fill the container with water and let it sit for at least an hour. Check the bottom and sides for leaks. If water seeps out, seal the problem area and test again. It is much easier to discover leaks before the pump, rocks, and decorations are inside.
Step 3: Seal Any Drainage Hole
If using a planter with a drainage hole, clean and dry the area around the hole. Apply silicone sealant generously inside and outside the hole, or insert a tight rubber stopper and seal around it. Let the sealant cure according to the product directions. Do not rush this step. Wet silicone is not waterproof magic; it needs time to become useful.
Step 4: Place the Pump in the Container
Set the submersible pump on the bottom of the container. Most small pumps have suction cup feet, which help keep them stable. Position the pump so the outlet faces upward. If the pump has a filter cover, make sure it is accessible for cleaning.
Attach tubing or a nozzle to the pump outlet. If using tubing, cut it to the height you want the water to bubble. Start slightly longer than needed. You can always cut more, but you cannot un-cut tubing without inventing a time machine.
Step 5: Add a Riser or Hidden Support
If you want the water to emerge near the top of the rocks, place an inverted plastic pot, small brick, or plant saucer around the pump. This creates a platform for decorative stones while leaving room for water to circulate below. Make sure water can still reach the pump intake.
Do not pack rocks tightly against the pump. Pumps need water flow to stay cool and function properly. Give the little machine some breathing room, even though technically it is breathing water.
Step 6: Arrange Rocks and Decorative Elements
Add rinsed stones around the pump and tubing. Build up the rocks gradually, keeping the tubing upright. You can create a natural bubbling look by letting the tube end just above the stones. For a stronger spout, attach a nozzle and leave it visible.
For extra personality, add a small ceramic bowl, a thrifted teacup, a stacked saucer, a piece of slate, or a smooth garden stone with a drilled hole. Keep decorations stable. If something wobbles when dry, it will wobble even more when water starts moving.
Step 7: Fill with Water
Add clean water until the pump is fully submerged. Most small pumps should never run dry. Running a pump without water can damage the motor quickly. Fill the container high enough that evaporation will not expose the pump after a few hours in the sun.
If you live in a hot climate, choose a slightly deeper container so you do not have to refill it constantly. A shallow fountain looks elegant for ten minutes and then becomes a decorative bowl of regret.
Step 8: Plug In and Adjust the Flow
Plug in the pump and watch the water pattern. If it splashes outside the container, lower the pump flow, shorten the tubing, adjust the stones, or use a wider basin. If the water barely moves, increase the flow or check that the tubing is not kinked.
The ideal sound is a gentle trickle or soft bubbling. You want relaxing water music, not a sink with stage fright.
Step 9: Hide the Cord Safely
Route the cord along a wall, behind a planter, or through a low-traffic area. Do not bury a standard indoor cord, run it through standing water, or pinch it under heavy furniture. If the cord must cross a walking area, reposition the fountain instead. A pretty fountain is not worth creating a backyard obstacle course.
Design Ideas for a Budget DIY Fountain
Minimalist Bowl Fountain
Use a wide ceramic or resin bowl, a small pump, and black or natural river stones. Let the water bubble gently from the center. This design looks modern and works well on patios, balconies, and small porches.
Galvanized Tub Fountain
A small galvanized tub creates a farmhouse-style water feature. Add a pump, stones, and a few water plants if the tub is large enough. This style looks especially good near herbs, raised beds, or rustic outdoor furniture.
Stacked Pot Fountain
Use a larger pot as the basin and a smaller pot or bowl as the top spill point. Run tubing from the pump into the upper pot, then let water overflow back into the lower container. This design may require more careful leveling, but it gives a classic fountain look without the classic fountain price.
Bird-Friendly Bubbler
Choose a shallow, wide container and keep the water movement gentle. Add stones that rise above the waterline so birds have safe footing. Clean this type of fountain often, especially in warm weather.
Safety Tips for DIY Fountains
Safety matters because a fountain combines water, electricity, and outdoor conditions. Use a pump rated for the location where you plan to use it. If the pump is for indoor use only, do not place it outside. For outdoor fountains, use a GFCI-protected outlet, keep plugs dry, and follow the pump manufacturer’s instructions.
Do not lift the pump by its cord. Unplug the fountain before cleaning or adjusting the pump. Keep the plug connection off the ground and away from puddles. If the cord or plug is damaged, replace the pump rather than trying to repair it with tape and optimism.
If you need a permanent outdoor outlet, hire a licensed electrician. Extension cords are generally best for temporary use, not long-term backyard wiring. Your fountain should create calm, not an electrical plot twist.
How to Maintain Your Under-$50 Fountain
A small fountain is easy to maintain, but it is not completely hands-off. Check the water level every few days, especially during hot or windy weather. Refill as needed so the pump stays submerged. If the fountain sounds louder than usual, the water level may be low.
Clean the pump intake every couple of weeks. Leaves, algae, dust, and tiny bits of debris can clog the filter cover and reduce flow. Unplug the pump, remove it from the fountain, rinse the cover, and clear the tubing if needed.
To reduce algae, place the fountain where it gets partial shade instead of full sun all day. Change the water regularly. For bird-friendly fountains, avoid harsh chemicals. A simple scrub with a brush and fresh water is usually enough.
Common Problems and Easy Fixes
The Fountain Splashes Too Much
Lower the pump flow, move stones around the water outlet, or use a wider container. Splashing usually means the water is shooting too high or hitting a hard surface at the wrong angle.
The Pump Hums but Water Does Not Flow
Check whether the pump is fully submerged. Remove debris from the intake and make sure the tubing is not kinked. Some pumps need to be tilted underwater to release trapped air before they start flowing properly.
The Water Gets Dirty Quickly
Move the fountain away from falling leaves, rinse rocks before use, and clean the basin more often. If birds visit frequently, congratulations: your fountain is popular. It will also need more cleaning.
The Fountain Looks Too Plain
Add height, texture, or contrast. Try larger stones, a decorative ceramic accent, a small plant nearby, or a darker basin that makes the water more reflective. Sometimes the difference between “homemade” and “handcrafted” is one bag of polished pebbles.
Smart Ways to Save Money
Shop your home before shopping the store. Old planters, unused bowls, leftover pond stones, spare bricks, nursery pots, and garden saucers can all become fountain parts. Thrift stores are excellent places to find ceramic bowls, metal containers, and decorative pieces for a few dollars.
Choose a pump that includes tubing or nozzles to avoid extra purchases. Avoid oversized containers that require more rocks, more water, and a stronger pump. Keep the fountain design simple, then spend your creativity on arrangement and styling.
If your budget is tight, prioritize the pump and container. Decorative stones can be collected from leftover landscaping materials, but the pump must be reliable and safe. A cheap rock is fine. A questionable electrical pump is not.
Where This Fountain Works Best
An under-$50 fountain is ideal for small outdoor spaces. It can soften street noise on a balcony, add movement to a front porch, brighten a patio table, or create a calm corner in a garden bed. It also works well near seating areas because the sound of moving water makes the space feel more intentional.
For renters, a container fountain is especially useful because it is portable. You can unplug it, empty it, and move it without leaving behind permanent changes. That means you can take your little oasis with you when your lease ends. Try doing that with a built-in waterfall.
of Real-World Experience: What You Learn When Building a Cheap Fountain
The first thing you learn when making a fountain for under $50 is that water has opinions. It does not always flow where you politely ask it to flow. A tube that looks perfectly centered may send water sideways. A stone that seems decorative may create splashback. A bowl that appears deep enough in the store may suddenly feel tiny once the pump starts moving water. This is normal. Building a DIY fountain is less like assembling furniture and more like negotiating with a small, splashy personality.
One of the best experiences from this project is realizing how much the sound changes with tiny adjustments. Raise the tube half an inch, and the fountain becomes lively. Bury the tube under stones, and it becomes a soft bubbler. Let water fall onto a flat rock, and you get a brighter trickle. Aim it into deeper water, and the sound becomes quieter and rounder. You do not need expensive parts to tune the mood. You just need patience and a willingness to get your sleeves wet.
Another lesson is that wider containers are usually friendlier than narrow ones. A tall, skinny pot may look elegant, but if the water lands outside the rim, you will spend the afternoon wiping the patio and questioning your choices. A wider bowl gives the water room to fall back inside. It also slows evaporation a little and makes the fountain easier to clean. If you are choosing between a dramatic narrow pot and a practical wide basin, the wide basin wins unless you enjoy surprise puddles.
You also learn that pumps are small but mighty. Even a budget pump can move more water than expected. Adjustable flow is worth looking for because every fountain design behaves differently. Start low, test the pattern, then increase the flow slowly. The goal is not maximum power. The goal is a balanced loop where the water moves beautifully without escaping like it has somewhere better to be.
Maintenance becomes part of the rhythm. After a few days outside, dust, pollen, leaves, and curious insects may visit the water. This does not mean the project failed. It means your fountain lives outdoors, where nature has no respect for fresh DIY photography. A quick rinse, a pump check, and a water refill keep things running smoothly. If birds discover it, expect more cleaning but also more charm. Watching a bird hop onto a stone for a drink is one of the quiet rewards of the project.
The biggest satisfaction comes from how expensive the finished fountain can look. Once the pump is hidden, the rocks are arranged, and the water is moving, nobody needs to know the project cost less than a casual dinner. A budget fountain proves that atmosphere does not always come from spending more. Sometimes it comes from using simple materials well, paying attention to sound and placement, and letting moving water do what it does best: make an ordinary corner feel peaceful.
Conclusion
Learning how to make a fountain for under $50 is one of the easiest ways to upgrade a patio, balcony, porch, or garden without committing to a major landscaping project. With a small submersible pump, a watertight container, decorative stones, and a few careful adjustments, you can create a recirculating water feature that looks polished and sounds relaxing.
The key is to keep the design simple, choose the right pump size, test for leaks, protect the electrical connection, and maintain the water level. Once you understand those basics, the creative options are wide open. Go rustic with a galvanized tub, modern with a sleek bowl, natural with river stones, or bird-friendly with shallow water and landing rocks.
A DIY fountain does not need to be expensive to feel special. Sometimes all it takes is a bubbling bowl of water, a quiet corner, and the proud knowledge that you built it yourself without making your budget cry.
Note: This article is based on current practical DIY fountain methods, common U.S. home improvement materials, small submersible pump guidance, and outdoor electrical safety best practices.


