
Table of Contents >> Show >> Hide
- Quick reality check: “liquid smoke” vs. homemade “smoked water”
- What you’ll need
- Method 1: Smoker or covered grill smoked-water method (recommended)
- Method 2: Outdoor stovetop “smoke capture” (small batch, big ventilation)
- Clarify, mellow, and (optionally) concentrate
- How to store homemade liquid smoke
- How to use it without ruining dinner
- Troubleshooting
- FAQ
- Conclusion
- Real-kitchen experiences (500-ish words): what making it actually feels like
You know that moment when you want your chili to taste like it just spent the afternoon flirting with a campfire…
but your apartment smoke detector is already emotionally unstable? That’s where liquid smoke (or its
DIY cousin) comes in. With a few smart steps, you can bottle legit smoky flavor and add it to weeknight food without
turning your kitchen into a reenactment of “Great Fire of Whatever.”
This guide shows you how to make liquid smoke at home with simple tools, plus the best way to use it
(so your dinner tastes like BBQ… not like you licked a charcoal briquette). You’ll also get storage tips, wood choices,
troubleshooting, and real-world “yep, that happened” experiences from home cooks.
Quick reality check: “liquid smoke” vs. homemade “smoked water”
Store-bought liquid smoke is typically made by burning hardwood, capturing the smoke, condensing it,
and then filtering and refining the liquid so the flavor is concentrated and more consistent.
Many commercial products are processed to reduce harsh compounds that can make smoke taste bitter or dirty.
At home, you can absolutely capture smoke into a liquidbut your result is usually best thought of as
smoked water: a gentler, fresher “smoke tea” that’s delicious in sauces, beans, marinades, and vegan
recipes. It won’t be as potent or standardized as many bottled versions, and it can vary by wood type, temperature,
and time.
The good news? Homemade smoked water is often easier to control and more forgiving: less “one drop too far,”
more “season like a reasonable human.” If you want a strong, shelf-stable concentrate, you can carefully reduce it
(more on that soon).
What you’ll need
Ingredients
- Hardwood chips or chunks (hickory, apple, cherry, oak, or mesquite)
- Cold water (filtered tastes cleanest)
- Optional: a splash of apple cider vinegar (for brightness and a more “classic” bottled profile)
- Optional: a pinch of salt (helps round flavor; also encourages “seasoning” vibes)
Equipment (pick the setup you can actually do)
- Best option: smoker or grill with a lid
- Disposable aluminum pan or heat-safe shallow pan
- Wire rack (optional, helps keep the pan away from direct heat)
- Fine mesh strainer + coffee filters (or a clean, lint-free cloth)
- Glass jar or bottle with a tight lid
- Ice (optional but helpful for better condensation)
Method 1: Smoker or covered grill smoked-water method (recommended)
This is the easiest, most repeatable method. You’re basically letting smoke drift over a pan of water so the water
absorbs smoky compounds. Think of it like making a smoky “stock,” except the stock is vibes.
Step-by-step
-
Choose your wood like it matters (because it does).
Apple and cherry are sweet and mild, hickory is classic BBQ, oak is balanced, mesquite is bold and can go sharp fast.
Avoid resinous softwoods (like pine) and never use treated or painted wood. (Your taste buds deserve better.) -
Set up for indirect heat.
On a grill, bank coals to one side or use a two-zone gas setup. In a smoker, keep temps on the lower side.
You want smoke flavor, not a rolling boil. -
Add a pan of cold water.
Pour 2–4 cups of cold water into a shallow pan. Place it on the cool side, away from direct flame.
If you can, set the pan on a rack so it’s not getting blasted with heat from below. -
Keep the temperature low and steady.
Aim for a gentle smoke sessionroughly 165–225°F is a sweet spot. Hotter temps can evaporate your water
and push harsher flavors. You’re not trying to cook the water. (Yes, that sentence is weird. Welcome.) -
Smoke the water for 45–120 minutes.
Start with 60 minutes for a lighter batch. Go up to 2 hours for a deeper, more assertive smoke note.
Add more wood chips as needed to maintain clean, steady smoke. -
Taste and stop before it turns into “campfire regret.”
Let a teaspoon cool, then taste. You want pleasantly smokylike grilled food, not like an ashtray.
If it’s too light, keep smoking in 15–20 minute increments.
Pro tip: Use ice for cleaner capture
If your grill/smoker setup allows, put a small metal bowl of ice above the pan of water (not touching the fire).
The colder surface encourages more smoke compounds to condense and drip into the water. It’s like making smoke do paperwork.
Method 2: Outdoor stovetop “smoke capture” (small batch, big ventilation)
Only do this outdoors (or under extremely strong ventilation) because indoor smoke is a terrible roommate.
This method creates a small smoke chamber using a pot or wok with a lid and a cold surface for condensation.
How it works
- Line the bottom of a pot/wok with foil and add a small handful of hardwood chips.
- Place a heat-safe rack above the chips and set a small bowl of cold water on the rack.
-
Invert the lid (so the top dips downward). Add ice on top of the inverted lid.
This creates a cold surface so smoke condenses and drips toward the center. -
Heat gently until chips smolder, then reduce heat to keep smoke steady (not raging).
Run 20–40 minutes, refreshing ice as needed. - Cool completely before opening to avoid a face full of smoke.
This technique can produce a stronger, more “raw smoke” liquid. If it tastes harsh, don’t panicfiltering and settling
will help, and you can blend it with a milder batch from Method 1.
Clarify, mellow, and (optionally) concentrate
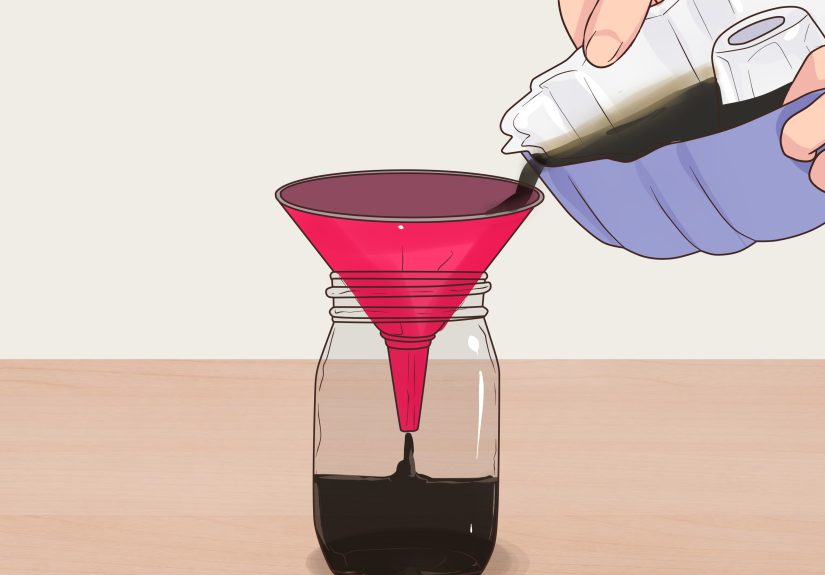
1) Filter it like you mean it
Pour the smoked liquid through a fine mesh strainer first, then through a coffee filter.
This removes ash and tiny particles that can make flavors muddy or bitter.
2) Chill and decant for a cleaner flavor
Refrigerate the filtered liquid overnight. You may see darker sediment settle at the bottom.
Pour off the clearer top portion into a clean jar, leaving the sediment behind.
This simple step can noticeably improve taste.
3) Optional: Add a tiny splash of vinegar
A teaspoon or two of apple cider vinegar per cup can brighten the flavor and mimic the tang some bottled products have.
This is optionalskip it if you want a softer, “woodsy” smoke.
4) Optional: Reduce to intensify (with caution)
If you want something closer to a “concentrate,” gently simmer the smoked liquid in a small saucepan to reduce volume.
Go slow, keep it barely simmering, and taste as you go. Reducing makes flavor stronger fast.
Rule of thumb: reduce by 25% for “noticeable,” by 50% for “powerful,” and more than that only if you’re
chasing a bold, drop-by-drop seasoning.
How to store homemade liquid smoke
- Refrigerator: store in a clean, sealed glass jar and use within 1–2 weeks.
- Freezer: freeze in ice cube trays, then transfer to a bag; use within 3 months for best flavor.
- Do not can at room temperature unless you truly know what you’re doing with tested acidity and safe canning practices.
If the liquid smells “off,” looks moldy, or tastes sour in a bad way (not a pleasant vinegar tang), toss it.
Smoky flavor is not worth a gastrointestinal plot twist.
How to use it without ruining dinner
Liquid smoke is famous for one thing: being strong. Even homemade smoked water can get intense,
especially if reduced. The move is to add a little, stir, taste, and repeat.
Starter amounts (you can always add more)
- Soups, chili, beans (1 pot): 1/2 to 2 teaspoons smoked water (or a few drops of reduced concentrate)
- BBQ sauce (1–2 cups): 1/4 to 1 teaspoon
- Marinade (for 1–2 pounds): 1/2 to 1 teaspoon
- Vegan “bacon” vibe: start with 1/4 teaspoon in a smoky soy-maple marinade and adjust
Where it shines
- Weeknight BBQ sauce: ketchup + vinegar + brown sugar + spices + a careful splash of smoky liquid
- “Smoked” pulled chicken in a slow cooker: add smoky liquid to the cooking sauce, then finish under a broiler
- Beans and lentils: gives “ham hock energy” without the ham hock
- Burgers or meatloaf: mix into the glaze or sauce instead of the meat for more control
- Roasted veggies: stir into oil + salt + acid, then toss after roasting
How to avoid the “ashtray” effect
- Use clean, thin smoke (not billowing white clouds).
- Add smoke flavor to fat + acid + sweetness (BBQ sauce, vinaigrettes, marinades). It rounds the edges.
- When in doubt, add smoke at the end so you don’t “cook it louder.”
Troubleshooting
It tastes bitter
- Smoke was too heavy or too hot. Next time, lower the heat and aim for steadier, lighter smoke.
- Filter more thoroughly and chill overnight, then decant the clear top portion.
- Blend the bitter batch with a milder one to soften it.
It’s weak
- Smoke longer (add 15–20 minutes at a time).
- Use a bolder wood (hickory/oak) or add an ice-cooled surface to encourage condensation.
- Reduce slightly to intensify.
It smells “weird,” not smoky
- Wood may be stale or contaminated. Use fresh, food-grade hardwood chips.
- Smoke may be dirty (from flare-ups or drippings hitting flames). Keep it indirect and clean.
FAQ
Is homemade liquid smoke safe?
Homemade smoked water is generally made from the same idea as commercial liquid smokecapturing smoke compounds in water
but it’s not industrially standardized or refined. Use food-safe hardwood, keep smoke clean,
filter well, and store refrigerated. If you want maximum consistency and long shelf life, store-bought products are hard to beat.
What’s the best wood for beginners?
Apple or cherry for mild, friendly smoke; oak for balanced; hickory for classic BBQ. Mesquite is bolduse it when you’re confident
and want the smoke to announce itself.
Can I use this in cocktails?
Yescarefully. Think “a drop or two,” not “a teaspoon.” It can be incredible in smoky Old Fashioned-style drinks,
but it goes from “interesting” to “campfire mouthwash” very quickly.
Conclusion
Making liquid smoke at home is really about capturing smoke flavor in a controlled wayideally as a clean, flexible
smoked-water base you can filter, mellow, and even concentrate. Keep the smoke clean, keep the heat gentle, and
season like you’re holding a tiny bottle of BBQ lightning: powerful, useful, and absolutely capable of going too far.
Once you’ve got a batch in the fridge (or frozen into little smoky cubes), you’ll start finding excuses to use it:
beans, chili, sauces, marinades, roasted veggies, and plant-based dishes that want that “I grilled this, I swear” flavor.
Just remember: you can always add more… but you can’t un-smoke the soup.
Real-kitchen experiences (500-ish words): what making it actually feels like
The first thing people notice is the smellnot the “barbecue restaurant” smell, but the more intimate, personal aroma of
smoke trapped under a lid. When you lift the smoker or grill cover, you’ll get a quick hit that feels like summer cookouts,
camping trips, or that one friend who insists they can start a fire with “just vibes.” It’s fun… until you remember your
clothes will also smell like it. (Plan accordingly.)
Most home cooks have a “confidence spike” around minute 30: the water looks the same, so you assume nothing is happening,
and you’re tempted to add more wood, crank the heat, and chase dramatic smoke. This is the fork in the road where good
smoked water becomes “liquid campfire.” The better move is boring consistencygentle heat, clean smoke, and patience.
When you finally taste a cooled spoonful, you’ll realize it did work; it’s just subtle in the way good seasoning
is subtle.
Another common moment: discovering how much wood choice matters. Applewood often reads like a soft, sweet
smokiness that makes chicken, turkey, and vegetables feel friendlier. Hickory leans more traditional BBQ and shows up
loudly in beans and sauces. Mesquite can feel thrilling for about five seconds, then slightly aggressive if you push it
too longlike a smoke flavor wearing a leather jacket indoors.
Filtering is where the magic gets “annoying but worth it.” The first pass through a strainer feels satisfying, like you’re
a culinary scientist. The coffee filter pass feels like you’re watching paint dry. But then you taste the difference:
fewer harsh notes, less bitterness, and a smoother smoke profile that plays well with sweet (brown sugar), tangy (vinegar),
and savory (soy sauce, Worcestershire-style flavors).
Refrigerating overnight can be surprisingly dramatic. Some batches settle into a clearer top layer with darker sediment
at the bottom. The first time you decant the clear portion and leave the sludge behind, you’ll feel like you just leveled
up. And you did. That sediment often holds the “over-smoked” harshness, so separating it makes the liquid more usable.
Finally, there’s the classic “oops” moment: using too much in the first dish. Almost everyone does it once. The lesson
sticks because it’s so specific: smoke flavor doesn’t behave like broth or soy sauce. It behaves like perfume.
Start small, stir well, taste, and creep up. Once you nail your personal strengthespecially if you reduce the liquid
you’ll use it like a secret weapon: tiny doses that make food taste like it took way more effort than it did.


