
Table of Contents >> Show >> Hide
If you’ve ever heard a slow, smoky guitar line and thought, “I wish that came out of my fingers,” welcome to the club. The good news? Blues guitar is one of the most beginner-friendly styles on the planet. With a simple 12-bar pattern, a couple of chords, and a small handful of notes, you can sound surprisingly legit in a short amount of time.
This guide walks you through how to play the blues on guitar in 15 clear steps, from your first 12-bar rhythm to bending emotional solos. We’ll cover chords, scales, rhythm, classic techniques, and how to actually put it all together in real-world jams.

Before You Start: Gear, Tuning, and Mindset
You don’t need a vintage Strat and a wall of tube amps to start playing the blues. A basic acoustic or electric guitar, a tuner, and a metronome (or metronome app) are more than enough.
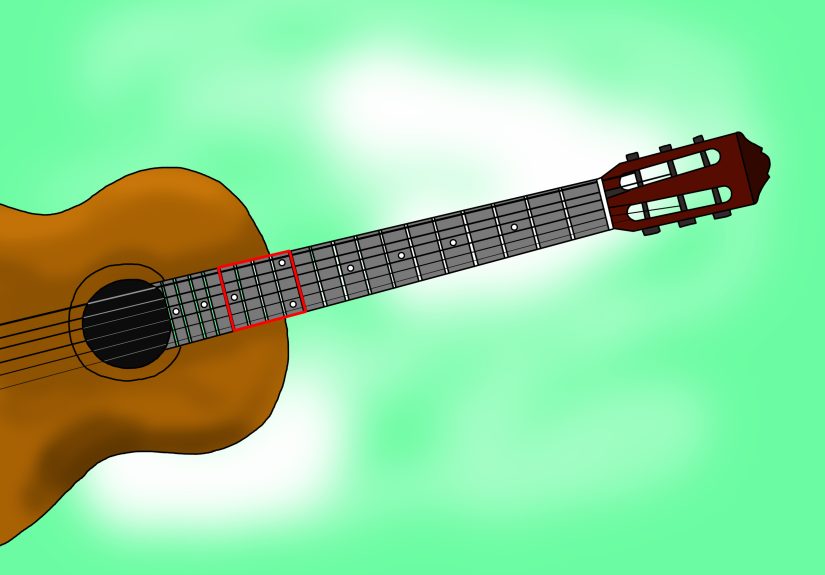
- Tuning: Standard tuning (E–A–D–G–B–E) is perfectly fine.
- Action: If your strings feel like barbed wire, have a tech lower the action so bends are easier.
- Tone: On electric, start with a clean sound plus a little overdrive. You want “warm and gritty,” not “volcano exploding.”
Most important of all is your mindset: blues is about feel more than speed. You’re not trying to win a race; you’re trying to tell a story with six strings.

Part 1: Rhythm – Building the 12-Bar Backbone
Step 1: Learn the 12-Bar Blues Chord Progression
The classic blues sound is built on a 12-bar (12-measure) chord pattern using just three chords: I, IV, and V (1, 4, and 5) of the key. In the key of E:
- I chord = E7
- IV chord = A7
- V chord = B7
The “standard” 12-bar progression looks like this in Roman numerals:
I – I – I – I
IV – IV – I – I
V – IV – I – I
In E, that means: E7 – E7 – E7 – E7 / A7 – A7 – E7 – E7 / B7 – A7 – E7 – E7.

Step 2: Play I–IV–V Chords in a Friendly Key
Most beginners start in E or A because the open-position chords feel comfortable and sound big.
Try this:
- Strum E7 for four measures.
- Switch to A7 for two measures, back to E7 for two.
- Then B7 for one, A7 for one, E7 for two.
Go slow. If the chord changes are messy, that’s normal. Clean rhythm beats sloppy solos every time.

Step 3: Add a Shuffle or Swing Rhythm
Strumming straight eighth notes (1 & 2 & 3 & 4 &) works, but the blues really comes alive with a shuffle feelthink “long-short, long-short.”
Count it like: ONE-a TWO-a THREE-a FOUR-a and strum on “ONE” and “a” to get that rolling groove. Your right hand should never completely freeze; keep it gently moving like a pendulum.

Step 4: Learn a Classic 12-Bar Turnaround
A turnaround is a short lick or chord move in the last measure that leads you back to the top of the 12-bar progression. A simple one in E is:
E – E7 – A7 – A#dim – B7
or even just walking single notes on the low E string: open E, F#, G, G#, A, then hit B7.
Turnarounds are like the punctuation at the end of your musical sentencethey make the listener expect the next verse or solo.

Part 2: Lead – Scales, Licks, and Feel
Step 5: Memorize the Minor Pentatonic Scale
The minor pentatonic scale is the backbone of blues lead playing. In A minor, the most famous “box” pattern looks like this (starting on the 5th fret of the low E string):
A – C – D – E – G – A
Five notes, tons of music. Practice going up and down slowly, then try to play random combinations instead of strict runs. Your goal is to hear where your fingers are going, not just follow a pattern by memory.

Step 6: Add the “Blue Note” to Build the Blues Scale
The blues scale is just the minor pentatonic scale with one extra spicy note: the flattened 5th (also called the “blue note”). In A, that note is E♭/D#.
A blues scale in A: A – C – D – E♭ – E – G – A.
Don’t park on the blue note for too long; think of it like hot sauce. A little sprinkle gives you that gritty, soulful tension before resolving to a more stable note.

Step 7: Explore the Major Pentatonic Scale for Sweeter Sounds
Blues isn’t always sad or dark; a lot of it is surprisingly upbeat. That’s where the major pentatonic comes in. In A major, the pentatonic notes are:
A – B – C# – E – F# – A
Same key, totally different flavorbrighter and happier. Many classic blues and blues-rock solos bounce between minor and major pentatonic to create contrast.

Step 8: Mix Major and Minor Pentatonics
The magic happens when you blend major and minor pentatonic over the same 12-bar progression. A simple rule of thumb:
- Use minor pentatonic for grit and tension.
- Use major pentatonic when the song feels sweeter or lands back on the I chord.
Try playing mostly A minor pentatonic, then occasionally slip in A major pentatonic notes (especially over the A7 chord). Your ear will tell you which choices sound tasty and which sound like a wrong turn.

Step 9: Practice Bending and Vibrato Like a Singer
Blues notes almost never sit perfectly on the fret. They slide into tune, wobble, or lean a bit sharp. That’s where bending and vibrato come in.
- Half-step and whole-step bends: Aim your bends to specific target notes (for example, bend the G up to A in A minor pentatonic).
- Controlled vibrato: Instead of shaking the string randomly, move it in a steady, rhythmic pulselike a slow, controlled wobble.
Listen to players like B.B. King or Stevie Ray Vaughan and notice how they can play just one note with a bend and vibrato that sounds like a complete sentence.

Step 10: Use Slides, Hammer-Ons, and Pull-Offs
Blues loves legato techniquesnotes that connect smoothly without a fresh pick attack each time.
- Slides: Play a note, then slide your finger up or down to the next one while holding pressure.
- Hammer-ons: Pick once and “hammer” a higher finger onto the string to sound a new note.
- Pull-offs: Reverse of a hammer-on; pull your finger off to a lower note while lightly plucking the string.
Mix these with bends and vibrato and your lines will start to sound fluid and vocal, not robotic.

Part 3: Putting It All Together in Real Blues Songs
Step 11: Play Along with 12-Bar Backing Tracks
Once you know the 12-bar progression and a couple of scales, it’s time to jam along with backing tracks. Search for “slow 12-bar blues in A” or “E shuffle backing track.”
Start by just playing the chords with a shuffle rhythm. When that feels solid, switch to simple single-note lines from your minor pentatonic or blues scale. Don’t worry about being fancyhit a note, let it ring, maybe bend one or two. Simplicity is your friend.

Step 12: Learn Call-and-Response Phrasing
Blues is rooted in call-and-response: musical question, musical answer. You can simulate that by playing one short phrase in the first two measures, then a different phrase in the next two.
Example: In the first bar, play a simple lick that ends on the root note. In the next bar, answer it with a slightly higher lick. Think of it as two characters talking to each other.

Step 13: Copy Short Licks from Your Heroes
You don’t need to memorize an entire solo note-for-note. Start with tiny licksone or two measuresfrom players you love. Learn them slowly, play along with the original recording, and then drop them into your own solos in different keys.
This is how blues has been passed down for generations: hear something cool, steal it lovingly, make it your own.

Step 14: Jam with Other Musicians
At some point, you need to escape the safety of your practice space and play with real humans. Start with friends who know a few chords, or seek out casual blues jams in your area.
Usually someone will call a key“Blues in A!”and everyone runs the same 12-bar form. You play rhythm most of the time, then take a turn soloing. The first time will feel terrifying. It will also teach you more in 10 minutes than a week of playing alone.

Step 15: Record Yourself and Develop Your Own Style
Finally, hit recordon your phone, your computer, anythingand listen back to your playing. You’ll hear things you miss in the moment: sloppy timing, rushed bends, or surprising little licks that actually sound great.
Over time, you’ll find phrases you repeat a lot (your “go-to” licks), rhythmic ideas you like, and favorite spots on the neck. That’s the beginning of your personal blues stylenot an imitation, but your own voice built on everything you’ve learned.

Blues Guitar Experiences: What Learning Really Feels Like
Learning how to play the blues on guitar is less like studying for a test and more like learning a new accent. At first, everything feels awkward. Your fingers miss strings, your bends sound out of tune, and your “shuffle rhythm” feels like you’re tripping down the stairs.
Most players go through the same phases:
Phase 1: Chord chaos. You’re wrestling with E7, A7, and B7, trying to land on the right chord at the right time. The first victory is getting through one 12-bar cycle without stopping. It won’t sound prettybut it will feel huge.
Phase 2: Scale confusion. When you learn the minor pentatonic box, it feels like someone gave you the keys to the kingdom… and then forgot to label any of the doors. You can physically play the notes, but turning them into music is a different story.
This is where a lot of people give up. The trick is to stop worrying about “improvising” and instead focus on tiny, repeatable ideas. Take just three notes, and see how many little phrases you can make by changing the rhythm, adding a bend, or sliding into them. Limiting yourself can actually make you more creative.
Phase 3: Feel over flash. The day it clicks, you’re usually not doing anything fancy. Maybe you’re playing a slow 12-bar in A, and you hit one note with just the right bend and vibrato. For a second, it sounds like something you’d hear on a record instead of a bedroom practice session. That’s the moment you realize: “Oh… this is the blues.”
From there, the journey becomes about deepening your touch, not chasing speed. You start noticing details: how softer picking changes the tone, how palm-muting the low strings tightens the groove, how leaving spaces between licks actually makes your solos sound more confident. You stop trying to play every idea you’ve ever learned in one chorus and start saying more with less.
Another big experience is your first jam with other musicians. Every blues guitarist remembers the first time they took a solo in front of people. Your hands shake a little, and you probably forget half of what you planned to play. But then you land on a simple, well-timed lick, the drummer smiles, and someone yells “Yeah!” from the back of the room. In that moment, you’re officially a blues guitaristmistakes and all.
Finally, there’s the quiet experience of late-night practice. You’re sitting with your guitar after a long day, noodling through a slow blues. Maybe you’re running the same 12-bar pattern you’ve played a thousand times. But somehow, tonight it feels a little differentmore relaxed, more personal. That’s the secret gift of blues guitar: it’s not just about sounding cool; it’s about having a way to process your feelings with six strings and a bit of electricity.
If you stick with these 15 stepslearning the 12-bar form, locking in your rhythm, exploring pentatonic and blues scales, and slowly shaping your own phrasingyou’ll wake up one day and realize you don’t just “know some blues licks.” You speak the blues. And that’s when the real fun begins.


