
Table of Contents >> Show >> Hide
- Before You Start: Understand What You’re Fighting
- Part 1: Assess Your Yard Like a Soil Detective
- Part 2: Slow Down and Redirect Water
- Part 3: Cover and Anchor the Soil
- Part 4: Improve Soil Health and Everyday Habits
- Putting It All Together: A Simple Erosion Control Plan
- Real-Life Experiences: Lessons from the Erosion Front Lines
If you’ve ever watched your garden after a heavy rain and thought, “Wow, my soil is literally escaping,” you’ve met the sneaky villain called soil erosion. Left alone, erosion can wash away fertile topsoil, expose roots, damage foundations, and send muddy water into nearby streets and streams. The good news? You don’t need a degree in geology to fight back. With a few smart, practical steps, you can keep your soil right where it belongs.
This guide walks you through 15 clear steps to prevent soil erosion around your home and garden. Think of it as a wikiHow-style walkthrough: simple, visual in your mind, and totally doable for a weekend DIYer.
Before You Start: Understand What You’re Fighting
Soil erosion happens when water, wind, gravity, or human activity loosen and move soil particles. Bare soil, steep slopes, compacted ground, and intense rainfall make erosion much more likely. Over time, you lose nutrient-rich topsoil, plants struggle, and runoff can carry sediment into storm drains and waterways.
Most home landscapes deal with three main culprits:
- Water erosion: Rainfall and runoff carve channels, wash mulched beds downhill, and create gullies.
- Wind erosion: On exposed, dry, bare soil, wind can literally blow topsoil away.
- Disturbance erosion: Construction, heavy foot traffic, or over-tilling leave soil vulnerable.
Your mission is simple: slow the water, cover the soil, and anchor it with roots or structures.
Part 1: Assess Your Yard Like a Soil Detective
Step 1: Identify Erosion Hotspots
Walk your yard after a good rain (or lightly hose suspect areas). Look for muddy puddles, rills (tiny channels carved in the soil), exposed roots, bare patches, or mulch that migrated downhill. These are your erosion “crime scenes.”
Picture idea: Close-up of a slope with small channels where soil has washed away.
Step 2: Notice the Slope and Water Paths
Water always obeys gravity. Watch where it naturally flows: down a driveway, across a bare slope, or straight toward your foundation. Long, uninterrupted slopes give water speed and cutting power. Your goal will be to break those slopes into smaller “steps” and redirect water more gently.
Picture idea: Arrows drawn on a photo of a backyard showing how water flows downhill.
Step 3: Check Soil Type and Compaction
Clay-heavy soils shed water quickly and erode when runoff accelerates. Sandy soils drain fast but can blow or wash away easily when bare. Compacted soil (from parked cars or heavy foot traffic) resists infiltration, so water runs off instead of soaking in. Use a screwdriver or hand trowelif it’s hard to push in, your soil is compacted and more erosion-prone.
Picture idea: Hand pressing a screwdriver into soil to test for compaction.
Part 2: Slow Down and Redirect Water
Step 4: Add Simple Drainage Swales
A swale is a shallow, gently sloped trench that guides water where you want it to go, often toward a rain garden or lawn area where it can soak in. Line the bottom with grass, native groundcover, or gravel. A good swale slows water, spreads it out, and lets it infiltrate instead of cutting straight downhill.
Picture idea: Cross-section diagram of a shallow swale with grass in the bottom.
Step 5: Capture Roof Runoff
Downspouts that dump water directly onto bare soil are erosion machines. Add downspout extensions, splash blocks, or, even better, rain barrels and direct overflow into a planted area or rain garden instead of a hard-packed corner. Spreading out that water reduces its erosive power and puts it to work watering your plants.
Picture idea: Downspout extension leading into a gravel-lined basin with plants around it.
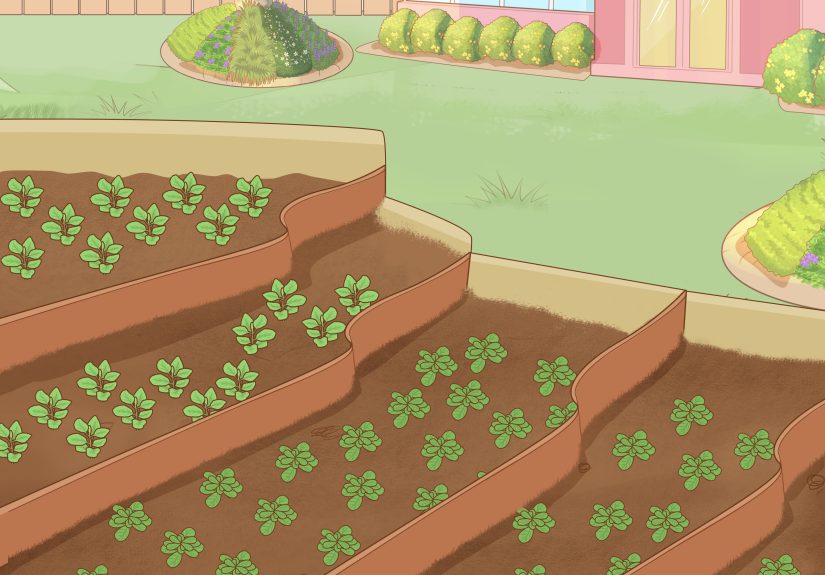
Step 6: Break Long Slopes into Terraces
On steep slopes, gravity always winsunless you cheat by adding terraces. Build low retaining walls, timber steps, or rock borders that create a series of smaller, flatter areas instead of one long slide. Each terrace slows water, gives it a chance to soak in, and provides a stable planting zone for erosion-control plants.
Picture idea: A hillside with several short stone retaining walls and planted tiers.
Step 7: Use Gravel or Stepping Stones on Footpaths
Repeated footsteps on bare soil crush soil structure and invite runoff. If you have informal “shortcut” paths across your yard, upgrade them. Add stepping stones with low groundcovers between them or a mulch or gravel path. You’ll protect the soil while guiding feet along a durable route.
Picture idea: A bark-mulch path with stepping stones and plants lining the edges.
Part 3: Cover and Anchor the Soil
Step 8: Mulch All Bare Soil
One of the fastest ways to prevent soil erosion is simply to mulch. A 2–3 inch layer of shredded bark, wood chips, straw, or shredded leaves protects soil from pounding raindrops, slows runoff, keeps soil moist, and supports beneficial organisms. Just keep mulch a few inches away from plant stems and tree trunks to prevent rot.
Picture idea: Close-up of a mulched bed around shrubs, with bare soil covered.
Step 9: Plant Deep-Rooted Groundcovers
Plants are nature’s erosion-control experts. Low-growing, deep-rooted groundcovers knit the top layer of soil together. On slopes, choose tough, drought-tolerant species that spread quickly. In many regions, native grasses, sedges, creeping thyme, or clover can work well. The key is dense coverageno large bare patches where water can grab soil.
Picture idea: Slope covered in dense groundcover plants instead of bare dirt.
Step 10: Add Shrubs and Trees as “Living Anchors”
For serious erosion issues, especially on slopes, shrubs and trees add deeper root systems that stabilize the soil long-term. Their foliage also softens the impact of rain, and their roots create channels that improve infiltration. Mix groundcovers under shrub and tree layers for multi-level protection.
Picture idea: Layered planting with groundcovers, shrubs, and small trees on a hillside.
Step 11: Use Cover Crops in Garden Beds
If you have veggie beds or small plots that sit bare in the off-season, plant cover crops like rye, clover, or vetch. They protect soil from erosion, build organic matter, and improve structure. In spring, you can cut them down and use them as mulch or dig them in lightly (without aggressive tilling) to feed the soil.
Picture idea: Raised bed with a lush green cover crop instead of bare soil.
Step 12: Replant Quickly After Disturbance
Any time you disturb soilconstruction, a new patio, removing a tree, or even a big garden overhaultreat it as a potential erosion hotspot. Don’t leave it bare “until you have time.” Seed it with grass, sow a quick cover crop, or spread mulch as a temporary shield. The faster you cover it, the less soil you’ll lose.
Picture idea: Newly graded slope seeded and covered with straw mulch.
Part 4: Improve Soil Health and Everyday Habits
Step 13: Add Organic Matter to Build Resilient Soil
Healthy soil resists erosion better. Adding compost and allowing mulch to break down over time increases organic matter, which improves structure and helps soil hold together during storms. Well-structured soil absorbs more water, so there’s less runoff to cause erosion in the first place.
Picture idea: Gardener spreading dark compost over a bed before mulching.
Step 14: Avoid Over-Tilling and Heavy Machinery
It can be tempting to till every season “to fluff up the soil,” but frequent tillage breaks apart soil aggregates and leaves the surface vulnerable to erosion. Likewise, driving heavy equipment or even repeatedly parking cars on the lawn compacts soil. Try no-till or low-till gardening, use hand tools where possible, and keep vehicles on drivewaysnot on your future erosion control projects.
Picture idea: Garden bed with plants and mulch, no visible tillage lines.
Step 15: Inspect After Storms and Repair Damage Early
After big storms, walk your property. Look for new channels, undercut edges, or areas where mulch migrated. Re-cover exposed soil, add more plants, re-level small gullies, and adjust downspouts or swales if they’re not working as expected. Catching problems early keeps minor erosion from becoming a full-blown landslide in miniature.
Picture idea: Homeowner standing on a slope, pointing to a small gully and adding mulch.
Putting It All Together: A Simple Erosion Control Plan
To prevent soil erosion effectively, think in layers:
- Shape the land: Use terraces, swales, and paths to slow and redirect water.
- Cover the soil: Mulch, groundcovers, cover crops, and plant residues act as a shield.
- Anchor with roots: Groundcovers, shrubs, and trees create a living net that holds soil in place.
- Support the soil itself: Build organic matter and avoid compaction and unnecessary tillage.
When you combine these methodsrather than relying on just oneyour yard becomes more resilient, your plants are happier, and you’re no longer watching your garden wash into the street every time it rains.
Real-Life Experiences: Lessons from the Erosion Front Lines
So what does all of this look like in real life? Here are a few experiences and scenarios that show how different approaches to preventing soil erosion actually play out.
A Steep Backyard That Kept Losing Mulch
Imagine a homeowner with a steep backyard hill behind their house. Every spring, they carefully mulched their flower bedsonly to find half the mulch at the bottom of the hill after the first thunderstorm. The soil underneath was hard, compacted clay, and the downspouts ended right at the top of the slope. Classic erosion setup.
Instead of giving up on mulch altogether, they made a few strategic changes:
- They extended downspouts into a shallow swale that curved across the yard, sending water toward a flat, grassy area.
- They added three short, stone retaining walls to “step” the slope into terraces.
- They planted tough, deep-rooted groundcovers between perennials so the soil wasn’t left exposed between plants.
The next storm still brought heavy rainbut the mulch stayed put, the soil didn’t wash away, and the swale quietly did its job, guiding water safely through the yard. The change didn’t require a full landscape overhaul, just a thoughtful combination of several erosion control steps working together.
The Community Garden with Seasonal Bare Soil
Many community gardens face the same problem: beds look great in spring and summer, then sit bare and eroding through fall and winter. One garden decided to experiment with cover crops and heavier mulching.
Instead of leaving harvested beds exposed, they sowed rye and clover in late summer and early fall. In other beds, they simply added a thick layer of shredded leaves donated by neighbors. Come spring, the soil in those beds was noticeably darker, softer, and less compacted. There were fewer rills and gullies and much less sediment washing onto nearby paths.
Gardeners also reported that their plants seemed to establish more quickly. That’s the hidden bonus of erosion control: not only do you keep soil in place, you often improve it at the same time.
Fixing a “Mud Corner” by the Downspout
Another common story: the one ugly corner of the yard where the downspout empties onto a patch of dirt. After every storm, it turns into a muddy crater, and over time the soil level drops while sediment sneaks onto the sidewalk.
To fix this, one homeowner:
- Installed a rain barrel and used the overflow outlet to feed a small gravel-lined basin.
- Planted moisture-loving perennials around the basin and mulched heavily.
- Added a short rock border to keep soil and mulch from drifting onto the sidewalk.
The result: that “mud corner” turned into a mini-rain garden. Instead of blasting soil away, stormwater became a resource that watered the new plants. The soil stayed put, the sidewalk stayed cleaner, and the homeowner got an attractive planting area out of the deal.
Learning to Till Less and Mulch More
Many experienced gardeners grew up with the habit of rototilling every year. One home gardener noticed that even with raised beds, soil kept crusting over and washing out of the beds after heavy rains. After reading about no-till methods, they decided to experiment on just one bed.
They skipped the tiller. Instead, they added a generous layer of compost on top and mulched around seedlings once they were a few inches tall. Over the season, they noticed the soil stayed looser, and after storms, there were far fewer signs of runoff. The next year, they expanded the no-till approach to all beds and saw fewer erosion problems overall, along with better moisture retention in dry spells.
The takeaway from these stories? Preventing soil erosion isn’t about one magic fix. It’s about stacking small, smart decisions: redirecting water, covering soil, planting deeply rooted vegetation, and treating your soil like the living system it is. When you do, erosion slows down, your landscape becomes more resilient, and you get to stop worrying about watching your yard wash away every time the forecast says “heavy rain.”


