
Table of Contents >> Show >> Hide
- Before You Start: 4 Quick Rules That Save Edits
- Method 1: Use Transform Warp for Everyday Bending
- Method 2: Use Puppet Warp for Pin-Point Control
- Method 3: Use Perspective Warp for Buildings, Rooms, and Realistic Composites
- Which Warp Method Should You Use?
- 5 Quick Tips That Make Warp Edits Look Professional
- Real-World Experiences Using the Warp Tool in Photoshop
- Conclusion
- SEO Tags
Some Photoshop tools feel like a polite handshake. The Warp tool feels more like a full yoga class for your pixels. Used well, it can bend a logo around a coffee mug, reshape a flowing dress, fix a leaning building, or nudge a pose from “awkward school photo” to “yes, that looks intentional.” Used badly, it can also make a face look like it was edited on a trampoline.
The good news is that Adobe Photoshop gives you more than one way to warp an image, and each method shines in a different situation. In this guide, you’ll learn three easy methods: standard Transform Warp for everyday bending, Puppet Warp for pin-based control, and Perspective Warp for architecture, product mockups, and composites. Along the way, I’ll show you when to use each one, how to avoid the most common mistakes, and how to get results that look intentional instead of suspiciously rubbery.
If you want the short version, here it is: warp broad shapes with Transform Warp, move specific parts with Puppet Warp, and correct angle or depth with Perspective Warp. That alone will save you a surprising amount of trial and error.
Before You Start: 4 Quick Rules That Save Edits
1. Work on a duplicate layer or Smart Object
If you warp the original layer directly, Photoshop will obey you, but your future self may not forgive you. Duplicating the layer or converting it to a Smart Object gives you a nondestructive workflow and makes it far easier to revise the edit later.
2. Isolate the subject when needed
If you only want to warp a sleeve, shoe, logo, or arm, select that part first and place it on its own layer. This keeps the background from stretching like taffy and makes your edit look far more believable.
3. Use just enough control points
Beginners often think more points equals more precision. Sometimes it equals more chaos. Too few points and the whole object moves. Too many points and the object starts looking stiff or crumpled. Aim for control, not clutter.
4. Zoom in before you commit
Warp edits often look fine at full screen and strangely cursed at 200%. Check edges, folds, hands, elbows, and text. Photoshop is powerful, but it will not protect you from optimistic editing decisions.
Method 1: Use Transform Warp for Everyday Bending
Best for: packaging mockups, curved labels, fabric graphics, simple object reshaping, bent paper effects, and general photo compositing.
Transform Warp is the version most people mean when they say “the Warp tool” in Photoshop. It adds a mesh over the selected layer or area so you can drag points, lines, and sections into a new shape. It is the easiest place to start because it is flexible, visual, and surprisingly fast once you understand the grid.
How to open Transform Warp
- Select the layer or isolated object you want to bend.
- Go to Edit > Transform > Warp.
- Alternatively, enter Free Transform first, then switch to Warp.
- Use the mesh, handles, and control points to reshape the layer.
- Press Enter or Return to apply the warp.
What makes Transform Warp so useful
Modern Photoshop gives you more control than the old “grab a corner and hope” approach. You can use preset warp styles, choose grid sizes such as 3×3, 4×4, or 5×5, and even create custom grids for more detailed edits. You can also adjust guide visibility, guide color, and mesh density if the overlay starts feeling like a spider web with performance anxiety.
A practical example
Say you are placing a logo onto a curved tote bag. Start by putting the logo on its own layer above the bag photo. Convert that layer to a Smart Object, then use Transform Warp. Pull the center of the logo slightly inward, bend the edges to match the fabric, and keep the distortion subtle. The goal is not to impress the mesh. The goal is to match the surface.
When Split Warp makes life easier
If regular Warp affects too much of the image, use Split Warp. This lets you add horizontal, vertical, or crosswise splits in the mesh so only one region changes while nearby areas stay more stable. It is excellent for bending one side of an object without wrecking the other side, such as adding shape to hair, curving only the top of a label, or adjusting one section of a folded poster.
Think of Split Warp like drawing crease lines into your warp grid. Suddenly the edit feels less like you are wrestling the entire image and more like you are giving exact instructions.
Tips for cleaner Transform Warp results
- Keep the warp subtle unless you are creating a stylized design effect.
- Match the direction of the object’s natural curve, fold, or surface.
- Use more grid detail only when you truly need local control.
- Check shadows and highlights so the bend still matches the lighting.
Common mistake
The biggest Transform Warp mistake is dragging too far, too fast. If a flat object suddenly looks like a potato chip in a wind tunnel, back up. Smaller moves produce more believable edits.
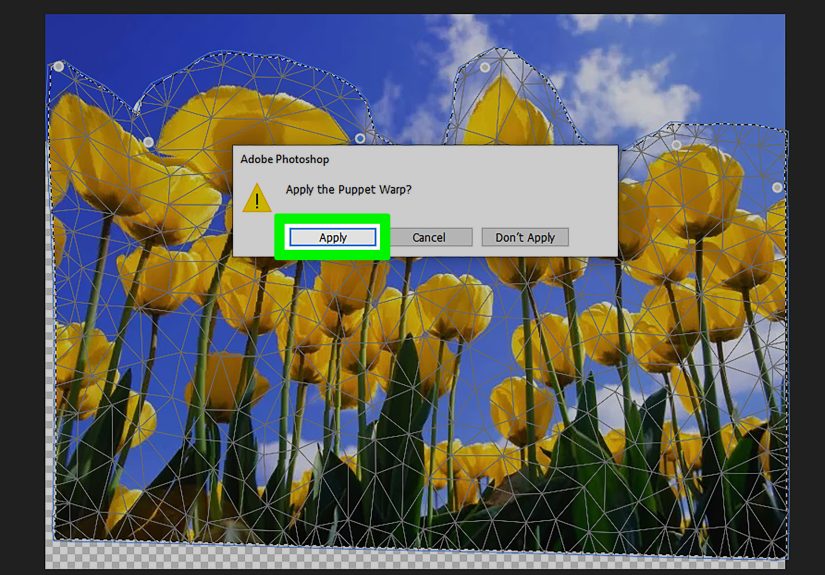
Method 2: Use Puppet Warp for Pin-Point Control
Best for: moving limbs, adjusting hair, changing small shapes, refining body pose, bending necks, arms, tails, straps, sleeves, and other articulated parts.
Puppet Warp is what you use when a normal mesh is too broad and you need precise control over how different parts of an object move. Photoshop lays a mesh over the selected layer, then you place pins to anchor certain areas and move others. It is ideal for anything that behaves like a connected structure: people, animals, clothing details, or composited objects with clear joints and pivot points.
How to open Puppet Warp
- Select the layer, layer mask, or vector mask you want to adjust.
- Go to Edit > Puppet Warp.
- Add pins where you want to hold parts in place.
- Add a pin to the area you want to move.
- Drag the movable pin gently into position.
- Press Enter or Return to apply.
How to place pins intelligently
The secret to good Puppet Warp edits is pin placement. Put pins around natural pivot points like shoulders, elbows, knees, wrists, ankles, necks, or the base of an object. One pin controls movement; the surrounding pins prevent the entire subject from shifting like it just lost contact with gravity.
If you are adjusting a leg, for example, you might pin the hip, knee, and ankle, then move the foot. If you are adjusting hair, anchor the roots and move only the strands you want to reshape. This keeps the edit looking anatomical instead of paranormal.
Useful settings to know
Puppet Warp includes settings for Mode, Density, and Expansion. Density controls how tightly the mesh is built. More points can help with fine details, while fewer points keep larger objects easier to manage. Expansion changes the mesh edge. This matters more than many beginners realize because too little expansion can cause rough edges or awkward cutoffs near the subject boundary.
If the object feels too floppy, try a more rigid behavior. If you are moving long limbs or straight structures, a firmer setting can help preserve shape. If you need to rotate around a pin, Photoshop also lets you rotate the mesh around selected pins for more natural repositioning.
A practical example
Imagine a portrait where the model’s hand is slightly off pose, but the rest of the shot is perfect. Instead of reshooting, isolate the arm or hand on a separate layer and use Puppet Warp. Place pins at the elbow and wrist, then nudge the hand into a more flattering angle. Done gently, it looks natural. Done aggressively, it looks like your subject suddenly has bones made of spaghetti.
How to keep Puppet Warp realistic
- Anchor more than you think you need.
- Move pins in small increments.
- Use joints as your visual guide.
- Inspect edges after the move and retouch if necessary.
When Puppet Warp creates slight distortion, you can clean it up afterward with careful masking, healing, or a tiny additional reshape. That final polish is often what separates “nice edit” from “wait, was this edited?”
Method 3: Use Perspective Warp for Buildings, Rooms, and Realistic Composites
Best for: architecture, interiors, product photography, straightening verticals, changing viewpoint, and matching perspective in composites.
Perspective Warp is the specialist. It is not for bending a flower petal or curling text around a circle. It is for correcting or changing the apparent angle of objects that live in perspective, especially buildings, walls, boxes, windows, furniture, and scenes with clear planes.
If you have ever photographed a tall building and watched the sides lean inward like they are shy, Perspective Warp is your friend. If you have ever composited an object into a scene and realized it looks pasted on rather than physically present, Perspective Warp is also your friend. Frankly, it is one of Photoshop’s most underrated tools.
How to use Perspective Warp
- Select the layer you want to correct or convert it to a Smart Object first.
- Go to Edit > Perspective Warp.
- Draw quads over the planes of the object or scene.
- Keep the quad edges aligned with existing straight lines in the image.
- Switch from Layout mode to Warp mode.
- Drag corners or sides to correct the perspective.
- Apply the edit, then crop or fill any empty edges.
Why this method works so well
Perspective Warp is built around planes rather than a freeform mesh. That makes it much better for scenes where geometry matters. Straight building edges, product boxes, room corners, and signs all respond better to plane-based correction than to general dragging. Photoshop can also help straighten horizontal and vertical lines, which is a huge advantage when accuracy matters.
A practical example
Let’s say you photographed a storefront from the sidewalk and the vertical edges tilt inward. Draw quads over the front face and side plane, switch to Warp mode, and adjust the corners until the facade stands upright. You may lose a little image area near the edges, but that is normal. Crop the frame or repair the missing areas afterward.
One important note
If Perspective Warp is unavailable, Photoshop may need graphics processor support enabled in the performance settings. So if the menu item looks grayed out and you are absolutely sure you did not anger the software gods, check your GPU settings before assuming the tool is broken.
Which Warp Method Should You Use?
- Transform Warp: best for broad shape changes, label mockups, surface bends, and flexible design work.
- Puppet Warp: best for moving connected parts while anchoring surrounding areas.
- Perspective Warp: best for fixing angle, depth, and plane relationships in architectural or composite work.
Here is the easiest way to decide: if you are bending a surface, start with Transform Warp. If you are moving a body part or object segment, use Puppet Warp. If you are correcting camera angle or scene geometry, use Perspective Warp.
5 Quick Tips That Make Warp Edits Look Professional
Match the original structure
Bend with the object’s form, not against it. Fabric folds, limb joints, packaging curves, and building lines all give you clues.
Retouch after the warp
Warping can create stretched pixels, awkward edges, or tiny gaps. A quick cleanup with masking, healing, or cloning often finishes the illusion.
Use guides and zoom levels
Guides help keep perspective believable, especially in product mockups and architecture. Zooming in helps you catch edge problems before they become public embarrassment.
Stay subtle
Most good warp edits are not obvious. If the edit screams, the image stops whispering realism.
Practice on simple shapes first
If you are new to Warp, start with labels, posters, and basic objects before trying to re-pose a person. Your confidence will grow, and your pixels will thank you.
Real-World Experiences Using the Warp Tool in Photoshop
One of the funniest things about learning the Warp tool is how often it teaches restraint. The first time I used Transform Warp on a product mockup, I thought, “Great, now I can bend anything.” Technically true. Spiritually dangerous. I over-bent a label on a bottle until it looked less like printed packaging and more like the bottle had spent a weekend in a black hole. That was the moment I learned that the best warp edits are usually the ones you barely notice.
In real projects, Transform Warp has been a lifesaver for mockups. If a flat design needs to sit naturally on a tote bag, notebook cover, T-shirt, or paper cup, Warp gets you close fast. The trick is always the same: watch the surface, not the artwork. Beginners stare at the logo and try to make it look dramatic. Experienced editors stare at the object and ask, “Where would this naturally curve?” That tiny mindset change makes a huge difference.
Puppet Warp feels even more magical because it solves problems that would otherwise require a reshoot or a lot of manual reconstruction. A slightly awkward arm angle, a necklace that sits strangely, a strand of hair that ruins an otherwise great portrait, a composited animal tail that needs a better curve, a sleeve that feels too stiff, all of those are situations where Puppet Warp can quietly save the day. The catch is that it rewards patience. When I rush pin placement, the edit gets weird fast. When I anchor thoughtfully and move slowly, it looks natural enough that nobody notices. And that, in photo editing, is basically the gold medal.
Perspective Warp is the one that makes you feel like a wizard after you finally understand it. At first, it can seem less intuitive than other warp methods because you have to think in planes and vanishing points. But once it clicks, it is incredibly satisfying. Straightening a leaning building or making a composited object actually match the scene perspective feels like cleaning a smudged pair of glasses. Suddenly the image makes sense. I have found it especially useful in travel photos, storefront photos, and quick commercial edits where a product or sign needs to look properly aligned.
The biggest real-world lesson across all three methods is that warping is not just about distortion. It is about believability. Good warp work respects anatomy, lighting, perspective, and texture. Bad warp work ignores those things and hopes nobody zooms in. Spoiler: someone always zooms in. So my practical rule is simple: make the move, zoom in, compare it to the untouched image, and then reduce the edit by about 10% if it still feels a little too heroic. Photoshop gives you a lot of power, but tasteful edits are what actually make the image better.
Conclusion
If you want to use the Warp tool in Adobe Photoshop without making your image look like it lost a fight with gravity, choose the right method for the job. Transform Warp is your go-to for flexible surface shaping. Puppet Warp gives you detailed control over connected parts. Perspective Warp fixes or changes spatial angles when geometry matters. Learn those three, practice on simple edits, and you will move from random dragging to deliberate shaping in a hurry.
And once that clicks, Photoshop stops feeling like a box of mysterious buttons and starts feeling like a tool you actually control. Which is nice, because yelling at your monitor is not technically a recognized editing technique.


