
Table of Contents >> Show >> Hide
- Before You Start: Pick the Right Shirts (and Save Yourself a Headache)
- Project 1: Turn Old Tees Into “T-Shirt Yarn” (The Gateway Craft)
- Project 2: Graphic Tee Collage Wall Art (No Sewing Required)
- Project 3: A No-Sew T-Shirt Tote (Because Plastic Bags Are So 2003)
- Project 4: Make a Braided Mini Rug or Trivet (Tiny Loom Energy)
- Project 5: The Memory T-Shirt Quilt (Art You Can Nap Under)
- Project 6: Dye + Paint Transformations (Turning “Stained” Into “Statement”)
- Project 7: Soft Sculpture + “Stuffed Art” (Cuddly, Weird, and Wonderful)
- How to Make Your T-Shirt Art Look Like “Art” (Not Just Crafts)
- FAQ: Making Art With Old T-Shirts
- Experiences That Make You Better at T-Shirt Art (and Save Your Sanity)
You know that drawer. The one stuffed with old tees from 5Ks you “totally trained for,” concerts you barely remember (but the merch was iconic), and that one shirt you keep because it’s basically a soft, cotton security blanket. If you’re ready to reclaim space without guilt-donating a pile of stretched-out memories, this is your sign: turn them into art.
Making art with old T-shirts is one of the most satisfying forms of upcycling: the fabric is easy to cut, forgiving to work with, and already comes in fun colors and graphics. Better yet, you can make everything from wall hangings to rugs, quilts, and wearable piecesoften with supplies you already have at home.
Before You Start: Pick the Right Shirts (and Save Yourself a Headache)
Not all tees behave the same once you start slicing them up like a craft-happy villain. Here’s how to choose wisely:
- 100% cotton is a dream for dyeing and painting. It absorbs color well and usually softens over time.
- Cotton blends (like cotton-poly) still work for many projects, but dyes may look more muted and fabric can feel “springy.”
- Jersey knit tees curl at the edges when cutthis is a feature, not a bug. That curl helps you make sturdy “T-shirt yarn.”
- Very thin or worn-out shirts are best for collage, stuffing, or “fabric paper” projects (more on that soon).
Quick prep checklist
- Wash and dry your shirts first (especially before dyeing or painting).
- Remove bulky seams if you want smooth yarn or clean quilt blocks.
- Sort by color family (this makes your finished piece look intentional, not accidental).
Project 1: Turn Old Tees Into “T-Shirt Yarn” (The Gateway Craft)
If old T-shirts had a glow-up résumé, “becoming yarn” would be the top bullet point. T-shirt yarn (sometimes called “trapillo”) is thick, strong, and perfect for chunky textile artwoven wall hangings, baskets, rugs, even sculptural pieces.
How to make T-shirt yarn (continuous-strip method)
- Lay the shirt flat and cut off the bottom hem (optional but helps reduce lumps).
- Cut off the top portion below the sleeves, creating a fabric tube.
- Starting at one side, cut the tube into a continuous spiral strip (about 1/2 inch to 1 inch wide, depending on how chunky you want it).
- Gently stretch the strip as you go. The edges will curl inward, forming a yarn-like cord.
- Wrap into a ball and feel ridiculously accomplished.
Pro tip: Wider strips make thicker yarn (great for rugs and baskets). Narrower strips make a smoother, more flexible yarn (better for weaving details or smaller projects).
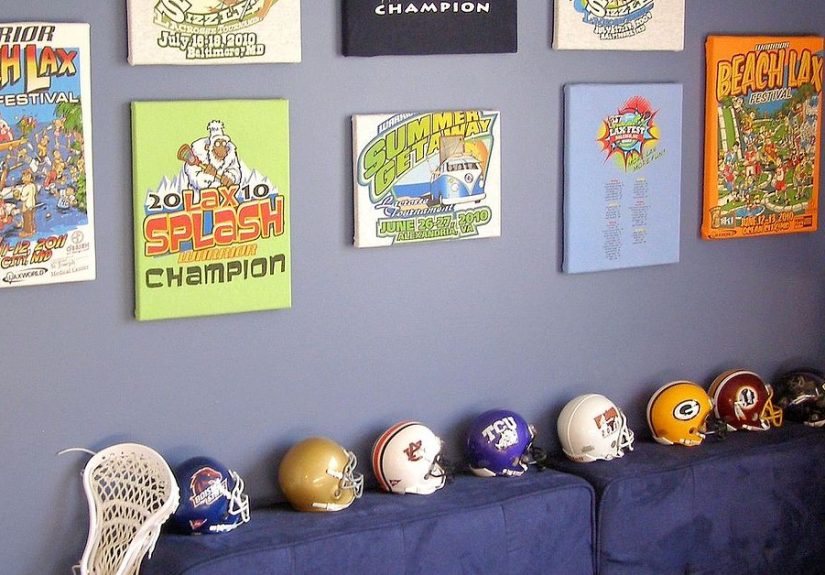
Project 2: Graphic Tee Collage Wall Art (No Sewing Required)
Got shirts with bold logos, vintage prints, or that hilariously unhinged slogan you can’t wear in public anymore? Cut the best parts out and turn them into a layered fabric collage. It’s part pop-art, part memory board, and 100% “this belongs in a gallery (or at least above my couch).”
What you’ll need
- Canvas panel or thick cardboard
- Fabric scissors
- Fabric glue or decoupage medium
- Optional: needle and embroidery floss, buttons, patches, paint markers
How to do it
- Cut out graphics, shapes, and interesting textures from your tees.
- Arrange pieces on the canvas before gluing (take a photo so you remember your layout).
- Glue from the bottom layer up, smoothing wrinkles as you go.
- Add stitching on top for detail (outline letters, add “hand-drawn” borders with thread, or stitch on patches).
- Seal lightly if desired, then hang it like the upcycling genius you are.
Design tip: Pick one “hero graphic” as the focal point, then surround it with quieter solids and textures. That’s how you avoid the dreaded “laundry pile aesthetic.”
Project 3: A No-Sew T-Shirt Tote (Because Plastic Bags Are So 2003)
This is the classic: fast, functional, and weirdly addictive. Once you make one, you’ll start eyeing every old shirt like, “You… could be a bag.”
Steps
- Cut off the sleeves (instant handles).
- Cut a wider neckline to create the bag opening.
- Turn the shirt inside out.
- Cut fringe along the bottom (about 1 inch wide strips, 3–4 inches long).
- Tie the fringe into tight knots, front strip to matching back strip.
- Turn right-side out and load it with farmer’s market dreams.
Upgrade idea: For extra strength, tie a second knot or double-knot each fringe pair. If you want a cleaner bottom, stitch a seam instead of fringe (a basic straight stitch works).
Project 4: Make a Braided Mini Rug or Trivet (Tiny Loom Energy)
Rugs sound like a “someday” projectuntil you realize you can make a small braided mat for your bedside, bathroom, or plant corner without needing to become a full-time textile wizard.
Two easy options
- Braided + coiled: Cut tees into long strips (or use T-shirt yarn), braid three strands, then coil and stitch the braid into a spiral.
- Simple weave: Make a cardboard loom (yes, cardboard), then weave strips over-under to create a flat mat. Finish with knots or stitching.
Color trick: Use 2–3 main colors plus one “pop” color. It looks curated, like you planned it, not like you panicked and used everything at once.
Project 5: The Memory T-Shirt Quilt (Art You Can Nap Under)
If your shirts are sentimentalschool events, sports, travel, concertsa T-shirt quilt turns them into functional art. And yes, stabilizing knit fabric matters, unless you enjoy quilts that slowly morph into abstract sculptures.
How it works (the practical version)
- Pick your “front” graphics and decide on a block size (common sizes: 12″ or 14″).
- Stabilize the back of each graphic area with lightweight fusible interfacing.
- Cut blocks consistently using a ruler and rotary cutter (or careful scissors).
- Lay out your blocks like a giant puzzle until the colors feel balanced.
- Sew blocks into rows, rows into a quilt top, then add batting and backing.
- Quilt it (straight lines are beginner-friendly) and bind the edges.
Reality check: You don’t have to make a bed-sized quilt. A wall quilt, lap quilt, or even a pillow cover counts as “I made a quilt,” and that’s still extremely cool.
Project 6: Dye + Paint Transformations (Turning “Stained” Into “Statement”)
Sometimes the shirt is structurally fine but visually… questionable. That’s where dye and paint come in. Tie-dye, ice dye, ombré dip dye, stencil printingthese are all ways to turn “laundry tragedy” into wearable art or fabric for other projects.
Tie-dye basics that actually matter
- Fiber content matters: Cotton dyes best and brightest.
- Pre-wash first: It helps remove finishes that resist dye.
- Safety is not optional: Wear gloves; avoid inhaling dye powder; cover your workspace.
- Set time helps: Let dyed shirts sit (often overnight) before rinsing for stronger color.
Fabric paint: make it last
If you paint on tees (freehand, stamped, or stenciled), follow the paint’s instructions for permanence. Many textile paints become significantly more wash-resistant after heat-setting (often with an iron or dryer). Translation: your masterpiece won’t fade into a sad ghost after one laundry day.
Project 7: Soft Sculpture + “Stuffed Art” (Cuddly, Weird, and Wonderful)
Old T-shirts are perfect for soft sculpture: they’re stretchy, easy to sew, and already soft. Make abstract plush shapes, mini pillows, or even a “memory creature” using scraps from multiple shirts.
Simple stuffed art idea: a knot pillow
- Cut a long strip of tee fabric (about 6–8 inches wide).
- Sew into a tube (or use fabric glue for a no-sew version), then turn right-side out.
- Stuff with scrap fabric, old socks, or fiberfill.
- Tie the tube into a chunky knot and tuck the ends in neatly.
Place it on a chair or shelf and tell visitors it’s “modern textile sculpture.” Because it is.
How to Make Your T-Shirt Art Look Like “Art” (Not Just Crafts)
The difference between “cute DIY” and “I would buy this at a boutique” is usually design discipline. Here are a few principles that make your upcycled T-shirt crafts feel elevated:
- Limit your palette: pick a small color family and repeat it intentionally.
- Repeat shapes: circles, stripes, squaresrepetition reads as design.
- Mix texture with restraint: one fuzzy element + one smooth element + one graphic element is often enough.
- Embrace negative space: leave breathing room so the eye can rest.
- Finish cleanly: trim stray threads, knot ends securely, and press fabric where needed.
FAQ: Making Art With Old T-Shirts
Do I need a sewing machine?
Nope. Many projects are no-sew (tote bags, braids, weaving, collage). A sewing machine helps with quilts and heavy-duty rugs, but it’s not required for getting started.
What if my shirts are stretched out or thin?
Perfect for collage, stuffing, layering, or cutting into strips for weaving. Thin fabric also works well when you want softer drape in wall hangings.
Can I wash finished projects?
Usually, yesespecially rugs, quilts, and totes. For dyed or painted pieces, follow the dye/paint instructions and wash gently at first to protect color.
Experiences That Make You Better at T-Shirt Art (and Save Your Sanity)
Here’s what people tend to learn after they’ve made a few upcycled T-shirt craftsthe stuff you won’t always hear in the “cut here, tie there” tutorials. Think of it as the unofficial field guide: equal parts practical wisdom and “why did nobody warn me?”
First, the shirt selection phase is where most projects are won or lost. Everyone starts by grabbing the loudest graphic tees, because that’s the fun part. Then you lay everything out and realize you’ve created a color palette that can only be described as “gas station neon meets middle school spirit week.” The fix is simple: treat your shirts like paint. Pick a base set of neutrals (black, gray, cream, denim-blue), choose two or three accent colors, and let the rest become “supporting actors.” Your final piece will look more intentional instantly, even if you were making it up as you went along (which, frankly, is half the charm).
Second, T-shirt yarn is dramaticin a lovable way. It stretches, it curls, it twists, it tangles the second you look away, and it somehow expands to fill the exact amount of space you didn’t plan for. The trick is to embrace its personality: roll it into tidy balls, label them by color family, and don’t be afraid to cut a fresh strip when a section gets too thin. A lot of makers also discover that the “perfect” strip width isn’t universal. The sweet spot depends on the shirt thickness and what you’re making. Coasters and small weaves often look better with narrower strips; rugs and baskets love thicker strips that hold their shape.
Third, the best-looking upcycles often come from constraints. If you tell yourself, “I’m only using three shirts for this wall hanging,” you’ll make stronger decisionsbecause you have to. You start paying attention to texture (smooth jersey vs. slightly ribbed knit), contrast (light on dark), and rhythm (repeating a stripe every few rows). It stops being “random scraps” and becomes composition. That’s the moment when your brain flips a switch and you realize you’re not just craftingyou’re designing.
Fourth, if you try dyeing, you’ll quickly learn that prep is the unglamorous hero. Pre-washing sounds boring until you skip it and end up with patchy color that looks like your shirt got into a fight with a highlighter. The people who fall in love with tie-dye and fabric painting are usually the ones who set up a calm workspace: gloves ready, surfaces covered, colors planned, and enough time to let the dye set properly. Also: write down what you did. That gorgeous “accidental” ombré you created? Future you will want the recipe, and future you will not remember it.
Finally, the most meaningful experience tends to come from memory projectsquilts, pillows, framed collages. People often expect those to feel heavy or overly sentimental, but the opposite happens: the making process turns nostalgia into something useful and warm. You’ll catch yourself smiling at a tiny corner of a graphic you forgot existed, or laughing because you used to think that shirt was fashionable. And when the final piece is finished, it doesn’t just store memoriesit shares them. Someone will ask about a square or a print, and suddenly the story is alive again. That’s the quiet magic of making art with old T-shirts: it’s not just recycling fabric. It’s repurposing parts of your life into something you can see, touch, use, and enjoy.


