
Table of Contents >> Show >> Hide
- Quick Table of Contents
- Why cleaning matters (beyond the ick factor)
- Before you start: safety + supplies
- The 5 easy steps to clean your window AC before summer
- Step 1: Power down, pop the cover, and do the “gross audit”
- Step 2: Clean (or replace) the filterthe easiest win
- Step 3: Vacuum the inside + gently clean the coils and fins
- Step 4: Clean the drain pan/drip tray and fix “the swamp” problem
- Step 5: Wipe the exterior, reassemble, and do a “dry-out” test run
- When cleaning isn’t enough
- How to keep it clean all summer (without making it a new hobby)
- of real-world “this is what usually happens” experiences
- Conclusion
Window air conditioners are basically tiny weather machines that live in a dusty sandwich: indoor air on one side, outdoor air on the other, and a whole lot of lint, pollen, pet hair, and “mystery fuzz” in between. If your unit smells a little like a damp gym bag, sounds louder than usual, or seems to be working overtime just to make the room “slightly less warm,” there’s a good chance it’s not brokenit’s just gross.
The good news: you don’t need a toolbox the size of a suitcase or an engineering degree. You just need a little time, a few basic supplies, and the willingness to face what your AC has been quietly collecting since last summer. (Spoiler: it’s not a skincare routine.)
Why cleaning matters (beyond the ick factor)
A dirty window AC doesn’t just look sadit can perform worse. Dust and grime restrict airflow, and buildup on coils can make it harder for the unit to move heat out of your room. Translation: longer run times, weaker cooling, and the kind of energy bill that makes you stare into the fridge like it has answers.
Cleanliness also ties into indoor air quality. A clogged filter can let more particles recirculate, and moisture inside the unit can create a cozy environment for mold and mildew (which are basically the unwanted houseguests of summer). If someone in your home has allergies, asthma, or generally dramatic sinuses, routine cleaning can help cut down on musty odors and airborne irritants.
Bonus: cleaning can be a mini “inspection.” While you’re in there, you might spot bent fins, gunked-up drainage, or parts that are wearing outbefore your AC chooses the hottest day of the year to go on strike.
Before you start: safety + supplies
Safety first (because electricity does not appreciate surprises)
- Unplug the unit completely. Not “turn it off.” Unplug it.
- Give it time to dry if it has been running. You’ll be working around wet surfaces and electrical components.
-
If you see heavy mold (thick fuzzy growth, widespread black/green patches, or you get symptoms when it runs),
consider wearing gloves and a well-fitting mask (an N95 is a solid choice) and cleaning outdoors where possible. - Check your manual for filter type (washable vs. replaceable) and any “do not spray here” zones.
Supplies you’ll want nearby
- Vacuum with brush attachment (or a soft brush)
- Microfiber cloths or soft rags
- Mild dish soap + warm water
- Spray bottle (for soapy water)
- Old toothbrush (for corners and stubborn grime)
- Optional: fin comb (for bent aluminum fins)
- Optional: coil cleaner labeled for AC coils (follow directions)
- Optional: disinfectant appropriate for hard surfaces (use per label; avoid harsh products on metal parts unless manufacturer-approved)
- A towel, baking sheet, or shallow tray (to catch drips)
Pro tip: If you can safely remove the unit from the window, deep cleaning is easier. But if your unit is heavy,
awkwardly placed, or installed three stories up like it’s auditioning for an action moviekeep it in place and do a careful “front-side” clean.
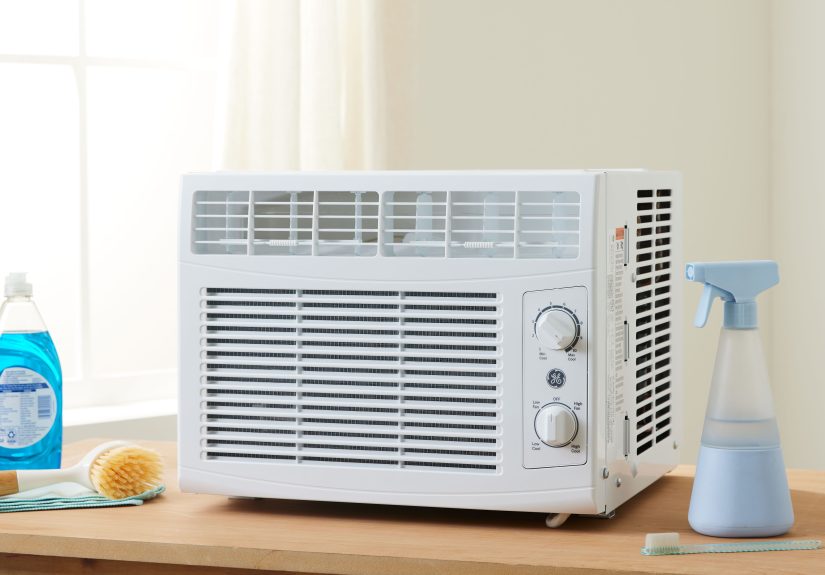
The 5 easy steps to clean your window AC before summer
Step 1: Power down, pop the cover, and do the “gross audit”
Unplug the unit. Remove the front grille/cover (most snap off; some have a couple screws). Now take 20 seconds to look around:
- Is the filter gray, furry, or visibly clogged?
- Do you see dust mats on the coils (the radiator-like metal fins)?
- Is there standing water in the bottom tray/drain pan?
- Do you smell a musty odor up close?
This quick check tells you whether you’re doing a basic clean (most people) or a “we should’ve done this last year” clean (also most people).
Step 2: Clean (or replace) the filterthe easiest win
The filter is typically right behind the front grille. Slide it out gently. If it’s disposable, replace it (washing some disposable filters can
damage them or encourage mold if they don’t dry thoroughly). If it’s washable, here’s the quick routine:
- Vacuum it lightly to remove surface dust.
- Rinse with warm water.
- Wash with a small amount of mild dish soap.
- Rinse again until water runs clear.
- Let it air-dry completely (seriouslydamp filter = mold’s favorite snack).
If you have pets, live near construction, or run the AC daily, the filter can clog fast. A clean filter can improve airflow immediatelysometimes
you’ll feel the difference the moment you turn the unit back on.
Step 3: Vacuum the inside + gently clean the coils and fins
With the filter removed, use a vacuum brush attachment to clean dust from the interior surfaces you can reach. Then focus on the coils/fins:
- Go gently. Those thin aluminum fins bend easily, and bent fins restrict airflow (aka: less cooling, more frustration).
- Brush in the direction of the fins instead of scrubbing across them.
For stuck-on grime: mist a light soapy-water solution onto a cloth (not directly into the unit), and wipe accessible areas carefully. If you’re
using a coil cleaner, choose one made for AC coils and follow the label instructions. Avoid soaking electrical components and avoid aggressive cleaners
that can corrode metal.
What about bent fins?
If you see flattened sections, a fin comb can straighten them. Work slowly. If the fins are badly crushed over large areas, the unit may need
professional attentionor it may be nearing retirement.
Step 4: Clean the drain pan/drip tray and fix “the swamp” problem
Moisture is normalstanding water is not. Many window units collect condensation and route it to a pan or a channel so it can drain outside.
If drainage is clogged or the unit isn’t positioned correctly, water can pool and lead to odor, mildew, and (in some cases) mold.
- Locate the bottom tray/drain area (often at the base inside the front cover area).
- Wipe up any standing water with a rag or paper towels.
- Clean the tray with warm, soapy water. Use a toothbrush for corners.
-
If there’s visible mildew: clean thoroughly, then use a disinfectant appropriate for hard surfaces per the product label.
(Avoid harsh chemicals on coils/metal unless the manufacturer approves it.) - Check the drain channel for gunk. Clear debris carefully.
Installation note: Many window units are designed to tilt slightly downward toward the outside so water drains properly. If your unit is
perfectly level (orworsetilting inward), you may be inviting water back into the pan. If you’re unsure, consult the manual or installation guide.
Step 5: Wipe the exterior, reassemble, and do a “dry-out” test run
Wipe the front grille and exterior housing with a damp cloth and mild soap. Let everything dry completely. Reinstall:
- Dry filter
- Front cover/grille
- Any screws or clips
Plug the unit back in. Run it on fan-only mode for 15–30 minutes first if possible (this helps dry remaining moisture). Then switch
to cooling. Listen for unusual noises and check that airflow feels stronger and odors improve.
If your unit still smells musty after cleaning, the odor may be deeper inside the casing, or the unit may have lingering moisture issues.
In that case, a more thorough cleaning (sometimes involving removing the unit from the window for full access) or replacement might be the smarter move.
When cleaning isn’t enough
Sometimes the issue isn’t dirtit’s wear, damage, or a design/drainage problem that keeps creating moisture buildup. Consider replacement or professional
service if:
- The unit leaks water indoors consistently even after correcting tilt/drainage.
- You see extensive mold growth that returns quickly.
- The unit barely cools, even with a clean filter and coils.
- It trips breakers, smells like burning plastic, or makes grinding/screeching noises.
- It’s part of a safety recall (check the model and manufacturer notices).
A practical rule: if the unit is older, inefficient, and keeps having moisture or performance problems, cleaning may buy you timebut it won’t turn it
into a brand-new machine. Sometimes the “best maintenance” is upgrading to a more efficient model before peak heat hits.
How to keep it clean all summer (without making it a new hobby)
Monthly: filter check
During heavy use, check the filter about once a month (or more often if you have pets or allergies). A quick rinse beats a full deep clean later.
Mid-season: quick vacuum + wipe
Pop off the front cover and vacuum dust. Wipe the grille. If you catch buildup early, you’ll keep airflow strong and odors under control.
After storms/pollen spikes: outside check
Outdoor-facing vents and coils can collect leaves, cottonwood fluff, or city grime. Gently clear debris from the exterior side if it’s accessible and safe.
End of season: dry it out before storage
Before you store the unit, run it on fan-only to reduce moisture inside. Store it upright if possiblecompressors aren’t fans of being tossed around like a suitcase.
of real-world “this is what usually happens” experiences
If you’ve never cleaned a window AC before, here’s what most people discover the first timeand what they typically notice afterward.
Think of this as the emotional support section for anyone about to meet their filter up close.
Experience #1: The filter reveal. People expect “dust.” What they often find is a felt-like layer that looks suspiciously like it could be
crafted into a small winter hat. Homes with pets usually have a filter that’s half fur, half pollen, and 100% offended that you waited this long.
After cleaning, the most common reaction is, “Oh. That’s what airflow is supposed to feel like.” The room cools faster, and the AC stops
running as long to keep up.
Experience #2: The musty smell mystery. A lot of people assume a musty odor means “the AC is old.” Sometimes it issometimes it’s simply
moisture plus dust living its best life in a dark corner. When the drain area is wiped down and dried, that damp-basement smell often improves quickly.
If it doesn’t, the odor can be deeper in the unit (or the unit may not be draining right), which is usually the moment people start reading the manual
like it’s a thriller novel.
Experience #3: The “why is it louder?” moment. Dirt buildup can change airflow patterns, and some people notice the unit sounds strained
like it’s trying to cool the room through a scarf. Once the coils and fins are cleared of dust, the sound can become smoother and less rattly.
It’s not silence (it’s still a machine in a window), but it often stops sounding like it’s negotiating with gravity.
Experience #4: The drip panic. Water in a window AC is normalwater on the floor is not. A surprisingly common scenario is discovering a
sticky, dusty “gutter” in the drain channel or a pan with enough grime to qualify as a tiny ecosystem. Once that area is cleaned and the unit is properly
angled for drainage, many people report fewer drips and less humidity-feeling air. It’s one of those fixes that feels almost too simple, which is why it’s
so easy to ignore until the rug gets involved.
Experience #5: The post-clean confidence boost. After reassembly, people often do a little “cool air hand test” like they’re checking bread
in an oven. And honestly? They should. It’s satisfying to feel stronger airflow and notice that the room reaches a comfortable temperature sooner.
The biggest real-world payoff is reliability: cleaning before peak heat tends to reduce the odds of performance issues when summer shows up with its annual
“surprise” of being hot.
The overall takeaway most homeowners share is simple: cleaning a window AC feels annoying right up until you finish itand then it feels like you just
gave yourself a cheaper, quieter, less smelly summer. Not glamorous, but wildly effective.
Conclusion
Cleaning a window air conditioner before summer is one of those small chores with big returns: better airflow, less odor, improved cooling, and fewer
“why is this thing struggling?” moments when temperatures climb. Stick to the five stepsunplug, filter, coils, drain area, reassembleand you’ll
keep your unit running smoother and your space feeling fresher. Your future self (and your electric bill) will thank you.


