
Table of Contents >> Show >> Hide
- Why Use VLC Media Player for a GoPro Stream?
- Before You Start
- Method 1: Use GoPro Webcam Mode and Open It in VLC
- Method 2: Send Your GoPro to an RTMP Stream and Open It in VLC
- Method 3: Use HDMI Output and a Capture Card with VLC
- Which GoPro-to-VLC Method Is Best?
- Troubleshooting Tips for GoPro Streaming in VLC
- Real-World Experience: What It Actually Feels Like to Stream a GoPro to a PC with VLC
- Final Thoughts
If you have ever looked at your GoPro and thought, “You’re way too good to spend your life only recording mountain bikes and accidental footage of my shoes,” you are not alone. A GoPro can do much more than capture action clips. With the right setup, it can send live video straight to your PC, and VLC Media Player can become your surprisingly capable command center.
This guide breaks down three practical ways to stream your GoPro to your PC using VLC Media Player. One method is quick and easy for newer cameras. One is more advanced and ideal for network-based streaming. The third is the dependable hardware route for older models or creators who prefer a more traditional video workflow. Whether you want a live preview, a monitoring screen, a backup stream, or a DIY webcam setup with a little more personality than the average laptop camera, there is a method here for you.
Why Use VLC Media Player for a GoPro Stream?
Most people think of VLC as the app that opens random video files when nothing else will. Fair enough. But VLC is also excellent at handling live video feeds, capture devices, and network streams. That makes it a solid tool for viewing a GoPro on your PC without needing a complicated broadcast stack just to see what your camera is doing.
Using VLC Media Player with a GoPro has a few real advantages. It is free, lightweight, and flexible. It can open a webcam-style video source, read a capture card, or connect to a network stream through a URL. In other words, VLC is the Swiss Army knife of media software. Sometimes it is not the prettiest knife in the drawer, but it usually works.
Before You Start
Before jumping into the three methods, gather the basics:
- A GoPro camera
- A Windows PC
- VLC Media Player installed
- A good USB cable, or an HDMI cable and capture card, depending on the method
- Updated camera firmware and any required GoPro utility software
- A stable power source if you plan to stream for more than a quick test
Also, keep expectations realistic. A live GoPro feed on a PC is possible, but the best method depends on your camera model, your patience level, and how much you enjoy troubleshooting cables that look identical but behave like sworn enemies.
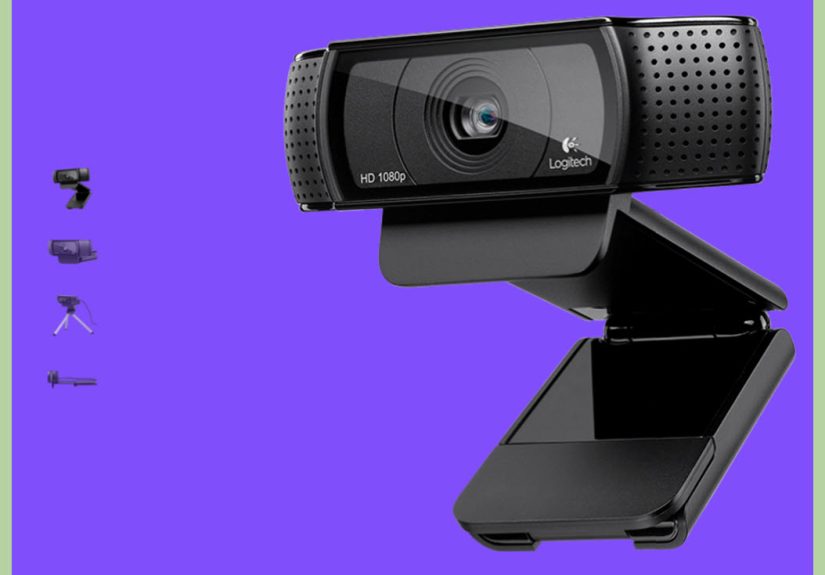
Method 1: Use GoPro Webcam Mode and Open It in VLC
Best for
Newer GoPro cameras, quick setup, simple monitoring, and users who want the easiest route.
How this method works
In this setup, your GoPro acts like a webcam. Once your PC recognizes it as a camera source, VLC can open that source the same way it opens other video input devices. This is the most beginner-friendly option for people with compatible newer GoPro models.
What you need
- A compatible GoPro
- The GoPro Webcam utility or the current GoPro desktop support workflow
- A USB connection to your PC
- VLC Media Player
Steps
- Update your GoPro firmware to the latest version.
- Install the GoPro webcam software or utility required for your camera and Windows setup.
- Connect the GoPro to your PC with a reliable USB cable.
- Turn on the camera and switch it into webcam mode if needed.
- In Windows, make sure desktop apps are allowed to access your camera.
- Open VLC Media Player.
- Go to
Media > Open Capture Device. - Choose the capture mode that matches your system, usually the default webcam-style option on Windows.
- Select the GoPro camera from the video device list.
- Click
Play.
Why this method is useful
This is the cleanest way to stream a GoPro to a PC when your model supports webcam mode. You do not need a capture card, and you do not have to build a streaming server just to watch yourself organize a garage or solder a keyboard. It is efficient, fairly tidy, and easy to repeat.
Common issues
If VLC does not show the GoPro as an available camera, the problem is often one of three things: Windows camera permissions, a weak USB cable, or the webcam utility not loading properly. This method can also be sensitive to software updates, so restarting the PC and reconnecting the GoPro often solves what appears to be a dramatic technical collapse.
When to choose this method
Choose webcam mode if you have a newer GoPro and want the fastest way to get live video into VLC. It is ideal for video calls, desk demos, product shots, overhead crafting views, and simple live previews.
Method 2: Send Your GoPro to an RTMP Stream and Open It in VLC
Best for
Advanced users, private live monitoring, local network workflows, and anyone who wants to treat the GoPro like a network source instead of a directly attached camera.
How this method works
Some GoPro live streaming workflows let the camera push video to an RTMP or RTMPS destination. VLC can then connect to a playable stream URL through Media > Open Network Stream. This method is more advanced because the GoPro is sending the stream out to a destination first, and VLC is pulling that stream back in for viewing.
That means this is not the same as plugging a camera straight into your PC. Instead, you are creating a network path. In practice, that often means using a local RTMP server, a supported streaming endpoint, or a service that provides a pull/playback URL for monitoring.
What you need
- A GoPro model that supports live streaming
- The GoPro mobile app or live streaming setup
- An RTMP or RTMPS destination
- A network VLC can access
- VLC Media Player on your PC
Steps
- Create or prepare your RTMP destination. This could be a local RTMP server or another compatible endpoint.
- In the GoPro live setup, enter the RTMP or RTMPS URL and stream key as required.
- Start the stream from the GoPro.
- Open VLC Media Player on your PC.
- Go to
Media > Open Network Stream. - Paste the playable network URL for your stream.
- Click
Play.
Why this method is powerful
This is the most flexible option if you want the GoPro feed to behave like a proper network stream. It works well for remote setups, multi-device monitoring, private stream testing, or technical workflows where the camera is not physically next to the PC. It is also useful if you want to separate the camera from the viewing station, which can be handy in workshops, studios, garages, classrooms, or field setups.
The catch
This method is not the one you choose when you want to be done before your coffee cools. It takes more setup, usually introduces more latency than direct capture, and requires a better understanding of stream URLs, network availability, and how your chosen RTMP destination behaves. But once it works, it feels delightfully nerdy in the best possible way.
When to choose this method
Choose RTMP if you want to use VLC as a live stream viewer, especially when the GoPro is not directly plugged into the PC or when you need a more network-friendly monitoring workflow.
Method 3: Use HDMI Output and a Capture Card with VLC
Best for
Older GoPro models, users who want a more dependable hardware route, and anyone who already owns a USB capture card.
How this method works
This approach sends video out of the GoPro through HDMI and into a capture device connected to your PC. VLC then opens that capture card as a video source. Think of this as the classic camera-to-computer workflow. It may involve more hardware, but it is often the most stable and predictable option.
What you need
- A GoPro with HDMI output support, or a Media Mod if your model requires it
- A micro-HDMI or appropriate HDMI cable
- A USB capture card
- External power for longer sessions
- VLC Media Player
Steps
- Set the GoPro HDMI output to Live if your model offers that option.
- Connect the GoPro HDMI output to the HDMI input on your capture card.
- Connect the capture card to your PC.
- Power the GoPro so it does not die mid-session like a dramatic actor in the final scene.
- Open VLC.
- Go to
Media > Open Capture Device. - Select the capture card from the video device list.
- Click
Play.
Why this method still matters
HDMI capture is often the best answer when software-based webcam mode is unavailable, unstable, or too restrictive. It also gives you a cleaner “camera pipeline” feeling, which many creators prefer. If you are using an older GoPro, this may be the most practical way to get live video into VLC without begging the universe for a firmware miracle.
What to watch for
Not every capture card behaves the same way, and not every camera outputs the same type of clean live feed. Some setups show overlays, some require you to adjust resolution, and some are picky about cables. Still, if you want a method that feels less virtual and more physical, HDMI is usually the route.
When to choose this method
Choose HDMI capture if you have an older GoPro, need longer-session stability, or want more hardware control over your live video path.
Which GoPro-to-VLC Method Is Best?
| Method | Difficulty | Extra Gear | Best Use Case |
|---|---|---|---|
| GoPro Webcam Mode | Easy | USB cable only | Fast setup, live preview, desk use |
| RTMP to VLC | Advanced | Streaming endpoint or server | Network viewing, private streaming, remote monitoring |
| HDMI + Capture Card | Moderate | Capture card and HDMI cable | Older GoPros, dependable hardware workflow |
If your camera supports webcam mode, start there. If you need a network workflow, use RTMP. If you care most about stability or older camera support, use HDMI capture. That is the short version, and happily, it is also the correct version.
Troubleshooting Tips for GoPro Streaming in VLC
1. VLC does not see the GoPro
Check Windows camera permissions first. Then check the cable. Then check the GoPro software. In technical support, that is the equivalent of “turn it off and on again,” but with more dignity.
2. The video is laggy
Network-based streams often have more delay than direct capture. If you are using webcam mode or HDMI capture, reduce background apps and make sure your PC is not trying to run twelve other tasks at once.
3. The picture looks wrong
Make sure the selected input device in VLC is the correct one. Capture cards sometimes default to odd settings, and webcam mode can occasionally expose a different resolution than you expected.
4. The GoPro disconnects mid-stream
Power is often the culprit. A long live session can drain a battery quickly. Use external power when possible, especially for HDMI and RTMP setups.
5. There is no audio
Double-check whether your chosen method carries audio the way you expect. Some capture devices need a separate audio selection, and some webcam-style workflows prioritize video first.
Real-World Experience: What It Actually Feels Like to Stream a GoPro to a PC with VLC
On paper, all three methods sound neat and logical. In real life, each one has its own personality. Webcam mode feels like the overachiever of the group. When it works, it works beautifully. You plug the GoPro in, launch VLC, choose the camera source, and suddenly your PC is showing that crisp wide-angle image that makes even a cluttered workbench look like a production set. It is the method that makes people think, “Oh, that was easier than I expected,” which is one of the highest compliments in the world of video gear.
RTMP streaming feels different. It is less “plug in and play” and more “build a tiny media pipeline and then grin like a wizard when it finally works.” This is the method that appeals to tinkerers, streamers, and people who enjoy understanding how video moves from point A to point B. The experience is rewarding because it makes the GoPro feel bigger than a simple camera. It becomes part of a networked system. That said, it also teaches patience. You may spend more time checking stream URLs, verifying endpoints, and wondering whether a missing slash has sabotaged your evening than you originally planned.
HDMI capture has the most old-school reliability. It feels solid. There is something reassuring about seeing a real cable run from the camera to a capture device, then into the PC. It is not glamorous, but it is often dependable. Many users end up liking this route because it feels less abstract than webcam utilities and less experimental than RTMP. It is especially practical for hobby streamers, tutorial creators, product reviewers, or workshop users who just want the feed on screen without negotiating with multiple layers of software.
Another real-world lesson is that GoPro streaming is often less about the camera and more about the ecosystem around it. A poor USB cable can ruin a great setup. A cheap capture card can make a sharp camera look mediocre. A sleepy network can add delay you will blame on VLC even though VLC is just sitting there, minding its business. The camera may be the star, but the supporting cast matters a lot.
In everyday use, VLC ends up being the unsung hero. It is not flashy, but it gives you a practical place to view the feed, test a setup, confirm the signal, and troubleshoot without buying more software. That makes it especially useful for people who are experimenting with a GoPro as a webcam, a live monitoring tool, or a streaming camera for creative projects. The overall experience can range from effortless to mildly chaotic, depending on your hardware and goals, but once your preferred method is dialed in, the setup becomes surprisingly repeatable. And that is when the whole thing starts to feel less like a hack and more like a genuinely smart workflow.
Final Thoughts
If you want the easiest answer to how to stream your GoPro to your PC using VLC Media Player, start with webcam mode. If you need network flexibility, move up to RTMP. If you want dependable hardware support, especially for older cameras, go with HDMI and a capture card.
The good news is that VLC can sit at the center of all three workflows. That makes it a handy tool whether you are live monitoring a camera angle, turning a GoPro into a desktop video source, or building a more advanced stream setup. With the right method for your camera and your goals, VLC stops being just a media player and starts acting like a very useful backstage assistant.


