
Table of Contents >> Show >> Hide
- Why Tall Glass Vases Are the MVP of DIY Décor
- Before You DIY: The 10-Minute Prep That Makes Everything Look Better
- 9 DIY Tall Glass Vase Makeovers That Look High-End
- 1) The Modern Color-Block Vase (a.k.a. the “Designer Minimalist”)
- 2) Paint-Swirl Inside the Vase (color without losing the glassy vibe)
- 3) Faux Mercury Glass (instant vintage glamour)
- 4) Stained-Glass Tint (color that still lets light through)
- 5) Frosted or Etched Patterns (soft, elegant, and surprisingly modern)
- 6) Gold Leaf Stripes (the fastest way to say “fancy”)
- 7) Marble Dip with Nail Polish (a little chaotic, in a good way)
- 8) Faux Pottery Texture (turn glass into “stoneware”)
- 9) Wrapped + Woven Looks (warm texture without heavy materials)
- How to Keep Tall Glass Vases From Tipping Over
- Styling Ideas: What to Put in a Tall Glass Vase
- Common DIY Mistakes (So You Don’t Recreate Them for Content)
- FAQ: DIY Tall Glass Vases
- Real-Life DIY Experiences: Lessons From the Vase Trenches
- Conclusion
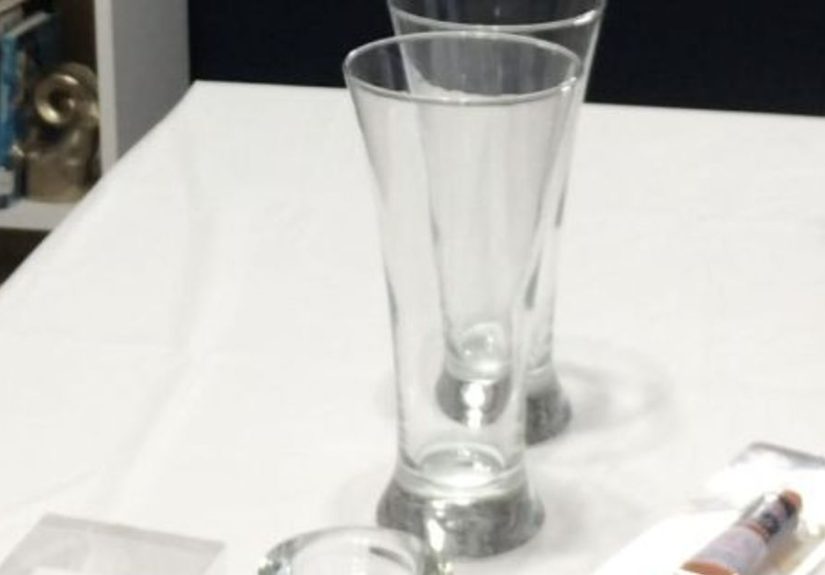
Tall glass vases are the supermodels of home décor: dramatic, elegant, and occasionally a little high-maintenance (one accidental elbow bump and they’ll remind you who pays the rent). The good news? You don’t need a designer budget to get that “wow” factor. With a few smart techniquespaint, texture, tint, and stylingyou can turn a plain cylinder vase into something that looks like it came from a boutique where everything is “curated” and also somehow $68.
This guide walks you through practical, good-looking DIY tall glass vase ideas that work for centerpieces, entryways, mantels, weddings, and everyday “I have my life together” moments. You’ll get step-by-step instructions, product and prep tips, and styling tricks that keep tall vases from turning into wobbly glass giraffes.
Why Tall Glass Vases Are the MVP of DIY Décor
Tall glass vases do three things better than most décor items: they add height, they catch light, and they make a space look intentionally styled even if the rest of the room is quietly panicking. They’re also perfect for DIY because glass is a clean canvasyou can paint it, etch it, wrap it, tint it, or fill it with almost anything without committing to a permanent look.
Best places to find tall glass vases (without paying “fancy” prices)
- Thrift stores (look for cylinders, hurricanes, and floor vases)
- Dollar stores (great for event centerpieces and practice runs)
- Craft stores (often have tall glass cylinders in multiple heights)
- Facebook Marketplace or estate sales (large vases for pennies)
- Your own cabinets (yes, that “unused” hurricane from 2019 counts)
Before You DIY: The 10-Minute Prep That Makes Everything Look Better
Glass is smooth, which is great for shine and terrible for “paint sticking like it actually wants to be there.” Prep is how you avoid chipping, streaking, and the dreaded “why does it look like I sneezed on it?” finish.
Quick prep checklist
- Inspect: Skip vases with cracks or sharp chips (pretty isn’t worth stitches).
- Wash: Warm soapy water, rinse well, dry fully.
- Degrease: Wipe with rubbing alcohol and a lint-free cloth.
- Handle smart: Wear gloves or hold by the rim to avoid fingerprints.
- Ventilate: If spraying or using strong adhesives, work outside or near open windows.
- Protect your space: Cardboard + drop cloth = fewer regrets.
9 DIY Tall Glass Vase Makeovers That Look High-End
These projects are designed for tall glass vases, including cylinder vases, hurricanes, and floor vases. Mix and match techniquesjust don’t try all of them at once unless your design style is “craft store tornado.”
1) The Modern Color-Block Vase (a.k.a. the “Designer Minimalist”)
Color-blocking makes a tall vase look intentional, architectural, and surprisingly expensive. It’s also forgivingclean lines hide a multitude of beginner sins.
Materials: painter’s tape, glass-safe spray paint or enamel paint, optional clear topcoat.
- Decide where the color starts (bottom third looks balanced on tall vases).
- Tape a crisp line around the vase; press tape edges firmly.
- Apply multiple light coats (thin coats beat drips every time).
- Let it dry completely, then peel tape back slowly at a low angle.
- If you want extra durability, add a light clear topcoat (optional).
Style tip: Pair a matte color-block vase with airy stems (eucalyptus, faux olive branches) to keep it from looking heavy.
2) Paint-Swirl Inside the Vase (color without losing the glassy vibe)
This technique keeps the outside sleek and easy to wipe, while adding a soft wave of color insideperfect for centerpieces where you still want that “clear glass” sparkle.
Materials: glass/enamel paint, disposable cup, gloves, drying rack or cardboard tube stand.
- Pour a small amount of paint into the vase (start with less than you think).
- Slowly tilt and rotate so paint rolls around the interior.
- Stop when you like the coverage; leave some clear areas for contrast.
- Invert the vase over paper to drain excess (a few minutes).
- Let it cure per paint instructions (some paints air-cure; some can be heat-set).
Reality check: If your swirl looks like a thunderstorm, congratulationsstormy décor is in. If not, add a second swirl layer later.
3) Faux Mercury Glass (instant vintage glamour)
Faux mercury glass is the “champagne bubbles” of vase makeovers: sparkly, imperfect, and flattering in candlelight. It’s especially stunning on tall hurricane vases.
Materials: mirror-finish spray paint, spray bottle (water + a splash of vinegar), paper towels.
- Lightly mist the vase with the water/vinegar mix.
- Spray mirror paint in light passes (don’t aim for full coverage).
- While wet, dab and blot with paper towels to create speckling.
- Repeat in layers until it looks like antique shimmer, not a chrome bumper.
- Let fully dry before handling.
4) Stained-Glass Tint (color that still lets light through)
Want jewel tones without opaque paint? A stained-glass look keeps the vase translucentgreat near windows, on mantels, or anywhere you want light to play.
Materials: clear decoupage medium (like Mod Podge Gloss), food coloring, foam brush.
- Mix decoupage medium with a few drops of food coloring until tinted.
- Brush on thin coats (it will look streaky at firsttrust the process).
- Let each coat dry before adding another for deeper color.
- Keep the rim mostly clear if you want a clean “finished” edge.
Best use: Tall glass vases with LED fairy lights inside. The glow looks expensive, but your wallet will remain calm and hydrated.
5) Frosted or Etched Patterns (soft, elegant, and surprisingly modern)
Frosted glass makes tall vases look boutique-level. You can go subtle (overall frost) or graphic (patterns, monograms, or geometric bands).
Option A: Frosted spray
- Mask any areas you want clear with painter’s tape or vinyl.
- Apply light, even coats of frosted glass spray.
- Peel masking once dry to the touch; let cure fully.
Option B: Etching cream + stencil
- Apply a vinyl stencil firmly (seal edges well).
- Wear gloves and protect surfaces (etching cream is no joke).
- Spread cream evenly over stencil, wait as directed, then rinse thoroughly.
- Remove stencil and admire your “I own a monogramming machine” energy.
6) Gold Leaf Stripes (the fastest way to say “fancy”)
Metallic stripes on tall glass vases work for weddings, holiday tables, and everyday glam. Gold leaf is delicate, but the result is chef’s-kiss reflective.
Materials: gold leaf sheets, gold leaf adhesive (size), soft brush, sealer, painter’s tape.
- Tape off stripes (or a band) where you want the gold leaf.
- Brush on adhesive, wait until tacky as directed.
- Press gold leaf gently, then brush away excess flakes.
- Seal lightly so it doesn’t shed glittery confetti forever.
Design idea: One thick band near the base looks modern; thin stripes feel Art Deco.
7) Marble Dip with Nail Polish (a little chaotic, in a good way)
This method creates a marbled effect that’s unique every time. It’s best on tall cylinder vases you want to use for dried stems or display (not heavy scrubbing).
Materials: disposable container of room-temp water, nail polish, skewer, gloves.
- Drop nail polish onto water’s surface (it spreads fast).
- Swirl lightly with a skewer for marbling.
- Dip the vase section you want marbled, then lift slowly.
- Let dry thoroughly; avoid harsh cleaners afterward.
8) Faux Pottery Texture (turn glass into “stoneware”)
Love the earthy look of pottery but already own a tall glass vase? Add texture on the outside. This is especially good for floor vases where you’re displaying branches, pampas grass, or faux stems (no water needed).
Materials: acrylic paint, baking soda (or baking powder), brush or sponge, optional matte sealer.
- Mix paint with baking soda to create a grainy, thick texture.
- Stipple or brush on in thin layers (texture builds quickly).
- Let dry, then add a second layer if you want more “ceramic” depth.
- Seal with a matte finish if desired.
Important: Keep the inside unpainted if you want the vase to hold water safely.
9) Wrapped + Woven Looks (warm texture without heavy materials)
Adding fabric, cane webbing, twine, or rattan-inspired wrap makes tall glass vases feel cozy and elevatedgreat for farmhouse, coastal, or modern organic décor.
Materials: cane webbing or burlap, embroidery thread/twine, hot glue or strong craft adhesive.
- Measure and cut the wrap material to fit the vase height and circumference.
- Attach neatly with adhesive; keep seams aligned in the back.
- Finish the top edge with twine or trim for a polished look.
Pro move: Wrap only the lower half so the top stays sleek and the whole vase feels lighter.
How to Keep Tall Glass Vases From Tipping Over
Tall vases look graceful until physics arrives like an uninvited guest. The secret is weight low, volume high. You want stability at the bottom and airy drama at the top.
Easy stabilization tricks
- Weighted base: add river rocks, sand, or glass beads inside the bottom.
- Hidden support: use floral foam (wet or dry) or a chicken-wire “nest” to hold stems.
- Double-vase hack: place a smaller water-holding container inside a wider vase.
- Floor vase tip: if it’s tall and empty, fill with decorative stones for weight.
Styling Ideas: What to Put in a Tall Glass Vase
A DIY tall glass vase is only half the story; the styling is the plot twist. Here are options that work year-round and don’t require an ongoing relationship with a florist.
Classic (and always photogenic)
- Long-stem faux eucalyptus or olive branches
- Seasonal branches (real or faux): dogwood, magnolia, maple
- One bold leaf + a few blooms for a modern centerpiece
Minimalist fillers for hurricane vases
- Layered beans, lentils, or colored sand (yes, pantry décor is a thing)
- LED candles surrounded by glass gems or stones
- Ornaments for holiday tables (fast, bright, and party-proof)
“I want height but not flowers”
- Pampas grass (instant volume)
- Reeds or decorative sticks
- String lights with a tinted vase for a soft glow
Common DIY Mistakes (So You Don’t Recreate Them for Content)
- Skipping the alcohol wipe: fingerprints can ruin paint adhesion.
- One thick coat: drips happen fast on vertical glassthin coats win.
- Touching too early: “dry to touch” is not “ready to handle like a toddler.”
- Painting where water will sit: unless the product is made for that, keep interiors clear or properly sealed.
- Ignoring cure time: some glass paints need longer to become durable.
FAQ: DIY Tall Glass Vases
Can I paint a tall glass vase and still use it for fresh flowers?
Yesif you keep paint on the exterior only (or use paint specifically designed for glass that becomes durable after curing). The safest option is leaving the inside clear so water never touches the finish.
Do I need primer on glass?
Usually, no. Clean, degrease, and use paint labeled for glass. For spray paint, light coats and good prep matter more than primer.
How do I clean a decorated glass vase?
Hand-wash gently around decorated areas, avoid soaking textured finishes, and skip abrasive scrubbers. If you made a tinted or decoupaged surface, treat it like you would a painted wallgentle and polite.
Real-Life DIY Experiences: Lessons From the Vase Trenches
I’ve learned that DIY tall glass vases are a lot like cooking: the recipe is helpful, but the real education happens when something slides off the counter and you briefly reconsider all your life choices. The first time I tried a spray-painted color-block on a tall cylinder vase, I went in with big confidence and one tragic mistaketouching it “just to see” after 20 minutes. The paint looked dry, felt dry, and then politely accepted my fingerprint like an autograph. Lesson one: let it cure like it has a tiny union contract.
The second lesson is that tall glass amplifies everything: beauty, mistakes, and wobble. A small drip on a short vase is a cute accident; on a tall vase it becomes a visible event you can spot from the next ZIP code. Now I do light coats and keep the can moving, even if my inner impatient goblin is chanting “one more heavy coat!” from the shadows.
Faux mercury glass was the most rewarding “trust the process” project. Midway through, it can look like you misted the vase and then fought it with a paper towel. But once the layers build, the finish turns into this soft, speckled shimmer that looks incredible with candlelight. I also discovered it’s a forgiving finish for thrifted vases with tiny scratchesthose imperfections stop reading as “used” and start reading as “antique charm.” That’s a glow-up story I can support.
The tinted stained-glass look taught me patience in slow motion. The first coat can streak, and your brain will try to file an emergency complaint. But by the second and third thin coats, the color evens out and the vase starts catching light like a fancy restaurant window. I once tinted three tall vases in different greens and blues for a dinner party and dropped in warm LED fairy lights. People asked where I bought them. I said “Oh, you know… an exclusive boutique called My Kitchen Table,” and then immediately felt powerful.
My biggest “grown-up” tip is stability. Tall vases are gorgeous, but they’re top-heavy divas. If you’re using long stemsespecially branchesadd weight low (stones, sand, or glass beads) and use a stem support like chicken wire. This turns the arrangement from “leaning tower of floral” into “effortless height.” For floor vases, I now always add a base layer of stones. It keeps the vase grounded and prevents the dreaded tip when a pet, kid, or enthusiastic friend decides to test gravity’s limits.
Finally, I’ve learned that DIY tall glass vases are a fantastic way to experiment with style without committing to a whole room makeover. One weekend it’s modern black-and-white color blocking. Next weekend it’s warm woven cane. And when you get bored? You can peel, repaint, re-wrap, or re-tint. Tall glass vases are basically reusable décor canvasesjust… keep them away from elbows.
Conclusion
A DIY tall glass vase makeover is one of the easiest ways to add “designer” height and shine to your home without spending designer money. Start with solid prep, choose a finish that matches your style (paint, tint, etch, leaf, or texture), and stabilize tall arrangements so they stay upright and gorgeous. Whether you’re styling a dining table centerpiece or filling an empty corner with dramatic branches, these projects give you flexible, high-impact décor that you can refresh whenever your mood (or season) changes.


