
Table of Contents >> Show >> Hide
- What a Spilled Planter Is (and Why It Works So Well)
- Plan Before You Dig: Location, Scale, and Sun
- Materials and Tools
- Step-by-Step: Build Your Spilled Planter DIY
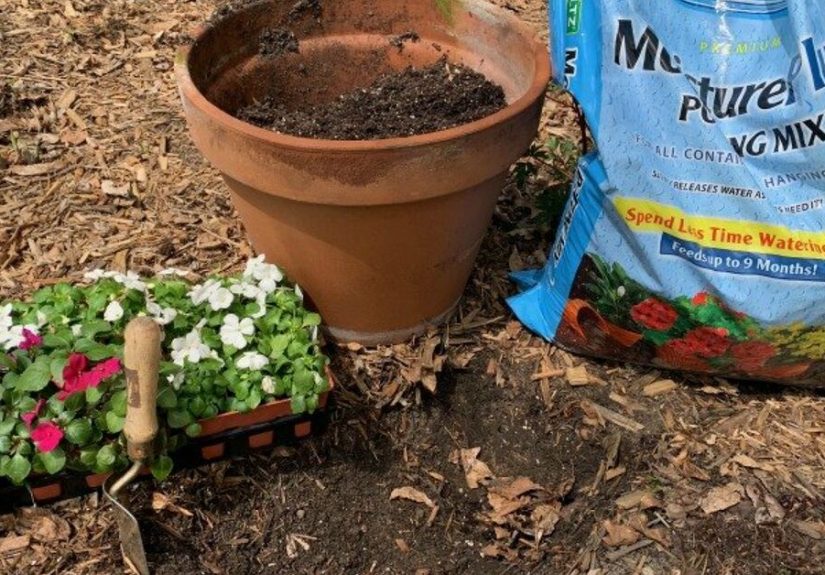
- Step 1: Choose the right pot (and make sure it drains)
- Step 2: Lay out the “spill” shape
- Step 3: Prep the bed
- Step 4: Tip and anchor the pot (so it stays “spilled,” not “rolled away”)
- Step 5: Fill with the right soil (skip the drainage myths)
- Step 6: Plant the pot and the spill bed like a designer
- Step 7: Finish the illusion
- Plant Combos That Make the Spill Look Real
- Design Tricks That Make It Look Intentional (Not Accidental)
- Maintenance: Keep Your Spill Looking Like a River, Not a Puddle
- Budget and Timeline
- Common Mistakes (and Easy Fixes)
- FAQ
- Conclusion: A Yard Upgrade That’s Equal Parts Art and Garden
- Experience Notes: What It’s Like Living With a Spilled Planter DIY (and Why You’ll Probably Make Another One)
Want your yard to feel like it has a personality (besides “mostly grass”)? A spilled planter DIYalso called a tipped-pot or overflowing-pot displayadds instant whimsy and curb appeal by making flowers look like they’re “pouring” out of a container like a colorful river. It’s cheerful. It’s artsy. And best of all, it’s the kind of project that looks fancy even if your DIY résumé currently includes “successfully kept a pothos alive.”
This guide walks you through planning, building, and planting a spilled planter that looks intentional (not like you dropped a pot and committed to the bit). You’ll get step-by-step instructions, plant combo ideas for different sun levels, design tricks that make it look professionally styled, and easy maintenance tips so your “flower spill” doesn’t turn into a “weed situation.”
What a Spilled Planter Is (and Why It Works So Well)
A spilled planter is a container set on its sidepartly buried or anchoredso the opening faces the ground. You plant inside the pot and along a shaped bed in front of it, creating the illusion that blooms and foliage are flowing out into the landscape.
Why it works:
- Movement: Trailing plants naturally cascade, so the “spill” looks believable.
- Color story: Repeating one or two main colors makes the design read like a deliberate stream.
- Built-in focal point: The tipped pot is a sculpture and a plantertwo-for-one yard magic.
- Easy creativity: You can keep it simple with one plant type or go full artist-mode with gradients, patterns, and textures.
Plan Before You Dig: Location, Scale, and Sun
Before you grab a shovel and optimism, pick the right spot. A spilled planter looks best where it can be seen from a common viewpointnear the walkway, mailbox, patio edge, or the corner of a front bed that needs a “wow” moment.
Quick planning checklist
- Sun exposure: Match plants to the light. Full-sun flowers sulk in shade. Shade plants crisp up in blazing afternoon sun.
- Background: A spill pops against mulch, stone, gravel, or low groundcoveranything that contrasts with the plants.
- Size balance: Tiny pot + giant bed can look like a teaspoon spilling the ocean. Choose a pot big enough to “explain” the spill.
- Water access: If you have to drag a hose across three emotional support lawn chairs, you’ll water less. (That’s just science.)
Materials and Tools
You don’t need a truckload of supplies. You need the basicsand a pot that’s ready to do theater.
Materials
- A large pot or planter (terra cotta, resin, ceramic, lightweight concrete, or even a half-barrel)
- Quality potting mix (not heavy garden soil)
- Compost (optional but helpful)
- Slow-release fertilizer (optional)
- Mulch (shredded bark, pine fines, or similar)
- Stones or bricks (for wedging/anchoring and edging)
- Landscape staples or small stakes (optional)
- Plants: a mix of trailing (“spillers”), mounding (“fillers”), and one focal plant (“thriller”) if desired
Tools
- Shovel or spade
- Hand trowel
- Gloves
- Garden shears
- Drill + masonry/ceramic bit (only if your pot needs drainage holes)
- Measuring tape or a hose (for laying out the spill shape)
Step-by-Step: Build Your Spilled Planter DIY
Step 1: Choose the right pot (and make sure it drains)
Pick a pot with a wide mouththis makes the “pour” look natural. Bigger pots are easier to make believable because they provide a strong visual source for the spill.
- Best look: Terra cotta or ceramic for cottage charm; resin or lightweight concrete for modern yards.
- Best function: A pot with drainage holes. If it doesn’t have holes, drill them (and wear eye protection).
- Pro tip: Slight chips and cracks can add characterjust avoid a pot that’s so broken it can’t hold soil.
Step 2: Lay out the “spill” shape
Use a garden hose or rope to sketch your spill on the ground. Most spills look great as:
- A tapered river: Wide near the pot, narrower as it flows out
- An S-curve: Adds movement and looks more natural
- A short burst: Great for small spaceslike a “splash” instead of a stream
Keep it realistic. A 24-inch pot can’t convincingly spill 12 feet of flowers unless you’re going for “cartoon physics,” which is validbut should be intentional.
Step 3: Prep the bed
Remove grass/weeds in the spill area and loosen the top few inches of soil. If your native soil is heavy clay, mix in compost to improve texture in the bed portion. (Inside the pot, use potting mix.)
Shape a shallow channel for your spill bed and create a slight berm along the edges if you want crisp definition. This helps keep mulch and soil from wandering away after rain.
Step 4: Tip and anchor the pot (so it stays “spilled,” not “rolled away”)
Set the pot on its side where the spill begins. Bury the bottom third to half of the pot for stability and a natural “settled” look.
- Wedge method: Place stones behind and underneath the pot to lock it in position.
- Stake method: For lightweight pots, drive a stake behind it and tie with garden twine (hidden from the front).
- Rebar method (extra stable): Place rebar behind the pot and bury it; use it like a brace.
Give the pot a gentle nudge test. If it moves easily, anchor more. Your future self will thank you when a summer storm tries to redecorate.
Step 5: Fill with the right soil (skip the drainage myths)
Fill the pot with potting mix. It’s lighter and designed to hold moisture while still draining well. If you want a boost, mix in a little compost and a slow-release fertilizer.
Important: Don’t add a thick layer of rocks or gravel at the bottom “for drainage.” In most containers, that can create a water-holding layer instead of improving drainage. If you’re worried about soil washing out, use a small piece of mesh or a coffee filter over the holejust to keep mix from escaping.
Step 6: Plant the pot and the spill bed like a designer
This is where the magic happens. A classic approach is the “thriller, filler, spiller” method:
- Thriller: One taller focal plant near the back of the pot (optional)
- Fillers: Mounding plants that bulk up the center
- Spillers: Trailing plants that create the flowing illusion
Plant the spillers closest to the pot opening, then continue them into the bed. Use fillers to support the spill visually and prevent it from looking like a few lonely vines escaping the scene.
Step 7: Finish the illusion
- Mulch the bed to unify the look and reduce weeds.
- Water deeply to settle soil and eliminate air pockets.
- Add edging stones if you want a crisp “riverbank” effect.
- Optional: Add drip irrigation or a soaker line under mulch for low-maintenance watering.
Plant Combos That Make the Spill Look Real
The best spilled planter plants are vigorous trailers that naturally cascade. Choose plants with similar water and sun needs so they thrive together instead of fighting like siblings on a road trip.
Full sun: “Color Flood” spill
- Spillers: Wave petunias, calibrachoa (million bells), trailing verbena
- Fillers: geraniums, lantana, marigolds
- Optional thriller: purple fountain grass or salvia
Look: Bright and dramatic. Great for front yards and mailbox beds.
Part shade: “Soft Glow” spill
- Spillers: trailing lobelia, creeping jenny (keep it contained), bacopa
- Fillers: begonias, coleus, impatiens (where appropriate)
- Optional thriller: a taller coleus or ornamental grass that tolerates shade
Look: Lush, layered, and excellent under trees or on the east side of the house.
Drought-tolerant vibe: “Silver Stream” spill
- Spillers: dichondra ‘Silver Falls,’ trailing rosemary
- Fillers: sedum, lavender (in larger containers), dusty miller
- Optional thriller: a compact ornamental grass
Look: Modern and low-key, perfect with stone, gravel, or a minimalist landscape.
Edible spill: “Snack River”
- Spillers: nasturtium (edible flowers), trailing thyme
- Fillers: basil, parsley, compact peppers
- Optional thriller: a small tomato variety with support
Look: Pretty and usefulideal near patios and outdoor kitchens.
Design Tricks That Make It Look Intentional (Not Accidental)
- Repeat colors: Choose 2–3 main colors and repeat them throughout the spill for a cohesive “river.”
- Use a gradient: Darker near the pot, lighter as it flows outwardlike an ombré flower stream.
- Texture matters: Mix fine foliage (lobelia, alyssum) with bold leaves (sweet potato vine) for depth.
- Define edges: A few stones or a tidy mulch edge makes the display look landscaped.
- Pair with hardscape: A spill near a path, boulder, or bench looks like a planned “moment.”
- Add lighting: A small solar spotlight aimed across the spill turns it into nighttime yard art.
Maintenance: Keep Your Spill Looking Like a River, Not a Puddle
Watering
Spilled planters dry out faster than in-ground beds because containers lose moisture quickly. Check moisture daily during hot weather. If the top inch of soil is dry, water thoroughly.
Feeding
Container plants often benefit from regular feeding. A slow-release fertilizer at planting plus occasional liquid feeding can keep blooms coming strong.
Pruning and deadheading
Trim spillers if they get leggy. Deadhead flowers (or shear lightly, depending on the plant) to encourage more blooms and maintain a full, flowing shape.
Weeds and washout
Mulch reduces weeds and helps hold moisture. If rain washes soil from the spill bed, add more mulch and consider edging stones to reinforce the “banks.”
Budget and Timeline
- Time: 1–3 hours for setup (plus planting time)
- Cost range: Budget-friendly if you already have a pot; moderate if you’re buying a large container and lots of plants
- Where to save: Use an existing pot, propagate trailing plants, or plant smaller starters (they fill in fast in warm weather)
Common Mistakes (and Easy Fixes)
- Mistake: Pot too small for the spill size.
Fix: Shorten the spill or swap to a bigger pot. - Mistake: Plants chosen only for looks, not sun needs.
Fix: Match plants to light conditions and group similar needs. - Mistake: Spill looks sparse at first.
Fix: Add a few extra fillers near the opening and be patientmost spillers bulk up quickly. - Mistake: Pot shifts after watering or storms.
Fix: Bury deeper, add stones, or brace from behind. - Mistake: Soil stays soggy.
Fix: Confirm drainage holes, use potting mix, and avoid adding a gravel layer at the bottom.
FAQ
Can I do a spilled planter without flowers?
Yesand it can look incredibly modern. Use foliage-only spillers like dichondra ‘Silver Falls,’ creeping Jenny (contained), or sweet potato vine, and pair them with textured fillers like sedum or ornamental grasses.
Can I use a broken pot?
Absolutely. Chipped or cracked terra cotta can look charming in cottage-style gardens. Just make sure it can still hold soil and won’t collapse when partially buried.
How long will it take to look “full”?
In warm growing weather, many trailing annuals fill out noticeably within 2–4 weeks. If you want instant fullness, plant more densely (and water consistently).
Conclusion: A Yard Upgrade That’s Equal Parts Art and Garden
A spilled planter DIY is one of the easiest ways to add creativity to your yard without committing to a full landscape overhaul. It’s playful, photogenic, and customizablewhether you want a bold neon flower stream, a soft shade-garden spill, or a sleek silver cascade.
Anchor the pot well, use quality potting mix, pick plants that love your sunlight conditions, and repeat colors for a cohesive “river.” Then step back and enjoy the best part: guests smiling at your yard like it just told a wholesome joke.
Experience Notes: What It’s Like Living With a Spilled Planter DIY (and Why You’ll Probably Make Another One)
Here’s the funny thing about a spilled planter: the day you finish it, you’ll probably stare at it and think, “That’s it?” This is completely normal. Freshly planted spills can look a little sparselike your flowers are politely trickling out instead of dramatically pouring. But within a couple of weeks (especially in warm weather), the whole display changes. Trailing plants start to lengthen, fillers puff up, and suddenly the “spill” reads clearly from the sidewalk. It’s one of the most satisfying glow-ups you can build in an afternoon.
You’ll also learn quickly that the container portion has its own personality. The pot dries out faster than the bed area, and the plants near the opening often need the most consistent watering. Many DIYers end up doing a simple routine: a deeper soak every few days, then quick checks on hot afternoons. If you add drip irrigation or tuck a soaker line under mulch, it feels like you unlocked a cheat codeyour spill stays lush with way less effort.
Another real-life detail: rain and storms can “edit” your design. A heavy downpour might splash mulch out of place or carve a tiny channel through the bed, especially if your spill is on a slope. The fix is easyrefresh mulch, reinforce edges with a few stones, and shape the spill bed with slightly raised “banks.” After that, it holds up much better. Think of the first storm as a stress test, not a failure.
Plant choice becomes an experience lesson, too. Some spillers are enthusiastic overachievers (looking at you, sweet potato vine) and may start to dominate the scene. Others are delicate and need a little backup from fillers so the spill doesn’t look thin. Over time, you’ll probably develop favorites: a trailing plant that always looks good, a filler that blooms nonstop, and maybe one drama queen you quietly stop inviting back next season.
And yespeople notice. A spilled planter is the kind of yard feature that gets comments from neighbors, delivery drivers, and anyone walking a dog at the exact speed required to admire flowers. It’s a conversation starter because it’s unexpected. Once you see how much personality it adds, you might start eyeing other spots in your yard like, “What if a second spill… but make it shady… and maybe edible?” That’s how it begins.
The best part is how flexible it is through the seasons. In spring, you can go pastel and fresh. In summer, crank up the color. In fall, swap in mums, ornamental kale, and warm-toned foliage. Even if you change nothing, the spill evolves naturallylike a living decoration that’s never exactly the same twice. It’s gardening, but with a wink.


