
Table of Contents >> Show >> Hide
- What Semi-Permanent Hair Dye Actually Does (And Doesn’t Do)
- Before You Start: Two Safety Checks You Shouldn’t Skip
- Choose the Right Semi-Permanent Dye for Your Goal
- What You’ll Need (AKA: Set Yourself Up Like You’re on a Salon Show)
- Prep Your Hair for Better Color Payoff
- Step-by-Step: How to Apply Semi-Permanent Hair Dye at Home
- Rinse Like You Mean It (This Part Affects How Long the Color Lasts)
- Aftercare: Make Your Semi-Permanent Color Last Longer
- Troubleshooting: Common DIY Problems (And Fixes That Don’t Involve Panic Bangs)
- When You Should Call a Professional Instead
- Quick FAQ
- Real-World Experiences: What DIY Semi-Permanent Dye Is Actually Like (The Extra-Real )
Semi-permanent hair dye is the “fun aunt” of hair color: it shows up with snacks, makes everything look cooler,
and leaves before it becomes a whole emotional commitment. If you want to refresh faded color, try a bold new shade,
tone down brassiness, or just see what you’d look like as a cherry-cola brunette (without signing a long-term lease),
semi-permanent dye is usually the easiest DIY lane.
This guide walks you through the full at-home processchoosing the right shade, prepping like a pro, applying without
patchy surprises, and keeping your color looking fresh for as long as possible. We’ll also cover the “oops” moments
(stained skin, uneven spots, color that came out louder than your personality) and what to do next.
What Semi-Permanent Hair Dye Actually Does (And Doesn’t Do)
Semi-permanent color is primarily a deposit-only situation. It coats the outside of the hair more than it
changes what’s inside. Translation: it generally won’t lighten your hair, and it fades gradually with washing.
That’s why it’s a favorite for low-commitment experimentation, color refreshing, and toning.
How long does it last?
Expect anywhere from a few washes to a few weeks depending on your hair, your shade, and your routine. Very porous hair,
pre-lightened hair, and bold pigments tend to hang on longer. Frequent shampooing, hot water, clarifying shampoos, and heavy
heat styling will speed up fading.
What results should you realistically expect?
-
On dark, unbleached hair: You’ll usually get a tint, shine shift, or subtle tone changeunless the product is specifically
designed to show on darker bases. - On light brown to blonde hair: You’ll see clearer color payoff and brighter fashion shades.
- On bleached or highlighted hair: You can get vivid colorsometimes very vivid. (Congrats, you’re now the main character.)
- On gray hair: Coverage varies. Some people get a soft blend; others find grays resist pigment or grab it differently.
Before You Start: Two Safety Checks You Shouldn’t Skip
1) Do a patch test (yes, even if you’ve dyed before)
Allergies can develop over time, and hair color reactions can be serious. Many manufacturers recommend a 48-hour skin test before using dye.
Pick a small area (like behind the ear or inside the elbow), apply a little product, let it sit, and watch for redness, itching, burning,
swelling, or rash. If anything looks angry, don’t proceed.
2) Do a strand test (your hair is not the picture on the box)
A strand test is your preview trailer. It tells you how vibrant the color will be, how long you should process, and whether your hair will
grab pigment in a weird way (hello, greenish ash where you wanted beige blonde). Choose a small hidden section, apply dye exactly as you plan
to do on your full head, time it, rinse, dry, and judge the results in natural light.
Choose the Right Semi-Permanent Dye for Your Goal
If you want a bold fashion shade
Look for direct dyes designed for vivid payoff. These often work best on lighter hair and pre-lightened sections. If your hair is dark and you want
bright blue, you may need lightening firstwhich is where DIY risk climbs fast. If you’re thinking bleach, consider a professional for the lightening part,
then do the semi-permanent color at home.
If you want to refresh or tone (less “mermaid,” more “polished”)
Consider a tinted conditioner, gloss, or color-depositing mask. These are usually easier to apply evenly and can add shine while nudging your tone warmer,
cooler, richer, or less brassy.
If you want to cover grays
Semi-permanent can soften and blend early grays, but results vary. If you need more reliable coverage, a demi-permanent formula (a different category) may
perform betterthough that typically involves a developer and a slightly more technical process. If you’re committed to semi-permanent, choose a shade close
to your natural color and expect a “blur,” not a total erase.
What You’ll Need (AKA: Set Yourself Up Like You’re on a Salon Show)
- Semi-permanent dye (and an extra bottle if your hair is long/thickrunning out mid-head is a villain origin story)
- Gloves (two pairs if you canone to apply, one to rinse)
- Old towel and an old T-shirt or button-down
- Hair clips for sectioning (at least 4)
- Petroleum jelly or barrier ointment for hairline/ears/neck
- Wide-tooth comb (optional but helpful for even distribution)
- Non-metal bowl and tint brush (if your dye isn’t in an applicator bottle)
- Timer
- Plastic cap (optional for longer processing or mess control)
- Gentle shampoo + conditioner, plus a deep conditioner
Prep Your Hair for Better Color Payoff
Step 1: Clarify (sometimes)
If you have a lot of product buildup (dry shampoo, heavy oils, silicone styling products), a clarifying shampoo can help your dye apply more evenly.
But if your hair is already dry or fragile, don’t over-strip itsemi-permanent dye doesn’t need your hair to be squeaky-clean to work, and over-clarifying
can make hair feel rough.
Step 2: Decide dry vs. damp based on your dye instructions
Some semi-permanent dyes are designed for clean, dry hair for maximum intensity. Others work well on towel-dried hair for easier saturation and softer results.
Your best move: follow the brand directions, then use your strand test results to fine-tune.
Step 3: Detangle and section
Detangle thoroughly first. Then divide hair into four sections (middle part front-to-back, then ear-to-ear), and clip them up. Sectioning is the single easiest
way to avoid missed patches in the backbecause your bathroom mirror is not a trustworthy coworker.
Step 4: Protect your skin and your environment
Put petroleum jelly along your hairline, on the tops of your ears, and on the back of your neck. Cover surfaces. Wear the shirt you don’t mind losing to purple.
Keep wipes nearby for quick cleanup.
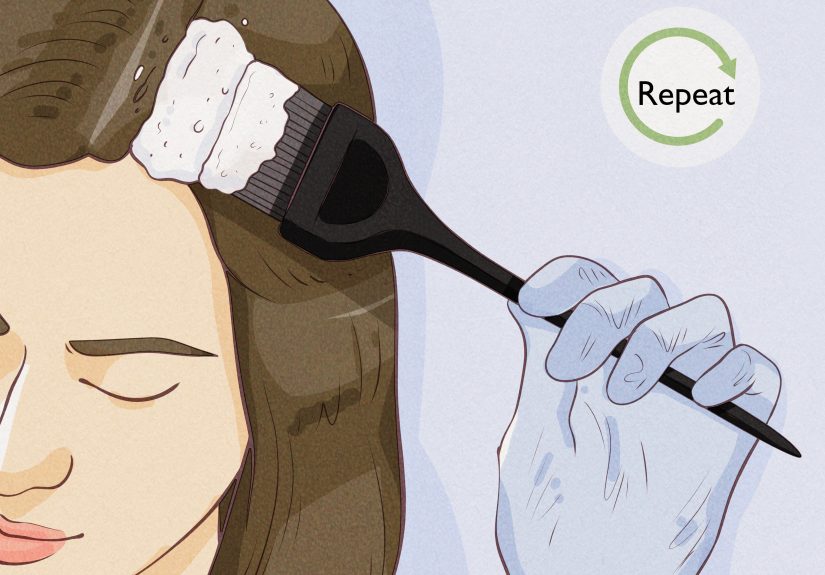
Step-by-Step: How to Apply Semi-Permanent Hair Dye at Home
Step 1: Put on gloves and start where it’s hardest
Start in the back of your head and work forward. The back is harder to see and usually drier or denser, so it benefits from early, thorough saturation.
Step 2: Work in thin slices for even saturation
Release one section at a time. Take thin “slices” of hair (about 1/4 to 1/2 inch) and apply dye from roots to ends, fully saturating each slice.
Semi-permanent dye needs enough product to coat the hairif you can still see dry strands, add more.
Step 3: Use a “massage and comb” strategy
After applying dye to a section, gently massage it through with gloved fingers. If your hair tangles easily, use a wide-tooth comb to distribute the dye
evenly (gentlyno aggressive yanking). This helps prevent the dreaded “spotty galaxy print” effect.
Step 4: Check your perimeter and part line
Hairlines, temples, and your part are the areas people notice firstso don’t rush them. Use a tint brush (or even a clean spoolie/makeup brush) for detail
work around the edges.
Step 5: Process for the right amount of time
Follow the instructions on your dye, then adjust based on your strand test. Many semi-permanent dyes process around 20–40 minutes; some can be left longer
for deeper payoff. Set a timer. Do not “guestimate” time with vibes alone.
Rinse Like You Mean It (This Part Affects How Long the Color Lasts)
Step 1: Rinse with cool or lukewarm water
Rinse until the water runs mostly clear. Cooler water can help keep the cuticle smoother and may reduce how quickly pigment slips away.
Step 2: Skip shampoo unless your dye instructs otherwise
Many semi-permanent dyes recommend rinsing without shampoo right away. If you do shampoo, use a gentle, color-safe formula. Then condition well.
Step 3: Deep condition if your hair feels dry
Even if semi-permanent dye is generally gentler than permanent color, the process can still leave hair feeling thirstyespecially if you clarified beforehand.
A deep conditioner or mask helps smooth things out and boosts shine.
Aftercare: Make Your Semi-Permanent Color Last Longer
Wash less, wash cooler
The more you shampoo, the faster pigment fades. Stretch washes when you can, and use cooler water. Dry shampoo can help between washes (just don’t let buildup
go wildclarify occasionally).
Use color-safe, sulfate-free products
Harsh detergents and frequent clarifying shampoos pull pigment out faster. Choose gentle cleansers and moisturizing conditioners. If your water is hard,
consider a shower filterminerals can dull tone and affect longevity.
Limit heat and sun
Heat tools can speed fading and dryness. If you style with heat, use a protectant. Sun exposure can also fade color; hats are both protective and a personality.
Troubleshooting: Common DIY Problems (And Fixes That Don’t Involve Panic Bangs)
“My color is uneven.”
- Cause: Not enough saturation, poor sectioning, or applying too quickly.
- Fix: Reapply dye to the patchy areas only, saturate well, and process again (use your strand test timing). For mild unevenness,
a color-depositing conditioner used weekly can help blend.
“It’s brighter than I expected.”
- Cause: Porous hair, light base, long processing time, or a highly pigmented formula.
- Fix: Wash with a gentle shampoo a few times, or use a clarifying shampoo occasionally. Some people use vitamin C-based fading methods,
but be aware these can be dryingcondition deeply afterward.
“It barely showed up.”
- Cause: Dark base, dye not designed to show on dark hair, product buildup, or too little processing time.
- Fix: Try a deeper shade closer to your base, process longer (within the product’s guidelines), clarify beforehand next time,
or choose a dye marketed for dark hair. If you truly want neon results, lightening may be requiredconsider a pro for that step.
“My skin is stained.”
Next time, use a barrier ointment at the hairline and wear gloves the whole time. For fresh stains, gentle cleansers, oils, or mild exfoliation can help.
Avoid harsh scrubbing that irritates your skin.
“My scalp burns or itches.”
Mild tingling can happen with some products, but burning, intense itching, swelling, or hives are not “beauty is pain” momentsthose are “stop now” moments.
Rinse immediately and seek medical guidance if symptoms are severe or worsening.
When You Should Call a Professional Instead
- You want to go significantly lighter (bleach/lightener is involved)
- You have a history of allergic reactions to dye
- Your hair is extremely damaged and breaks easily
- You’re correcting a major color mishap (especially green, muddy, or banded color)
- You want precise placement (balayage, heavy highlights, complex color blocking)
Quick FAQ
Can I dye my hair the same day I wash it?
For semi-permanent dye, many people get great results on clean hair. Some prefer slightly “lived-in” hair for comfort and easier scalp tolerance.
If you wash right before, skip heavy conditioner at the roots so you don’t create a slippery barrier.
Will semi-permanent dye damage my hair?
Generally, it’s considered less damaging than permanent dye because it’s deposit-only and often doesn’t rely on ammonia or strong developers. That said,
dryness can still happenespecially with clarifying, heat styling, or frequent washing.
Can I mix shades?
Often yes (within the same brand and formula type). Mixing is great for customizing tonelike softening a neon shade or adding warmth to a too-ashy color.
Do a strand test first so you don’t invent a color that only exists in science fiction.
Real-World Experiences: What DIY Semi-Permanent Dye Is Actually Like (The Extra-Real )
The funniest thing about dyeing your hair at home is how confident you feel during the planning phase. You’ve watched three tutorials, you’ve laid out your tools,
you’ve chosen a shade with a name like “Moonlit Berry” or “Cosmic Latte,” and you’re basically one ring light away from being your own salon.
Then the dye hits your gloves and suddenly time moves differently.
A common first-timer experience is underestimating product. Semi-permanent dye works best when hair is fully saturated, which can require a lot more
dye than expectedespecially on thick, curly, or long hair. People often report that the back of the head is where things go wrong: missed patches, lighter sections,
or a “shadow root” that wasn’t intentional. The fix is almost always the same: slower sectioning, thinner slices, and using a second mirror so you can actually see
what you’re doing instead of relying on hope.
Another real-life lesson: your hair’s porosity has opinions. If your hair is highlighted, bleached, or naturally porous, it may grab pigment fast and hold it
longer than you planned. That’s why some people fall in love with semi-permanent dye (“It stayed vibrant for weeks!”) while others panic a little (“It’s still teal and I have
a wedding!”). Many learn to keep a “fade plan” on standby: gentler shampoos for maintaining, clarifying washes for speeding up, and a deep conditioner ready for recovery.
Then there’s the color expectation gap. On dark hair, semi-permanent dye can look subtlelike a glossy tint that only shows in sunlight. Some people love that
low-key vibe; others expected full cartoon-anime saturation and feel disappointed. The reality is that vivid shades usually need a light base. A lot of DIYers end up embracing
a smarter strategy: go for richer tones that complement their base (burgundy, deep copper, chocolate gloss), or use semi-permanent color as a “practice round” before deciding
whether lightening is worth it.
And yes, skin staining happens, even to careful people. The most common “I wish I knew” tip is applying barrier ointment more generously than you thinkespecially
around the ears and nape. The second tip is wearing gloves the entire time, not just for application. Plenty of people have learned the hard way that rinsing without gloves is how
you end up with hands that match your hair for the next three days.
Finally, DIY semi-permanent dye tends to teach patience. The best results come from moving slowly, timing properly, and rinsing thoroughly. Once you’ve done it once, the next time
feels dramatically easierbecause you’ve already made the rookie mistakes and survived. And if the color turns out amazing? Enjoy the compliments like you didn’t do it in your
bathroom with a towel you stole from your own linen closet.


