
Table of Contents >> Show >> Hide
- What Is Windows 10 OEM?
- Before You Start: What You Need
- Step 1: Create a Windows 10 Bootable USB Drive
- Step 2: Prepare the New PC
- Step 3: Enter BIOS or UEFI
- Step 4: Start Windows 10 Setup
- Step 5: Choose the Installation Drive
- Step 6: Complete the Out-of-Box Setup
- Step 7: Activate Windows 10 OEM
- Step 8: Install Windows Updates
- Step 9: Install Motherboard, Graphics, and Network Drivers
- Step 10: Configure Storage and Basic Settings
- Common Problems When Installing Windows 10 OEM
- Should You Install Windows 10 OEM on a New PC in 2026?
- Practical Experience: What Real Installations Teach You
- Conclusion
Building a new PC is exciting until you press the power button and realize your shiny machine has the personality of a toaster. No operating system, no desktop, no comforting startup chimejust a motherboard logo staring back like it knows something you do not. That is where learning how to install Windows 10 OEM on a new PC becomes useful.
An OEM copy of Windows 10 is designed to be installed on one computer and activated on that device. It is often cheaper than a full retail license, which makes it popular with PC builders, small offices, gamers, students, and anyone who has ever looked at the price of computer parts and whispered, “Maybe I do not need RGB after all.”
This guide walks through the full process: preparing your new computer, creating a bootable USB installer, choosing the right BIOS or UEFI settings, installing Windows 10, activating your OEM license, installing drivers, and avoiding common mistakes. Although Windows 10 can still be installed, it is important to know that Microsoft ended standard support for Windows 10 on October 14, 2025. That means a Windows 10 installation in 2026 should be a deliberate choice, not a surprise party for future security problems.
What Is Windows 10 OEM?
Windows 10 OEM is a license type commonly sold for new computers. OEM stands for Original Equipment Manufacturer. In plain English, it means the license is intended for a specific PC rather than being moved casually from one machine to another like a favorite USB mouse.
The biggest difference between Windows 10 OEM and Windows 10 Retail is transferability. A retail license is generally more flexible if you replace your computer. An OEM license is normally tied to the first device where it is activated, especially the motherboard. If you later replace major hardware, Windows may need reactivation, and the license may not transfer cleanly to a completely different PC.
For a brand-new custom build, an OEM key can be a practical choice as long as you understand the rule: buy it legitimately, install it once, and treat that PC as its long-term home.
Before You Start: What You Need
Installing Windows 10 OEM on a new PC is not difficult, but preparation saves time. Before starting, gather the following:
- A valid Windows 10 OEM product key for the edition you plan to install, such as Home or Pro.
- A USB flash drive with at least 8GB of space. Everything on it will be erased.
- A working computer with internet access to create the installer.
- Your new PC with CPU, RAM, motherboard, storage, power supply, and graphics output properly installed.
- A stable internet connection for activation, updates, and drivers.
Make sure your PC meets Windows 10 requirements. Most modern hardware easily clears the basic bar, but the official minimums include a 1GHz processor, 2GB RAM for 64-bit Windows, and at least 32GB of storage. Realistically, a comfortable Windows 10 experience should have more than the minimum. A 250GB or larger SSD and 8GB or more RAM will feel far better than trying to run Windows on bargain-bin storage with the speed of a sleepy turtle.
Step 1: Create a Windows 10 Bootable USB Drive
The easiest way to install Windows 10 on a new PC is with Microsoft’s official Windows 10 installation media. On a working computer, download the Windows 10 Media Creation Tool from Microsoft. Insert your USB flash drive, run the tool, and choose the option to create installation media for another PC.
Select the language, edition, and architecture. For almost every modern new PC, choose 64-bit Windows 10. If your OEM key is for Windows 10 Home, install Home. If your key is for Windows 10 Pro, install Pro. Choosing the wrong edition is one of the most common activation headaches. Windows is picky here, like a restaurant that refuses to serve soup in a coffee mug.
When prompted, select USB flash drive as the media type. The tool will download Windows 10 and create a bootable installer. This can take a while depending on your internet speed and USB drive performance. Do not remove the USB drive until the tool says it is finished.
Step 2: Prepare the New PC
Before installing Windows, connect only the essentials: keyboard, mouse, monitor, power cable, and the USB installer. If your PC has multiple internal drives, consider leaving only the target installation drive connected during setup. This reduces the chance of Windows placing boot files on the wrong drive.
For example, if you have one NVMe SSD for Windows and one large SATA hard drive for games or files, install Windows with only the NVMe drive connected if possible. After Windows is installed, shut down the PC and reconnect the secondary drive. This small step can prevent a future “Why will my PC not boot after I removed my old drive?” situation.
Step 3: Enter BIOS or UEFI
Turn on the new PC and enter the BIOS or UEFI setup screen. The key varies by motherboard brand, but common keys include Delete, F2, F10, F11, or F12. Watch the first startup screen carefully. It usually tells you which key opens setup or the boot menu.
Modern PCs should use UEFI mode rather than Legacy BIOS mode. UEFI works well with GPT partitions, modern SSDs, Secure Boot, and newer motherboard features. In your firmware settings, confirm that UEFI boot is enabled. If you see a boot option beginning with “UEFI:” followed by the name of your USB drive, choose that option.
Recommended BIOS/UEFI Settings
- Boot mode: UEFI
- Storage mode: AHCI for most standard SSD setups
- Secure Boot: Usually enabled or available after installation
- Boot priority: USB installer first, then your SSD
- XMP or EXPO memory profile: Optional; enable after confirming the system is stable
If your SSD does not appear, check that it is properly seated, recognized by the motherboard, and not disabled in storage settings. NVMe drives sometimes hide in BIOS menus with names that look like serial numbers written by a robot with no social skills.
Step 4: Start Windows 10 Setup
Boot from the USB installer. The Windows Setup screen should appear. Choose your language, time and currency format, and keyboard layout. Click “Install now.”
When asked for a product key, you can enter your Windows 10 OEM key immediately. If you prefer, you may also choose “I don’t have a product key” and activate later, but make sure you select the correct edition on the next screen. Again, Windows 10 Home keys activate Windows 10 Home. Windows 10 Pro keys activate Windows 10 Pro. They are not interchangeable just because both have a Start menu.
Accept the license terms and choose “Custom: Install Windows only.” This is the correct option for a new PC or clean installation.
Step 5: Choose the Installation Drive
Windows Setup will show available drives and partitions. On a brand-new SSD, you may see one block of unallocated space. Select it and click Next. Windows will automatically create the necessary system partitions.
If the drive has old partitions from testing, previous installs, or cloning attempts, delete the partitions only if you are certain there is no data you need. Deleting partitions removes the data on them. For a fresh new PC, clearing the target drive is usually fine. For a reused drive, pause and check before clicking around like a squirrel on espresso.
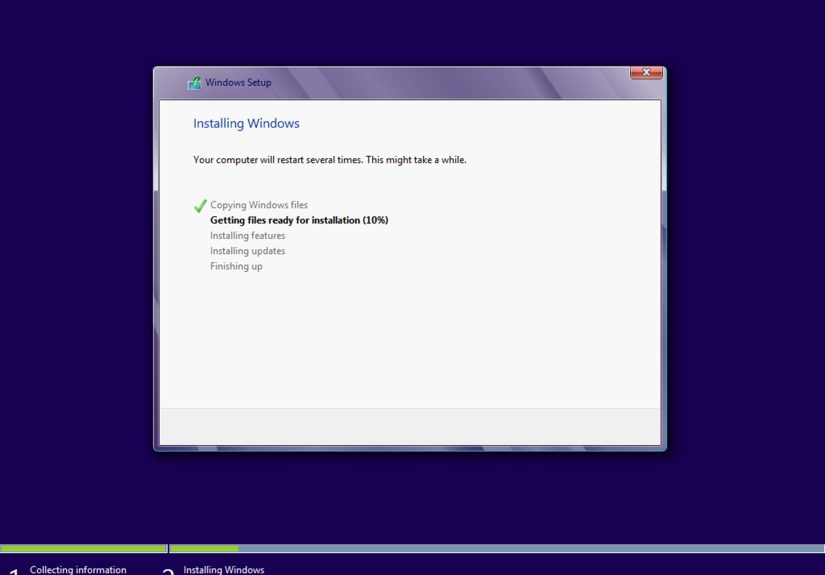
Once you select the destination drive, Windows copies files, installs features, applies updates, and restarts several times. Do not panic when the screen goes black or the PC reboots. That is normal. However, after the first restart, remove the USB drive if the system keeps booting back into the installer instead of continuing setup.
Step 6: Complete the Out-of-Box Setup
After installation, Windows will guide you through the first-time setup. You may be asked to choose your region, keyboard layout, network connection, account type, privacy settings, and device name.
You can sign in with a Microsoft account or create a local account, depending on the setup options available for your edition and internet status. A Microsoft account can make activation and device recovery easier in some cases, especially when a digital license is associated with your hardware. A local account may appeal to users who prefer a simpler offline setup.
For privacy settings, read each option instead of smashing “Accept” at full speed. You can disable many optional tracking, advertising, diagnostic, and personalization features during setup. Windows will still function without turning every toggle into a personal documentary.
Step 7: Activate Windows 10 OEM
Once you reach the desktop, connect to the internet. Go to Settings, then Update & Security, then Activation. If you entered a valid OEM key during setup, Windows may activate automatically. If not, choose the option to change product key and enter your 25-character Windows 10 OEM key.
If activation fails, check three things first:
- You installed the correct edition: Home, Pro, or another matching version.
- You typed the product key correctly.
- Your internet connection is working.
If the key has already been used on another PC, it may not activate on the new build. That is the nature of OEM licensing. It is affordable, but it is not a free-range chicken license wandering between motherboards.
Step 8: Install Windows Updates
Open Settings, go to Update & Security, and run Windows Update. Install available updates, restart, and repeat until Windows says you are up to date. This part is not glamorous, but it matters.
Because standard Windows 10 support ended in October 2025, new security updates are no longer provided through the normal free update channel for most users. If you must run Windows 10, check whether your PC qualifies for Extended Security Updates or whether your use case is better served by Windows 11. For a new PC that supports Windows 11, installing Windows 11 may be the safer long-term decision.
Step 9: Install Motherboard, Graphics, and Network Drivers
Windows 10 includes many basic drivers, but basic does not always mean best. Visit your motherboard manufacturer’s support page and download the latest chipset, LAN, Wi-Fi, Bluetooth, audio, and storage drivers for your exact model. If you use a dedicated graphics card, install the latest driver from NVIDIA, AMD, or Intel.
Install the chipset driver first, then network, graphics, audio, and other device-specific drivers. Restart when required. If Device Manager shows unknown devices, use the hardware ID or motherboard support page to identify what is missing.
Step 10: Configure Storage and Basic Settings
After Windows is installed and activated, reconnect any secondary drives. Open Disk Management to initialize, format, or assign drive letters if needed. Be careful not to format the wrong disk. Give your drives clear names such as “Windows SSD,” “Games,” or “Backups.” Future you will appreciate this tiny act of kindness.
Next, set up File History, OneDrive, or another backup method. A fresh install feels clean and invincible, but drives fail, files disappear, and people accidentally delete folders named “final_final_REAL_final.” Backups are not exciting until the day they save your entire digital life.
Common Problems When Installing Windows 10 OEM
The PC Will Not Boot From USB
Enter the boot menu and choose the UEFI version of the USB drive. Try another USB port, preferably one directly on the motherboard rear I/O panel. Recreate the installer if the drive is not detected. Some front-panel USB ports can be unreliable during installation.
The SSD Does Not Show Up
Check BIOS to see whether the drive is detected. Reseat an NVMe drive if necessary. If using RAID or Intel storage modes, you may need a storage driver during setup. For most home builds, AHCI is simpler unless your motherboard or storage configuration specifically requires another mode.
Windows Installs but Will Not Activate
Confirm the edition matches your product key. A Windows 10 Home OEM key will not activate Windows 10 Pro. Also confirm that the key is legitimate and has not already been used on another machine.
The PC Keeps Returning to the Installer
After Windows copies files and restarts, remove the USB drive or change boot priority so the internal SSD starts first. Otherwise, the computer may keep launching setup again, creating an installation loop that feels like a bad tech-themed sitcom.
Should You Install Windows 10 OEM on a New PC in 2026?
This is the big question. Technically, yes, you can install Windows 10 OEM on a new PC if you have valid installation media and a legitimate product key. Practically, you should think carefully. Since Windows 10 has reached the end of standard support, it is no longer the best default choice for a new internet-connected computer.
Windows 10 may still make sense for a specific offline workstation, older software compatibility, certain business workflows, lab machines, or hardware that does not behave well with Windows 11. However, for gaming, schoolwork, office productivity, browsing, banking, email, and everyday online use, Windows 11 is usually the more future-ready option if your PC supports it.
If you still choose Windows 10, use strong security habits. Keep supported applications updated, use reputable security software, avoid suspicious downloads, back up important files, and consider Extended Security Updates if available. Installing Windows is only the first step. Keeping the machine safe is the ongoing job.
Practical Experience: What Real Installations Teach You
After installing Windows on enough new PCs, you start noticing patterns. The actual Windows setup is rarely the hard part. Most problems happen before or after installation: a loose cable, a BIOS setting, a mismatched product key, missing Wi-Fi drivers, or a USB drive that worked yesterday but has apparently decided to retire.
One useful habit is to download essential drivers before beginning. Save motherboard LAN or Wi-Fi drivers on the same USB drive or a second flash drive. This is especially helpful because a fresh Windows 10 installation may not recognize every network adapter. Nothing is more awkward than needing the internet to download the driver that gives you internet. That is technology comedy, but not the fun kind.
Another lesson is to keep the build simple during installation. Fancy extras can wait. Install Windows with one monitor, one keyboard, one mouse, and the main SSD. Skip RGB controllers, external hard drives, capture cards, printers, drawing tablets, and other accessories until the operating system is stable. Each extra device is another possible source of confusion.
It also helps to label your USB installers. A drawer full of mystery flash drives is not a tool kit; it is a tiny plastic casino. Use a marker or sticker that says “Windows 10 Installer” and include the creation date. Microsoft updates installation media over time, so refreshing the USB occasionally is smarter than using an ancient installer that needs hours of updates.
During setup, take your time on the drive selection screen. This is where expensive mistakes happen. If you have multiple drives connected, Windows may show Disk 0, Disk 1, and Disk 2 without friendly names. A 1TB SSD and a 1TB backup drive can look dangerously similar. When in doubt, stop. Check sizes, disconnect drives you do not want touched, and continue only when the target is obvious.
Activation is another area where patience helps. If Windows does not activate immediately, do not assume disaster. Sometimes activation takes a few minutes after connecting to the internet. Restart, run updates, and check the Activation page again. If it still fails, the edition mismatch is the first suspect. Many people accidentally install Pro because it sounds better, while their key is for Home. Windows does not care that Pro sounds cooler.
For performance, update drivers before judging the PC. A fresh install using generic display drivers may feel sluggish or look blurry. Install the correct graphics driver, chipset driver, and monitor refresh rate settings before deciding something is wrong. On gaming PCs, remember to enable the correct refresh rate in Windows display settings; a 144Hz monitor running at 60Hz is like buying a sports car and only driving in a parking lot.
Finally, create a restore point or system image once everything works. Install Windows, activate it, update it, add drivers, install core apps, and then make a clean backup. That gives you a known-good state to return to later. It is much easier than rebuilding the entire system because one experimental driver or questionable utility turned your desktop into a haunted appliance.
The best Windows 10 OEM installation experience comes from calm preparation: legitimate license, correct edition, UEFI boot, clean target drive, updated drivers, and a security plan. Do those things and the process is straightforward. Skip them and your new PC may still work, but it might also spend the afternoon teaching you humility through error messages.
Conclusion
Installing Windows 10 OEM on a new PC is a clean, manageable process when you understand the order: create the USB installer, boot in UEFI mode, choose the correct Windows edition, install to the right SSD, activate with a valid OEM key, update drivers, and secure the system. The OEM license can save money, but it comes with a major limitation: it is generally tied to the first PC where it is activated.
The most important modern detail is support. Windows 10 remains familiar and usable, but it is no longer under standard support. For a new PC in 2026, consider whether Windows 11 is the smarter long-term choice. If you need Windows 10 for compatibility or a specific workflow, install it carefully and protect it seriously.


