
Table of Contents >> Show >> Hide
- What Is Curtain Lining Tape?
- What You Will Need
- How to Sew Curtain Lining Tape: 12 Steps
- Step 1: Measure the Finished Length and Width First
- Step 2: Cut the Face Fabric and the Lining
- Step 3: Press Everything Before You Sew
- Step 4: Hem the Side Edges of the Curtain Panel
- Step 5: Hem the Bottom of the Curtain and the Lining
- Step 6: Join the Lining to the Curtain Panel
- Step 7: Fold and Prepare the Top Header
- Step 8: Position the Curtain Lining Tape Correctly
- Step 9: Pin or Baste the Tape in Place
- Step 10: Sew the Tape Along the Edges
- Step 11: Add Hooks or Gather the Tape
- Step 12: Hang, Adjust, and Train the Curtain
- Common Mistakes to Avoid
- Why Curtain Lining Tape Is Worth the Effort
- Experience and Lessons Learned From Sewing Curtain Lining Tape
- Final Thoughts
- SEO Tags
If your curtains look a little limp, floppy, or like they gave up halfway through the decorating process, curtain lining tape can help. Sewing curtain lining tape gives your panels structure, cleaner folds, and a more polished finish. In plain English: it helps your curtains stop acting casual when you wanted them dressed for dinner.
This guide walks you through exactly how to sew curtain lining tape in 12 practical steps, whether you are making lined drapes from scratch or upgrading plain panels. You will learn how to prep the fabric, place the lining correctly, sew the tape without tangling the cords, and finish the header so the curtains hang neatly instead of resembling a wrinkled science experiment.
If you are a beginner, do not panic. This is absolutely doable with a home sewing machine, a little patience, and the willingness to press your fabric more than feels emotionally reasonable.
What Is Curtain Lining Tape?
Curtain lining tape is a sew-on tape used near the top of a curtain panel to support the header, help shape pleats or gathers, and make it easier to attach hooks or form a clean curtain heading. Depending on the style, the tape may include pockets for hooks, woven channels, or cords that pull the fabric into even gathers. It is commonly used with lined curtains, pencil pleat curtains, and pleated drapery panels.
What You Will Need
- Curtain fabric
- Lining fabric
- Curtain lining tape or heading tape
- Matching thread
- Measuring tape
- Fabric scissors
- Pins or clips
- Iron and ironing board
- Sewing machine
- Curtain hooks, if your tape uses hook pockets
- Chalk or fabric marker
How to Sew Curtain Lining Tape: 12 Steps
Step 1: Measure the Finished Length and Width First
Before you cut anything, decide exactly how your finished curtain should hang. Measure from the top of the rod or track to where you want the curtain to end. For width, measure the window and think about fullness. If you want a richer, more traditional look, you usually need more fabric than the exact window width.
This step sounds obvious, but it is where many curtain projects go off the rails. A panel that is too short looks accidental. A panel that is too narrow looks like it is rationing privacy. Measure twice, write it down, and only then touch the scissors.
Step 2: Cut the Face Fabric and the Lining
Cut your curtain fabric to size, allowing extra fabric for side hems, bottom hem, and top turnover. Then cut the lining fabric slightly smaller than the face fabric. In many lined curtain methods, the lining sits a bit shorter than the curtain face so it does not peek below the hem. It is also often slightly narrower, which reduces bulk at the sides and helps the front fabric wrap neatly to the back edges.
If you are sewing just one test panel, this is the moment to give yourself grace. Curtains use a lot of fabric, and even confident sewists occasionally mutter dramatic things during the cutting stage.
Step 3: Press Everything Before You Sew
Yes, pressing matters. No, this is not optional if you want a crisp finish. Press the fabric after cutting and straighten any edges that seem slightly off. Curtain fabric can shift, lining can skew, and a wrinkled panel will make accurate sewing much harder.
A good press makes the next steps easier because your folds stay where they belong. It also helps you see whether your fabric is behaving nicely or plotting something.
Step 4: Hem the Side Edges of the Curtain Panel
Fold each long side of the curtain fabric toward the wrong side, usually with a double fold so the raw edge stays hidden. Pin and sew the side hems. If you are working with a lining, tuck it in neatly so the curtain face wraps around the lining at the sides for a professional finish.
This wrapped edge is one of those small details that makes homemade curtains look custom instead of homemade in the “I did this at midnight with pure optimism” sense.
Step 5: Hem the Bottom of the Curtain and the Lining
Sew the bottom hem of the curtain panel and the bottom hem of the lining separately. The curtain face usually gets the deeper hem, while the lining is typically hemmed shorter so it hangs slightly above the finished curtain edge. That helps keep the lining from showing on the front and reduces bulk at the bottom.
If you want the most accurate finished length, you can hang the panel temporarily before the final bottom hem. Floors are not always perfectly level, and your house may have opinions.
Step 6: Join the Lining to the Curtain Panel
Lay the curtain fabric right side down or flat, depending on your preferred method, then place the lining in position so it sits slightly above the bottom edge and just inside the side hems. Pin carefully. Sew or hand-finish the lining to the side edges and top section as needed for your curtain style.
The goal is simple: the curtain face should be what people see from the front, while the lining does its job quietly in the background like the world’s most underappreciated assistant.
Step 7: Fold and Prepare the Top Header
At the top of the curtain, fold the fabric over to create the header area where the tape will be sewn. The depth of this fold depends on the width of your curtain lining tape or pleater tape. Some tapes sit close to the top edge, while others are enclosed inside a deeper fold or header wrap.
Press the fold well. If the tape is 3 inches wide, you will usually need enough top fabric to cover or support that tape cleanly. A neat header is what gives the curtain its structure, so do not rush it.
Step 8: Position the Curtain Lining Tape Correctly
Place the tape on the back of the curtain header. If your tape has pockets for hooks, make sure those pockets face the correct direction and sit where the hooks can be inserted easily later. Fold under the ends of the tape so the cut edges are tucked in and hidden near the side hems.
This is also the time to make sure any cords or loose strings are free and not trapped awkwardly. With drawstring-style tape, one end is usually secured, while the other end stays free so you can pull the cords after sewing.
Take a breath here and double-check everything. The tape may look innocent, but sewing it upside down is a classic curtain-making plot twist.
Step 9: Pin or Baste the Tape in Place
Once the tape is aligned, pin it securely across the top of the curtain. If your fabric is slippery or heavy, baste first. This extra minute can save you from wrestling the tape halfway across the panel like you are trying to tame a small but determined snake.
Make sure the tape lies flat and does not pull the fabric. If the tape is slightly longer than the panel width, trim only after confirming the first and last pockets or loops are positioned properly near the edges.
Step 10: Sew the Tape Along the Edges
Now sew the tape in place. In many methods, that means stitching along the top and bottom edges of the tape, and sometimes the short side ends too. Follow the woven guide lines on the tape if they are visible. Sew slowly and keep the tape flat.
The golden rule: do not stitch through the draw cords. If you catch those cords in your seam, the gathering feature will stop working, and your curtain will respond with total emotional shutdown. Keep the cords out of the way as you sew, especially near the tape ends.
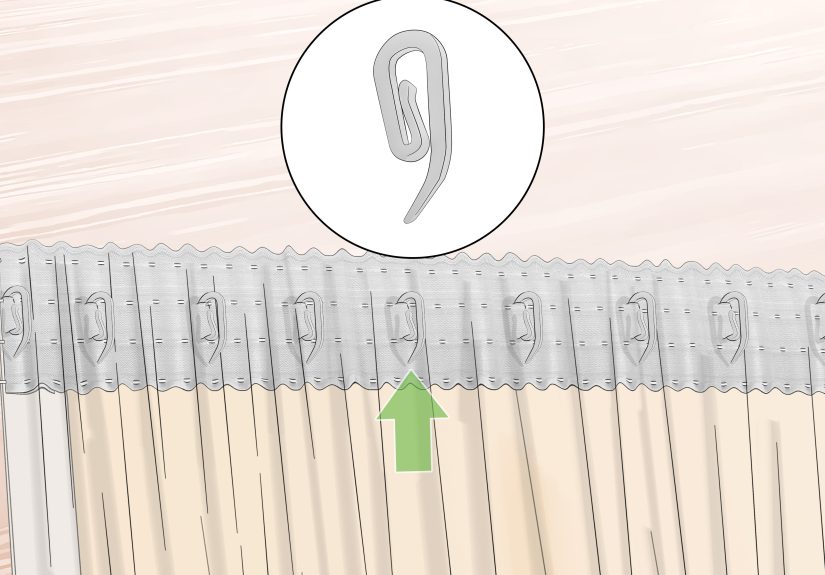
Step 11: Add Hooks or Gather the Tape
What happens next depends on the tape type. If you are using pleater tape with hook pockets, insert the curtain hooks into the proper pockets according to the pleat style. Two-prong and four-prong hooks are common for pleated headers. If you are using shirring or pencil pleat tape, pull the cords gently until the panel reaches your desired finished width, then knot the cords securely.
For pencil pleat styles, many sewists use roughly 2 to 2.5 times fullness for a nicely gathered look. If you prefer softer gathers, use less. If you want lush, dramatic folds that whisper “custom workroom,” use more.
Step 12: Hang, Adjust, and Train the Curtain
Hang the curtain panel on the rod or track and check the drape. Adjust the hooks if needed, space the pleats evenly, and smooth the folds by hand. For pleated curtains, “training” the folds by arranging them neatly and letting them hang for a while can improve the finished look.
Do not skip this final adjustment stage. Curtains often look good right away, but a little arranging turns “good enough” into “Wait, did you have these custom made?” which is the highest form of curtain compliment.
Common Mistakes to Avoid
Sewing the tape upside down
Always check where the hook pockets, cords, or channels are meant to face before stitching.
Stitching through the draw cords
If the tape is meant to gather, those cords need to stay free. Catching them in the seam ruins the gathering function.
Skipping the iron
Unpressed hems and headers lead to crooked tape placement. Your iron is not the side character here. It is one of the leads.
Using the wrong tape for the fabric weight
Heavier curtain fabrics usually benefit from wider, sturdier tape. Lightweight sheers do better with lighter tape that will not overpower the fabric.
Forgetting about the return and leading edge
If your curtain wraps back to the wall or overlaps at the center, think about that before placing hooks or pleats. The edges need to function, not just look pretty on the ironing board.
Why Curtain Lining Tape Is Worth the Effort
Sewing curtain lining tape takes more time than simply making a rod pocket, but the payoff is huge. The curtains hang better, the pleats look more controlled, the header feels sturdier, and the whole window treatment looks more finished. It is the difference between “I made curtains” and “I made curtains that have their life together.”
It also gives you more design flexibility. You can create pencil pleats, pinch pleats, gathered headings, or cleaner hook-mounted panels depending on the tape you choose. That means you are not locked into one basic look.
Experience and Lessons Learned From Sewing Curtain Lining Tape
The first time I sewed curtain lining tape, I assumed it would be a quick little finishing step. Reader, it was not. It was a humbling journey involving a long panel of fabric, a tape with mysterious pockets, and a sewing machine that suddenly seemed to enjoy drama. I had measured the curtain correctly, but I had not fully thought through how the lining, header fold, and tape would all stack together. The result was a top edge bulky enough to qualify as light upholstery.
The biggest lesson I learned was that curtain sewing is less about speed and more about order. When I tried to “just attach the tape and see what happens,” what happened was confusion. When I slowed down, pressed each fold, and pinned the tape carefully, the entire project got easier. Curtain work rewards calm, slightly fussy behavior. This is not rude; it is just true.
I also learned that lining fabric has a sneaky personality. It shifts, wrinkles, and tries to peek out where it does not belong. Keeping the lining a little shorter and a little narrower than the face fabric made a huge difference. Suddenly the panel looked intentional instead of mildly chaotic. The front fabric wrapped around the sides better, and the hem stopped advertising the lining to the room.
Another memorable moment came when I nearly sewed right over the draw cords. That would have turned my gathering tape into decorative disappointment. Since then, I always pause before stitching the last few inches of tape and physically move the cords out of the way. It takes seconds and saves a lot of regret.
I have also found that cheap pins, rushed pressing, and heavy fabric are a terrible combination. Good pins matter. A solid steam iron matters. And if the fabric is thick, wider tape really does help the header behave better. Thin tape on a heavy curtain is like asking a spaghetti noodle to support a shelf.
One of the most satisfying parts of the process is the final hang. The panel that looked flat and unimpressive on the table suddenly develops shape once the hooks go in or the tape is gathered. The pleats fall into place, the folds start looking elegant, and you briefly feel like the kind of person who says things like “These are my custom draperies” while casually holding coffee.
So if you are making lined curtains for the first time, expect a learning curve. Expect a little unpicking. Expect to re-measure something you were absolutely sure was correct. But also expect the result to look much more polished than a basic curtain panel. Once you get the hang of sewing curtain lining tape, it becomes one of those techniques that makes future projects feel less intimidating and far more professional.
Final Thoughts
If you want curtains that hang neatly, hold their shape, and look custom instead of flimsy, sewing curtain lining tape is one of the smartest upgrades you can make. The process is not difficult, but it does reward careful measuring, pressing, and patient stitching. Follow the steps, keep the cords free, place the tape correctly, and your curtains should come out looking crisp, polished, and ready to show off.
In other words: your window gets a glow-up, and you get bragging rights.


