
Table of Contents >> Show >> Hide
- What Is a Spruce-Pine-Fir Furring Strip?
- Why SPF Lumber Works Well for Furring Strips
- Common Uses for Spruce-Pine-Fir Furring Strips
- Popular Sizes and How to Choose the Right One
- How to Select Quality SPF Furring Strips
- How to Install Spruce-Pine-Fir Furring Strips
- Moisture, Concrete, and Outdoor Considerations
- SPF Furring Strip vs. Other Materials
- Common Mistakes to Avoid
- Buying Tips for Homeowners and DIYers
- Real-World Experience: What Working With SPF Furring Strips Teaches You
- Conclusion
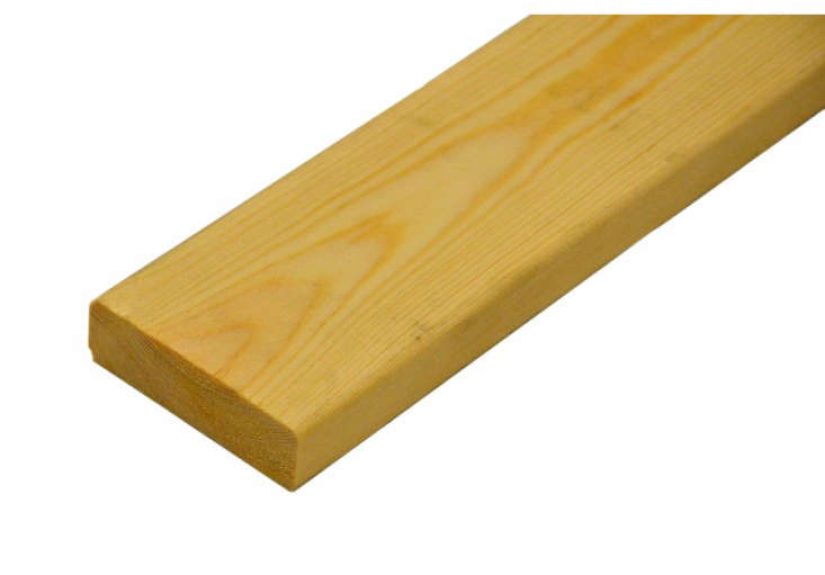
A Spruce-Pine-Fir furring strip may not look glamorous at first glance. It is usually a narrow, inexpensive piece of softwood lumber stacked quietly in the aisle while flashier boards get all the attention. But in the real world of home improvement, remodeling, drywall work, paneling, basement finishing, ceiling repair, and DIY framing, this humble strip often saves the day. Think of it as the behind-the-scenes stage crew of construction: not always visible, but absolutely responsible for making the finished surface look straight, solid, and professional.
Spruce-Pine-Fir, often shortened to SPF lumber, is a common softwood species group used throughout North American construction. It usually includes spruce, pine, and fir species that share similar strength and working characteristics. When milled into furring strips, SPF becomes a lightweight, easy-to-cut, practical material used to create a level surface, add spacing, support interior finish materials, or correct uneven framing. In plain English: it helps you make crooked, bumpy, awkward surfaces behave themselves.
This guide explains what a Spruce-Pine-Fir furring strip is, where it works best, how to choose the right size, how to install it, and what mistakes to avoid. Whether you are finishing a basement, hanging paneling, building a slat wall, adding insulation space, or simply trying to make drywall stop looking like it was installed during an earthquake, SPF furring strips deserve a spot on your shopping list.
What Is a Spruce-Pine-Fir Furring Strip?
A furring strip is a narrow strip of wood, metal, or another material installed over framing, masonry, concrete, ceilings, or uneven surfaces to create a flat, secure base for another finish material. In residential projects, wood furring strips are commonly used behind drywall, paneling, plywood, beadboard, shiplap, insulation, siding details, and decorative wall treatments.
A Spruce-Pine-Fir furring strip is simply a furring strip made from SPF softwood. SPF is popular because it is relatively light, affordable, widely available, easy to cut, and suitable for many interior construction tasks. You will commonly see SPF furring strips in nominal sizes such as 1 x 2, 1 x 3, and 1 x 4, usually in 8-foot lengths. Actual dimensions vary by product and retailer, so a board labeled 1 x 2 may actually measure closer to 3/4 inch thick by 1-1/2 inches wide, or slightly different depending on milling.
That “nominal versus actual” size difference confuses many beginners. It is not a trick, a typo, or a secret lumberyard prank. Lumber is named by its rough size before drying and surfacing. After it is dried and dressed, the final board is smaller. Always check actual dimensions before designing tight layouts, especially if your project involves trim, panels, or precise spacing.
Why SPF Lumber Works Well for Furring Strips
SPF lumber is a construction-friendly softwood group with several advantages. It is generally lightweight, which makes long strips easier to carry, lift, and fasten overhead. It cuts cleanly with common tools, accepts screws and nails well when installed properly, and is usually affordable compared with many appearance-grade boards. For behind-the-wall or behind-the-panel applications, that combination is hard to beat.
Another advantage is availability. Walk into many home improvement stores or lumberyards in the United States, and you are likely to find SPF or SPF-type furring strips in standard lengths. This makes them useful for repairs and weekend projects because you do not need to special-order an exotic board just to straighten a wall.
SPF is also workable for DIYers. If you can measure carefully, cut squarely, pre-drill where needed, and check for straightness, you can use SPF furring strips successfully. The boards are light enough for one person to handle, yet strong enough for many non-structural support and spacing tasks. That said, “non-structural” is an important phrase. Furring strips are not a substitute for engineered framing, beams, joists, or code-required structural members.
Common Uses for Spruce-Pine-Fir Furring Strips
1. Creating a Level Surface for Drywall
One of the most common uses for SPF furring strips is creating a level attachment surface for drywall. If studs are uneven, masonry is rough, or an old wall has dips and waves, furring strips can help establish a flatter plane. Once the strips are aligned and fastened, drywall can be screwed to them instead of fighting the uneven surface behind them.
2. Finishing Basement Walls
Basements often have concrete or block walls that are not ideal for direct drywall attachment. SPF furring strips can be installed vertically or horizontally to create a wood fastening base. They may also create a shallow cavity for insulation or wiring, depending on the design. However, untreated SPF should not be placed directly against damp concrete. If the strip touches masonry or concrete, use an appropriate moisture strategy, treated material where required, and follow local building code.
3. Installing Paneling, Beadboard, or Shiplap
Decorative wall treatments need solid backing. Furring strips give paneling and boards something dependable to grab. They are especially useful when the existing wall surface is masonry, uneven plaster, or old framing that does not line up with your new layout. Nobody wants a shiplap wall that looks like ocean waves unless the design theme is “shipwreck chic.”
4. Adding Air Space Behind Materials
Furring strips can create a small air gap behind wall or ceiling materials. This can be useful in certain insulation, siding, moisture-management, and panel applications. The gap may help separate finish materials from the base surface, improve alignment, or provide room for thin insulation layers.
5. Ceiling Leveling and Repair
Old ceilings can sag, dip, or show uneven joists. Installing furring strips across joists can help create a flatter base for new ceiling drywall or panels. This is especially helpful in renovation work where removing the entire ceiling would be messy, expensive, and emotionally damaging to anyone who just cleaned the room.
6. DIY Shelving, Utility Frames, and Light-Duty Projects
Although furring strips are not fancy furniture lumber, they can work for garage organizers, light-duty frames, temporary bracing, craft projects, and shop jigs. Choose straighter, cleaner pieces if they will remain visible. Sanding and primer can improve the look, but do not expect budget furring strips to behave like premium hardwood.
Popular Sizes and How to Choose the Right One
Spruce-Pine-Fir furring strips are sold in several common sizes. The right size depends on what you are fastening, how much spacing you need, and how much holding surface the finish material requires.
| Nominal Size | Typical Use | Best For |
|---|---|---|
| 1 x 2 | Light spacing and narrow backing | Paneling, small trim projects, light-duty wall strips |
| 1 x 3 | Wider fastening surface | Drywall backing, basement walls, decorative panels |
| 1 x 4 | More support and easier fastening | Ceiling work, wider panels, utility framing |
For drywall and wall panel applications, wider strips usually make fastening easier because they give screws more room to land. A 1 x 2 can work in tight spaces, but a 1 x 3 or 1 x 4 may be more forgiving, especially for beginners. If you are attaching heavy material, confirm that the strip size, spacing, fasteners, and wall assembly are appropriate. Furring strips are useful, but they are not magical load-bearing wands.
How to Select Quality SPF Furring Strips
Because furring strips are often budget lumber, quality can vary. Some boards are beautifully straight. Others look like they are auditioning to become boomerangs. Take a few extra minutes in the store to inspect each piece. This small effort can save hours of frustration later.
Check for Straightness
Look down the length of the board from one end. Avoid strips with severe bow, crook, twist, or cup. A tiny curve may be manageable for short pieces, but a badly warped strip can make your finished wall or ceiling uneven.
Watch for Large Knots and Splits
Small knots are common in SPF lumber, but large loose knots, cracks, and splits can weaken the strip or make fastening difficult. If a screw lands near a split, the wood may open up like it just heard bad news.
Choose Dry, Clean Boards
Kiln-dried lumber is generally more stable than green lumber. Look for boards that feel dry and are not covered in excessive moisture, mold, or dirt. If the strips will be used behind drywall or paneling, starting with dry material helps reduce movement after installation.
Consider Appearance If Visible
If your furring strips will be hidden, appearance matters less. If they will be part of a decorative slat wall, open shelving frame, or exposed utility design, spend more time choosing cleaner boards with fewer knots and better grain.
How to Install Spruce-Pine-Fir Furring Strips
Installation depends on the surface, but the basic goal is always the same: create a straight, secure, properly spaced base for your finish material. Good layout matters more than speed. Measure twice, fasten once, and avoid the classic DIY tragedy of discovering that your last strip is 1/2 inch off after everything is already screwed in.
Step 1: Plan the Layout
Decide whether the strips should run vertically or horizontally. For drywall, paneling, and many wall applications, strips are often installed perpendicular to the finish material or aligned to provide regular fastening points. Spacing often follows the needs of the material being attached. Many wall and ceiling systems use spacing such as 16 inches on center, but always check the requirements for the product you are installing.
Step 2: Mark the Wall or Ceiling
Use a tape measure, level, chalk line, or laser level to mark the strip locations. If the existing surface is uneven, identify high and low spots. Shims may be needed behind the furring strips to bring everything into the same plane.
Step 3: Cut the Strips to Length
Cut SPF furring strips with a circular saw, miter saw, hand saw, or jigsaw. For clean cuts, support the board properly and use a sharp blade. Light sanding can remove splinters from cut ends.
Step 4: Fasten Securely
For wood framing, screws or nails can usually be used, depending on the application. Screws offer better holding power and easier adjustment. For concrete or masonry, use appropriate masonry screws, anchors, or powder-actuated fasteners where allowed. Pre-drilling can reduce splitting, especially near board ends.
Step 5: Check for Flatness
Use a long level, straightedge, or string line to check the surface created by the strips. Add shims where needed. This step is where patience pays rent. If the furring strips are not flat, the finished material will not be flat either.
Step 6: Attach the Finish Material
Once the strips are secure and aligned, attach drywall, paneling, plywood, beadboard, or another finish material according to its installation instructions. Use the correct fastener length so the screw penetrates the furring strip adequately without damaging hidden utilities.
Moisture, Concrete, and Outdoor Considerations
SPF lumber is commonly sold as untreated wood. Untreated SPF furring strips are best suited for dry interior spaces. When wood touches concrete, block, or masonry, moisture becomes a serious consideration. Concrete can hold and transfer moisture, and wood that stays damp may warp, decay, or support mold growth.
For basement walls, garage walls, or masonry installations, avoid trapping moisture where it cannot dry. Use treated furring strips when required, add suitable barriers or spacers where appropriate, and follow local code. In some assemblies, metal furring channels may be a better choice than wood, especially in damp conditions.
For exterior use, untreated SPF is not ideal unless it is protected from weather and moisture. If the project is outdoors or exposed to dampness, choose pressure-treated lumber, naturally durable wood, metal furring, or another material designed for that environment. Paint alone is not a waterproof force field, no matter how confident the paint can looks.
SPF Furring Strip vs. Other Materials
SPF furring strips compete with other options, including southern yellow pine, whitewood, metal furring channels, pressure-treated strips, plywood rips, and composite strips. Each material has strengths.
SPF is light, affordable, and easy to work with. Southern yellow pine is often denser and harder, but it can be heavier and may split more easily without pre-drilling. Metal furring channels are straight, dimensionally stable, and moisture-resistant, making them useful for certain drywall and masonry assemblies. Pressure-treated wood is better for contact with concrete or damp areas, though it is heavier and may require corrosion-resistant fasteners.
The best choice depends on the project. For a dry interior wall, SPF is usually practical. For a damp basement, think carefully about moisture. For a commercial fire-rated or sound-rated assembly, follow the tested system exactly. For a decorative visible wall, consider whether budget furring strips are attractive enough or whether you should upgrade to appearance-grade boards.
Common Mistakes to Avoid
Using Warped Strips
A warped strip creates a warped finish. Do not assume screws will force every board straight. Sometimes they will; sometimes they will simply create a new problem with more holes in it.
Ignoring Actual Dimensions
Nominal size is not actual size. If your design depends on exact depth, width, or reveal lines, measure the boards before cutting and spacing.
Fastening Into Weak Surfaces
Furring strips must be attached to something solid. Drywall alone is usually not enough for structural support. Masonry needs the right anchors. Wood framing needs proper fastener penetration.
Forgetting Moisture Control
Wood and moisture have a complicated relationship. Untreated SPF against damp concrete is not a great romance. Use suitable materials and moisture-control details.
Spacing Strips Too Far Apart
If strips are spaced too widely, finish materials may flex, sag, or crack. Follow the spacing requirements for the material being installed.
Buying Tips for Homeowners and DIYers
When buying Spruce-Pine-Fir furring strips, purchase a few extra pieces. Budget strips can have defects, and you may need to cut around knots, splits, or warped sections. Having extras also protects you from the dreaded “one board short” return trip to the store, which somehow always happens after you have already changed clothes.
Store furring strips flat and off the ground before installation. If possible, allow them to acclimate indoors for a short period before using them in a finished space. Keep them dry, and avoid leaning them diagonally against a wall for days, as that can encourage bowing.
If you need a cleaner look, compare standard furring strips with select pine, primed boards, or appearance-grade SPF. Furring strips are designed for utility, not perfection. For hidden applications, save money. For visible applications, spend a little more if the final look matters.
Real-World Experience: What Working With SPF Furring Strips Teaches You
After you use Spruce-Pine-Fir furring strips on a few projects, you start to develop a sixth sense for them. You can spot a twisted strip from the other end of the aisle. You learn that the cheapest board is not always the cheapest board after you spend twenty minutes trying to force it flat. And you discover that a simple strip of wood can make the difference between a wall that looks professionally finished and one that looks like it lost an argument with gravity.
One of the biggest lessons is that selection matters. Many beginners grab the first bundle they see, assuming all furring strips are basically the same. They are not. SPF is a natural material, and every board has its own personality. Some are straight and cooperative. Some have knots exactly where you want to drive a screw. Some are slightly bowed but usable if cut into shorter pieces. A smart approach is to sort carefully, choose the straightest boards for long runs, and save less-perfect pieces for blocking, short sections, or utility work.
Another practical lesson is that layout is everything. On a basement wall, for example, you may be tempted to start fastening strips quickly just to see progress. But if the first strip is out of plumb, every panel that follows will remind you. Taking time to mark lines, check level, and shim low spots makes installation smoother. It may feel slow at first, but it prevents the kind of crooked finish that keeps bothering you every time you walk past it with a cup of coffee.
SPF furring strips also teach respect for moisture. In dry interior rooms, they behave well. In basements, garages, laundry rooms, and exterior-adjacent spaces, you need to think harder. If the wall smells damp, shows efflorescence, or has a history of water intrusion, do not cover it blindly. Fix moisture problems first. Use treated material where appropriate. Leave drying potential in the assembly. A beautiful finished wall over a damp problem is like putting a tuxedo on a raccoon: impressive for a moment, then chaos.
Fasteners are another area where experience helps. Screws are excellent because they let you adjust the strip, pull it tight, and remove it if needed. But screws placed too close to the end of a narrow strip can split SPF. Pre-drilling takes extra time, but it often saves the board. For masonry, the right anchor and drill bit matter more than enthusiasm. If the fastener does not hold firmly, the finish material will not either.
Ceiling projects reveal one more truth: lightweight lumber is your friend. Holding a long board overhead while balancing a drill is nobody’s idea of spa therapy. SPF furring strips are easier to handle than heavier lumber, which makes them useful for ceiling flattening, panel backing, and light overhead framing. Still, overhead work demands extra care. Use temporary supports, mark joist locations clearly, and avoid rushing. Gravity is undefeated.
For decorative projects, SPF furring strips can work, but expectations should be realistic. They may need sanding, filling, priming, and careful sorting. If you want a rustic slat wall, they can be charming. If you want a smooth furniture-grade finish, choose better boards. The trick is matching the material to the job instead of forcing budget lumber to become luxury trim through optimism alone.
The best experience-based advice is simple: treat furring strips as a system, not just strips. The wood, fasteners, spacing, moisture control, shimming, and finish material all work together. When those details are handled well, Spruce-Pine-Fir furring strips are incredibly useful. They are affordable, flexible, easy to cut, and widely available. They turn rough surfaces into workable surfaces and give finish materials the support they need. For a modest piece of lumber, that is a pretty heroic resume.
Conclusion
A Spruce-Pine-Fir furring strip is one of the most practical materials in residential construction and DIY remodeling. It is not flashy, but it solves real problems: uneven walls, rough masonry, difficult ceiling surfaces, panel installation, drywall backing, insulation spacing, and more. SPF lumber is lightweight, affordable, and easy to work with, making it a smart choice for many dry interior projects.
The key is using it correctly. Choose straight boards, understand actual dimensions, plan your layout, use proper fasteners, control moisture, and follow the requirements of the finish material. For damp areas, concrete contact, exterior exposure, or code-specific assemblies, choose the right treated or alternative material and check local building rules.
In the end, furring strips prove that small materials can have a big impact. They are the quiet problem-solvers of the building world. Give them a straight line, a good fastener, and a little respect, and they will help your walls and ceilings look like they were built by someone who owns both a level and good judgment.
Note: This article is for general educational and home-improvement guidance. Always follow local building codes, product instructions, and professional recommendations for structural, fire-rated, moisture-sensitive, or load-bearing projects.


