
Table of Contents >> Show >> Hide
- What Is a Whitewashed Plywood Plank Wall, Exactly?
- Why Use Plywood Instead of Solid Planks?
- Design Decisions Before You Touch a Saw
- Materials and Tools
- Step 1: Prep the Wall (So the Finish Looks “Custom,” Not “Camp Craft”)
- Step 2: Cut the Plywood Into Planks
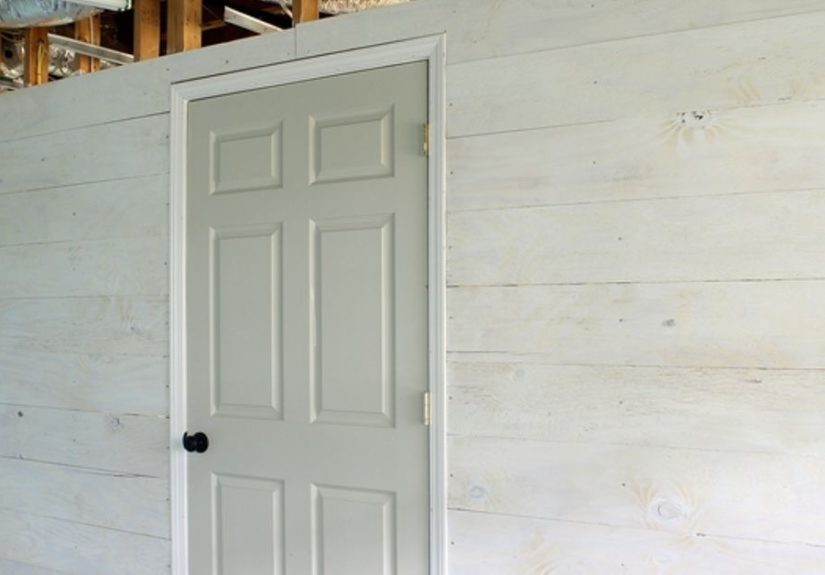
- Step 3: Install the Planks
- Step 4: Whitewash the Wall (The Part Where It Gets Pretty)
- Step 5: Seal It (Optional, But Usually a Smart Move)
- How to Nail the “Right Amount of White”
- Common Mistakes (So You Don’t Invent New Words)
- Cost and Time: What to Expect
- Maintenance: Keep It Looking Effortlessly Cool
- Real-Life Experience: What I Learned Building a Whitewashed Plywood Plank Wall
- Conclusion
- SEO Tags
Want the cozy, lived-in charm of a beach cottage or modern farmhouse… without paying “authentic reclaimed wood” prices? A whitewashed plywood plank wall is the DIY sweet spot: it looks like real planks, costs less than solid boards, and gives you a ton of control over the final vibe (from barely-kissed-by-white to “fresh snow on driftwood”).
Bonus: it’s also the kind of project that makes your friends say, “Wait… you did that?” while they quietly rethink their relationship with plain drywall.
What Is a Whitewashed Plywood Plank Wall, Exactly?
It’s an accent wall (or full-room treatment) made by cutting plywood into plank-like strips, installing them in a staggered layout, then applying a semi-transparent white finish so the wood grain still shows through. The result is airy, textured, and intentionally imperfectin the “designer casual” way, not the “I dropped my sandwich here” way.
Why Use Plywood Instead of Solid Planks?
1) It’s budget-friendly (and still looks high-end)
A few sheets of sanded plywood can cover a lot of wall. When you cut plywood into planks, you’re basically turning one big, affordable panel into a whole stack of “boards” without buying individual boards.
2) It’s easier to control the look
Because plywood is uniform in thickness, the wall stays flatter and more predictable. You can also choose the “character level” you want by selecting different plywood facesclean and minimal, or knotty and rustic.
3) It’s DIY-friendly
If you can measure, cut straight-ish lines, and operate a nailer without turning your wall into Swiss cheese, you can pull this off.
Design Decisions Before You Touch a Saw
Pick your plank style
- Shiplap look: tight seams or a small reveal (gap) between boards.
- Rustic plank wall: mixed widths, visible texture, slightly uneven edges.
- Modern coastal: consistent widths, lighter wash, cleaner seams.
- Statement pattern: vertical planks, diagonal, or chevron (harder, but impressive).
Choose your wall wisely
A single accent wall behind a bed, sofa, or dining bench is often the perfect “big impact, low regret” choice. If you’re doing a humid space (bathroom/laundry), plan for extra sealing and ventilation.
Measure like a grown-up
Measure wall width and height, subtract big openings, then add about 10% for waste (cuts, outlet notches, and the plank you’ll inevitably sacrifice to the DIY gods).
Materials and Tools
Plywood: what to buy
Look for sanded plywood (often labeled “sanded,” “cabinet-grade,” or “project panels”) so your whitewash looks smooth and intentional. For most walls, 1/4″ works well; 3/8″ feels chunkier and more “real plank.” If you want deep texture, stronger shadow lines, or plan to add heavy trim, 1/2″ can workbut it’s heavier and pricier.
If you’re staring at plywood grade letters like they’re a secret code: the face grade generally indicates appearance quality. Higher-grade faces are smoother and cleaner; lower grades have more knots/patches. For a whitewashed look, a few “features” (small knots, subtle patches) can actually be a wincharacter without chaos.
Other supplies
- Stud finder, level (or laser level), tape measure
- Circular saw or table saw (a straight-edge guide helps a lot)
- Finish/brad nailer (18-gauge is common) and nails
- Construction/panel adhesive
- Wood filler (paintable), caulk (paintable), sanding block/paper
- Primer (optional), white paint (matte/flat is usually best), water
- Rags (lint-free), brushes (chip brush + nicer brush)
- Clear topcoat (optional but recommended for durability)
Step 1: Prep the Wall (So the Finish Looks “Custom,” Not “Camp Craft”)
Clean, flatten, and map the studs
Remove outlet covers, mark stud locations lightly with painter’s tape, and patch big dents/holes. If your wall is wavy, fix what you can nowbecause planks love to highlight drywall drama.
Paint behind the wall (optional but smart)
If you’re doing a small reveal gap between planks, paint the wall behind them a similar white or a soft gray. That way any tiny gaps look intentional, not like the wall is peeking through to judge you.
Step 2: Cut the Plywood Into Planks
Pick plank widths that look natural
For a more authentic plank-wall feel, use mixed widths (for example: 4″, 6″, and 8″). If you prefer a cleaner, modern look, keep widths consistent (like all 6″).
Cut cleanly
- Use a sharp blade (plywood likes to splinter when it’s annoyed).
- Use a straight-edge guide for long cuts.
- Sand edges lightly so seams sit clean and don’t catch on rags during whitewashing.
Dry fit your layout
Lay planks on the floor and plan your stagger pattern. Avoid lining up end seams in a “brick wall made by robots” repeating pattern. The goal is balanced randomnesslike a good playlist.
Step 3: Install the Planks
Start level, stay sane
Draw a level reference line for your first row. Your first plank row is the “steering wheel” of the entire wall: if it’s crooked, everything after it is just you arguing with geometry.
Adhesive + nails: the classic combo
Apply panel adhesive to the back of each plank (a wavy or “W” pattern works well), press it into place, then tack with brads. The nails hold while adhesive cures and help prevent slight lift over time.
Leave room to breathe
Wood products expand and contract with humidity changes. Don’t jam planks together like you’re packing a suitcase at the airport. Leave small gaps at edges (corners/ceiling/floor) that will be covered by trim or caulk.
Work around outlets and switches safely
Turn off power at the breaker before removing devices. Often you’ll need a box extender so the outlet sits flush with your new wall thickness. Test fit carefully, cut openings neatly, and keep cover plates aligned.
Finish edges with trim (optional, but it elevates the look)
You can frame the accent wall with simple 1×2 trim, add baseboard, or use corner molding for a polished finish. Fill nail holes, sand smooth, and caulk where trim meets wall for that “built-in” look.
Step 4: Whitewash the Wall (The Part Where It Gets Pretty)
Whitewashing is basically “paint, but make it translucent.” The wood grain remains visible, which is what keeps it from looking like you accidentally painted over a fence board collection.
Method A: Diluted paint whitewash (most popular)
- Mix white water-based paint with water. Start around a 1:1 ratio, then adjust to taste.
- Test on a scrap plank first (same plywood, same sanding). This saves emotional distress.
- Brush on with the grain using long strokes.
- Wipe off excess with a lint-free rag while it’s still wet/tacky.
- Layer if needed: light coats look more realistic than one heavy coat.
Method B: Dry-brush “whisper coat” (for maximum texture)
Dip your brush, wipe most of it off (like you’re trying to hide the evidence), then lightly drag it over the surface. This catches the grain and edges beautifully and is perfect for a weathered coastal look.
Method C: Whitewash/pickling stain (more consistent, less guessy)
If you want a predictable finish (and fewer “is this too white?” existential moments), use a pre-made whitewash/pickling stain. Apply, then wipe back to the transparency you like. It’s especially nice when you want the grain to show evenly across the wall.
Step 5: Seal It (Optional, But Usually a Smart Move)
On a wall, you might be tempted to skip a topcoat. But if the wall is in a hallway, behind dining chairs, or anywhere hands and backpacks roam, a clear protective coat can keep it looking fresh. A water-based polyurethane is popular because it tends to dry clear and is easy to clean. Choose a sheen that fits the vibematte/satin usually looks most natural for whitewashed wood.
In higher-moisture areas, sealing becomes more important. Humidity swings can cause movement and staining, so protect the finish and keep the room ventilated.
How to Nail the “Right Amount of White”
If it looks too solid/painted…
- Add more water to your mix.
- Wipe sooner and more aggressively.
- Use a dry-brush layer instead of a full wet coat.
If it looks too faint…
- Add more paint to the mix.
- Let it sit slightly longer before wiping back.
- Add a second light coat once the first is dry.
Common Mistakes (So You Don’t Invent New Words)
- Skipping test boards: your wall is not the place to freestyle ratios.
- Starting unlevel: your “rustic” wall becomes “mystery slant.”
- Over-nailing: you don’t need 47 brads per plank. Let adhesive do its job.
- No expansion room: tight seams can telegraph movement later.
- Glossy paint: it can look plastic-y under light; matte/flat usually reads more natural.
Cost and Time: What to Expect
Most DIYers can complete a single accent wall over a weekend: one day to cut/install, and another for whitewashing + touch-ups (plus drying time). Cost depends heavily on plywood quality and whether you already own tools. The biggest “upgrade lever” is choosing a nicer sanded/cabinet-grade face if you want a smoother, more premium finish.
Maintenance: Keep It Looking Effortlessly Cool
- Dust with a microfiber cloth or vacuum brush attachment.
- Spot-clean gently; harsh scrubbing can burnish the finish (especially if unsealed).
- If sealed, mild soap + water on a damp cloth usually does the trickno soaking.
Real-Life Experience: What I Learned Building a Whitewashed Plywood Plank Wall
Let me tell you about the moment I realized “whitewash” is less a single technique and more a mood. I started confidently: sanded plywood, crisp cuts, a layout plan that looked like it belonged in a home-reno show montage. Then the first test board happened. My 1:1 paint-to-water mix looked perfect on the scrap… until I brushed it on a plank and stepped back under actual room lighting. Suddenly it was giving “I accidentally primed my wall” instead of “soft coastal texture.”
The fix was not dramaticjust annoying in a very educational way. I added more water, switched to smaller sections, and wiped back sooner. That was the turning point: timing matters. If you wipe too early, you remove all the good stuff. If you wait too long, the paint grabs and you get streaks that look less “weathered charm” and more “sad zebra.” I ended up doing two light coats instead of one heavier coat. The grain stayed visible, the tone evened out, and the wall started looking like it belonged therelike it had always been quietly cooler than the rest of the room.
Installation had its own personality. The first row was the boss fight. I thought my level line was “close enough,” and the wall immediately disagreed. I re-did the first plank, and everything after that went faster and cleaner. Lesson: the first row isn’t just important; it’s basically your project’s entire reputation.
I also learned to respect adhesive. My early instinct was to use more nails so things felt “secure,” but that just created extra filler work. Once I trusted the adhesive and used brads as temporary clamps, the finish improved and the wall stayed flatter. I left small gaps at the edges (that trim later hid), and that little bit of breathing room made the install feel less like wrestling wood into submission.
The most surprisingly satisfying part was the final touch-up pass. After whitewashing, I walked the wall slowly (coffee in hand, like a museum curator), and hit a few spots with a dry brushjust enough to tie the tones together. It took maybe 20 minutes and made the wall look intentional instead of “good from across the room.” If you do one “extra” step, make it that. And if your wall is in a high-traffic zone, don’t skip the topcoat. The first time you wipe off a mysterious fingerprint without removing your finish, you’ll feel like you outsmarted the universe.
Final verdict: a whitewashed plywood plank wall is totally doable, surprisingly forgiving, and wildly effective at making a space feel finished. It’s also the rare DIY that photographs wellbecause texture is basically interior design’s cheat code.
Conclusion
A whitewashed plywood plank wall gives you the warmth of wood, the brightness of a light finish, and the flexibility to customize everything from plank width to wash intensity. Plan your layout, start level, test your whitewash, and don’t rush the wipe-back. You’ll end up with a wall that looks like it came from a styled home tour without the price tag (or the contractor schedule).


