
Table of Contents >> Show >> Hide
- Before You Cut: Understand SIM Card Sizes
- Should You Cut Your SIM Card?
- Tools You Need to Cut a SIM Card to Nano SIM Size
- Step-by-Step: How to Cut a Standard or Micro SIM to Nano SIM
- Step 1: Back up contacts stored on the SIM
- Step 2: Confirm your phone really needs a nano SIM
- Step 3: Print a nano SIM cutting template
- Step 4: Line up your SIM card on the template
- Step 5: Mark the nano SIM outline
- Step 6: Cut outside the marked lines first
- Step 7: File the edges gently
- Step 8: Test the fit in the SIM tray
- Step 9: Insert the SIM and restart the phone
- What to Do If the Cut SIM Does Not Work
- Standard SIM to Nano SIM vs. Micro SIM to Nano SIM
- Common Mistakes to Avoid
- Is Cutting a SIM Card Safe?
- Better Alternatives to Cutting a SIM Card
- Real-World Experience: What Actually Happens When People Cut SIM Cards
- Conclusion
So, you bought a new phone, opened the SIM tray with the confidence of a tech genius, and then discovered your old SIM card is roughly the size of a cafeteria tray compared with the tiny nano SIM slot. Excellent. Welcome to the small but dramatic world of SIM card resizing.
The good news: in many cases, a standard SIM or micro SIM can be carefully cut down to nano SIM size because the important electronic part is the metal contact area, while much of the surrounding plastic is just packaging. The less-good news: cutting a SIM card is not risk-free. Cut too much, scratch the contacts, leave a rough edge, or force it into the phone, and your “quick fix” can turn into a tiny plastic tragedy.
This guide explains how to cut a SIM card from standard or micro SIM to nano SIM size, when you should avoid doing it, what tools you need, and how to test the result without turning your phone into a very expensive paperweight.
Before You Cut: Understand SIM Card Sizes
SIM cards come in several physical sizes, but the three most common removable versions are standard SIM, micro SIM, and nano SIM. Technically, what many people call a “standard SIM” today is actually a Mini SIM, but since everyone says standard SIM, we will keep life simple and not invite a standards committee to dinner.
Common SIM card dimensions
- Standard SIM: 25 mm x 15 mm, usually found in older phones and some basic devices.
- Micro SIM: 15 mm x 12 mm, common in many older smartphones from the early 2010s.
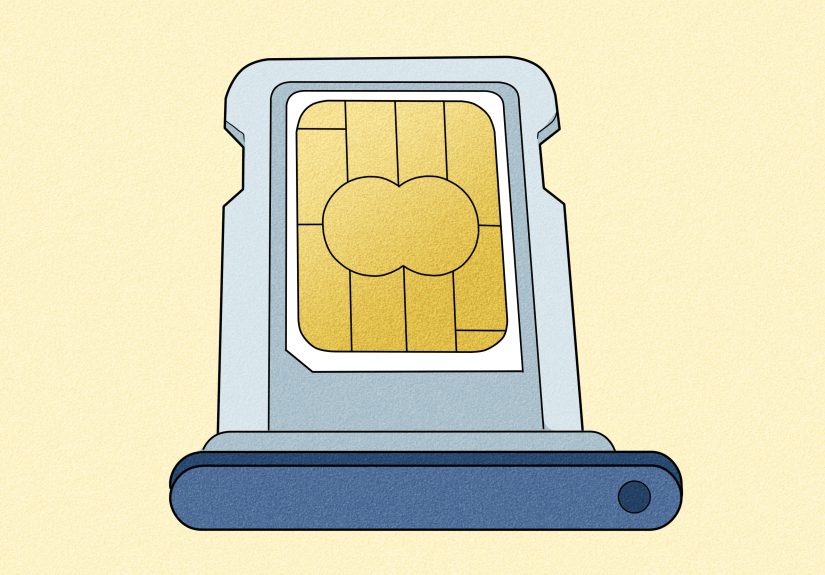
- Nano SIM: 12.3 mm x 8.8 mm, used by most modern phones with physical SIM trays.
The nano SIM is not only smaller; it is also slightly thinner than standard and micro SIM cards. That thickness difference is one reason cutting a card is not always perfect. Some phones tolerate it. Others are pickier than a cat choosing a sleeping spot.
Should You Cut Your SIM Card?
Cutting a SIM card is usually a last-resort solution, not the first option. Before reaching for scissors, check whether your carrier can provide a replacement nano SIM or convert your line to eSIM. Most major carriers can replace a physical SIM, and many newer phones support eSIM, which lets you activate service digitally without inserting a card at all.
You should consider cutting your SIM only if you need a quick temporary fix, your carrier cannot help immediately, your SIM is not already damaged, and you understand that you might ruin the card. If this SIM is tied to important calls, banking verification, travel plans, or work, play it safe and get a replacement SIM from the carrier.
Do not cut the SIM if:
- The gold contact area is unusually large and extends close to where you need to cut.
- The SIM is very old, cracked, warped, or already unreliable.
- Your phone is expensive and has a tight SIM tray.
- Your carrier offers an easy replacement nano SIM or eSIM.
- You are not comfortable measuring and trimming precisely.
Also, never force a cut SIM into a phone. If it does not sit flat in the tray, stop. Forcing it may damage the SIM tray, the phone’s internal pins, or your patience.
Tools You Need to Cut a SIM Card to Nano SIM Size
You do not need a laboratory, but you do need patience and a clean workspace. A SIM card is small, slippery, and surprisingly good at disappearing under furniture.
Recommended tools
- A printed nano SIM cutting template at 100% scale
- A ruler with millimeter markings
- A sharp pencil or fine-tip marker
- Sharp scissors or a craft knife
- Fine sandpaper or a nail file
- Tape to hold the SIM on the template
- Your phone’s SIM tray for final size checking
A dedicated SIM cutter is easier and more accurate than scissors, but it still is not magic. It can misalign the card if the SIM is not seated correctly. If you use one, test carefully and avoid cheap cutters that feel loose or wobbly.
Step-by-Step: How to Cut a Standard or Micro SIM to Nano SIM
The goal is simple: remove extra plastic while keeping the metal contacts intact and shaping the card so it fits smoothly in a nano SIM tray. The process is slow, careful, and slightly nerve-racking, like trimming your own bangs before school photos.
Step 1: Back up contacts stored on the SIM
Most modern phones store contacts in your Google account, iCloud, or the phone itself, but older phones may store some contacts directly on the SIM. Before cutting, check your contacts settings and import anything stored on the SIM to your phone or cloud account. If the SIM gets damaged, you do not want your entire contact list to vanish like socks in a dryer.
Step 2: Confirm your phone really needs a nano SIM
Do not guess. Search your phone model’s official specifications or check the manual. Many recent iPhones, Samsung Galaxy phones, and Google Pixel phones use nano SIM or eSIM, but exact support can vary by model, region, and carrier. If your phone supports eSIM, that may be the cleaner option.
Step 3: Print a nano SIM cutting template
Use a reliable nano SIM template and print it at 100% scale. Do not use “fit to page,” “scale to fit,” or any printer setting that changes the size. After printing, measure the nano SIM outline with a ruler. It should be 12.3 mm x 8.8 mm. If the printed size is wrong, do not use it. A bad template is just a tiny map to disaster.
Step 4: Line up your SIM card on the template
Place your standard SIM or micro SIM on the template with the angled corner facing the correct direction. The angled corner matters because it tells the phone how the card should sit in the tray. Tape the SIM lightly so it does not slide around while you mark it.
Make sure the template lines avoid cutting through the essential contact area. On many SIM cards, part of the cut may come close to the gold contacts. That can still work if you are only removing plastic or a tiny outer edge, but cutting deeply into the contact pattern is risky.
Step 5: Mark the nano SIM outline
Use a fine marker or pencil to trace the nano SIM shape onto the old SIM. Mark the sides clearly, including the angled corner. Do not make thick marker lines and then cut inside them randomly. At this scale, “close enough” is not always close enough.
Step 6: Cut outside the marked lines first
Cut slowly and leave a tiny amount of extra plastic outside the line. It is better to trim twice than to cut too far once. Scissors work best if they are sharp and small. A craft knife can be precise, but it can also slip, so use it only on a safe cutting surface and keep your fingers away from the blade path.
Cut the long edges first, then the short edges, and save the angled corner for last. Keep the card flat while cutting. Bending it can crack the plastic or loosen the contact layer.
Step 7: File the edges gently
After cutting, the card may have rough edges or tiny plastic burrs. Smooth them with fine sandpaper or a nail file. Do not sand the gold contacts. The finished SIM should have clean edges, a clear angled corner, and no loose plastic flakes.
Step 8: Test the fit in the SIM tray
Before inserting the tray into the phone, place the cut SIM into the empty SIM tray. It should sit flat without rocking, bending, or sticking out. If it is slightly too large, remove it and file the edge a little more. Do not press hard. The SIM should fit naturally, not with the emotional support of brute force.
Step 9: Insert the SIM and restart the phone
Once the SIM fits properly in the tray, insert it into the phone and restart the device. Give it a minute to detect the network. If it works, you should see signal bars, your carrier name, or a mobile data indicator. If it does not work, remove the SIM and inspect it.
What to Do If the Cut SIM Does Not Work
If your phone says “No SIM,” “Invalid SIM,” or “SIM not supported,” do not panic immediately. The issue might be the cut, the phone, the carrier lock, or activation status.
Check the shape and orientation
Remove the SIM and make sure the angled corner matches the tray. If the card is upside down, backward, or slightly crooked, the phone cannot read it correctly. Also check that the SIM is sitting flat and not floating above the tray edges.
Inspect the contacts
Look for scratches, cracks, or cuts through the gold contact area. A tiny edge trim may be fine, but a deep cut through contact lines can kill the SIM. Also wipe the contacts gently with a clean, dry microfiber cloth. Do not use water.
Test the SIM in another phone
If possible, try the cut SIM in another unlocked phone that accepts nano SIM. If it works there, your issue may be phone compatibility, carrier lock, or tray fit. If it does not work anywhere, the SIM may be damaged.
Contact your carrier
If the SIM is damaged, request a replacement nano SIM or ask about eSIM activation. In most cases, your number is tied to your carrier account, not permanently trapped inside the plastic card. The carrier can usually move your number to a new SIM after verifying your account.
Standard SIM to Nano SIM vs. Micro SIM to Nano SIM
Cutting a micro SIM to nano SIM is usually easier than cutting a standard SIM because there is less plastic to remove. The micro SIM already has a shape closer to nano size, so alignment is simpler. Standard SIM cutting requires more trimming and more opportunities to drift off course.
That said, both jobs require precision. A standard SIM is not automatically safer just because it has more plastic. Some older standard SIM cards have larger contact areas that are not ideal for nano trimming. If the template line cuts through too much gold contact, stop and get a replacement card instead.
Common Mistakes to Avoid
Cutting directly on the final line
Always leave a small margin and file down gradually. Cutting directly to the final size can make the card too small, and a loose SIM may shift inside the tray.
Ignoring SIM thickness
A trimmed standard or micro SIM may be slightly thicker than a true nano SIM. If the tray feels tight, do not force it. Lightly filing the plastic back can help in some cases, but thinning a SIM too much can damage it.
Using a dull blade or bulky scissors
Dull tools crush plastic instead of cutting it cleanly. Use sharp, controlled tools and cut slowly.
Forgetting the angled corner
The angled corner is not decoration. It is the SIM card’s “this side goes here” sign. Cut it in the wrong place and the card may not align with the phone’s contacts.
Is Cutting a SIM Card Safe?
It can be safe if done carefully, but it is never the safest option. The safest option is to use a proper nano SIM from your carrier or activate an eSIM if your phone and carrier support it. Cutting is a practical workaround, especially when traveling or dealing with an older SIM, but it comes with real risk.
The biggest danger is not just ruining the SIM. A poorly cut SIM can jam inside a tight tray or damage the phone’s SIM reader. That is why the fit test matters so much. If the card does not sit perfectly in the tray, fix the card before it goes anywhere near the phone.
Better Alternatives to Cutting a SIM Card
Ask your carrier for a replacement nano SIM
This is usually the best option. A replacement nano SIM is manufactured to the correct size and thickness. Once activated, it should work more reliably than a hand-cut card.
Use a 3-in-1 SIM card
Many carriers now provide multi-size SIM cards. These come as one card with pop-out sections for standard, micro, and nano sizes. You simply push out the size you need. It is the SIM card version of nesting dolls, but less charming and more useful.
Switch to eSIM
If your phone supports eSIM, you may not need a physical SIM at all. eSIM activation is handled digitally through your carrier, often using an app, QR code, or device settings. It is especially convenient for newer phones and travelers who use multiple plans.
Real-World Experience: What Actually Happens When People Cut SIM Cards
In real life, cutting a SIM card is usually less dramatic than it sounds, but it rewards careful people and punishes hurry. The most common successful story goes like this: someone has an older micro SIM, buys a newer phone, prints a template, trims slowly, files the edges, and the phone detects the network within a minute. The person then feels like a hardware engineer for the rest of the afternoon. Fair enough.
The most common failure story is also predictable. Someone eyeballs the cut, uses kitchen scissors, clips too close to the gold contacts, and then wonders why the phone says “No SIM.” Another classic mistake is cutting the card almost correctly but leaving one edge slightly too wide. The SIM tray still closes, but the card sits at a tiny angle, so the internal pins do not touch properly. The phone cannot read it, even though the SIM is not technically dead.
A good practical habit is to treat the phone’s SIM tray as your final judge. Not your eyes. Not your confidence. Not your cousin who once repaired a PlayStation controller. If the cut SIM drops into the tray cleanly and lies flat, you are in good shape. If it needs pressure, it is not ready. Remove it and file the edges gently. A nano SIM slot is small enough that even a fraction of a millimeter can matter.
Another experience-based tip: do not rush the angled corner. Many people trim the rectangle correctly and then guess the diagonal corner at the end. That corner helps align the SIM in the tray, so copy it from the template carefully. If the angle is too shallow or too deep, the card may still fit, but it may sit slightly off. Tiny plastic, big attitude.
People also underestimate how useful carrier stores can be. If you are near a store, getting a real nano SIM is often easier than doing a home surgery project on a card smaller than a postage stamp. A replacement SIM also avoids the thickness issue. Older SIMs trimmed to nano size may be a little thicker than real nano SIMs, which can make some slim trays feel tight. If the phone is new, expensive, or still under warranty, this matters.
For travel, the smartest move is to prepare before leaving. If your current phone uses nano SIM, carry a small SIM eject tool and keep the original SIM frame if you have one. If you are using an old SIM in a new phone abroad, ask the carrier for a proper nano SIM before the trip. Airport Wi-Fi is not the ideal place to learn precision cutting.
The best mindset is simple: cutting a SIM card is a backup plan, not a lifestyle. Done carefully, it can save the day. Done casually, it can ruin your card, waste your time, and possibly damage your phone. Measure twice, cut once, file slowly, test gently, and remember that the carrier replacement option exists for a reason.
Conclusion
Learning how to cut a SIM card from standard or micro SIM to nano SIM can be useful when you need a quick fix, especially with an older card and a newer phone. The key is precision: use a proper template, cut slowly, avoid damaging the contacts, smooth the edges, and never force the card into the tray.
Still, the best solution is usually a carrier-issued nano SIM or eSIM activation. A factory-cut nano SIM has the correct shape and thickness, while eSIM avoids the plastic card entirely. If you decide to cut your SIM, do it with patience, good lighting, and the humility to stop if the card does not fit perfectly. Your phone will appreciate the maturity.


